Assignment Report for SDG Group 2 [SDG 13.3 : SAVE THE WORLD]

[Semester 2]
[SCCVK2023 GRAPHIC AND COMPUTER ANIMATION]
GROUP ASSIGNMENT
Assignment Report for SDG
[SDG 13.3 : SAVE THE WORLD]
PREPARED TO
PROF. MADYA DR. SITI MAHFUZAH BINTI SARIF
PREPARED BY
304515 Nicholas Ho Zao Chuen
305162 Tan Wei Theng
304149 Koek Jia Rong
303892 Leow Jason

https://youtu.be/nYkfoMSmSas?si=jNik50brjJc_TZXy
1.0. INSPIRATION
The inspiration of this assignment came from the recent changes in climate in Malaysia especially in Kedah and Penang. The increasing impact of climate-related events like rising temperature, changing of weather time zone and also flash flood have become more frequent and severe. We were motivated by the idea that educating people is a powerful tool to slow down these climate change problems.
As a multimedia student, we knew how visual appeal and storytelling can influence public understanding and behaviour if your product was interesting enough and persuasive. Animated video can be widely shared compared to traditional media and have the potential to reach a larger and more diverse community. Therefore, we decided to make an animation to raise awareness and contribute in this meaningful way to slow down climate change.
We got the inspiration for our assignment from Vox (https://youtu.be/1ZKBaRsP1gY?si=_Ck_jotvCsDd9OcN) on how we want our animation to be like.

From spy to president: The rise of Vladimir Putin
https://youtu.be/lxMWSmKieuc?si=QL4rSMMoUosm7TWg
The idea of Vox animation style combines the concept of simplicity and motions that make complex topic easy to understand. As data driven infographics, strong narrative and a unique consistent mixed media style design, we believe Vox has perfected it's own unique visual identity. Hence, we believe this sort of animation is perfect for topics related to awareness videos as it can be mixed with some storytelling or visual and emotion cues to enhance the visual connection of the viewers.
(https://app.milanote.com/1Un1c71NgzTOaD/graphic?p=W1QXCZsxraP)
We also refer to these Youtube videos to make sure the concept and element that we wanted to have is mainly in our animation.
https://youtube.com/playlist?list=PLs-r41p0a-meogCGyTdOlppUSiAK2Ahc0&si=MA5LIOxUsNPSjNME
2.0 AIM & OBJECTIVE
Climate change is one of the most serious and critical issues that we humans are facing these days. Climate change does not only refer to an increase in temperature like global warming, it refers to the whole weather system of the Earth has changed due to the activities that had been done by us humans such as burning rubbish publicly, deforestation or the industrial processes. Climate change refers to long-term alteration in temperature, weather patterns and also the climate system. The changes have resulted in the current era such as rising sea levels, extreme weather and also loss of biodiversity.
We wish to produce an engaging and informative animation that is able to educate the public about climate change and promote awareness and provide mitigation strategies in the support of UN SDG Target 13.3. There are few objectives that we plan to achieve in this assignment:
To educate viewers on causes and effects of climate change.
We aim to break down this complex subject into simple and relatable explanations through visual presentation using animation and narration. By doing this, we aim to educate or give out the information in an understandable way for all stage audiences including teenagers to adults.
To raise awareness about the importance of taking action to mitigate the pace of climate change.
We aim to let our audience know that the climate change problem is not returnable, what we can do is to slow down the pace of it and we hope our audience to feel empowered to become part of the individuals that contribute or become one part of the solution. Our animation suggests ways and impactful actions that can be done to contribute to climate mitigation efforts.
To use animation as a creative tool to communicate the issue effectively.
Using animation allowed us to convey a message visually, making it easier to illustrate abstract ideas like global warming or greenhouse gas. Using this medium helps us to capture viewer attention rather than using just pure hand drawing that might not be that persuasive. This makes the message more memorable and impactful compared to the traditional formats too.
To support Target 13.3 by contributing to public education and institutional understanding of climate change challenges.
Our animation uses the subject of Target 13.3, which is to strengthen knowledge and capacity at all levels. By making this animation can potentially be shared with schools, NGOs, we aim to be part of a broader educational movement toward climate action.
3.0 STORYBOARD
Scene 1,2 and 3
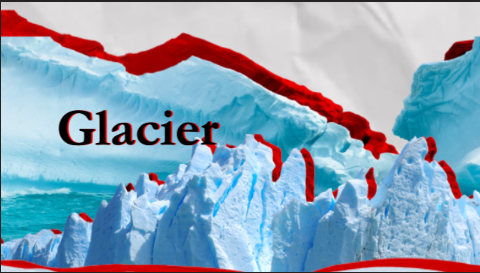
Scene 1: Glacier Appear
Explanation:
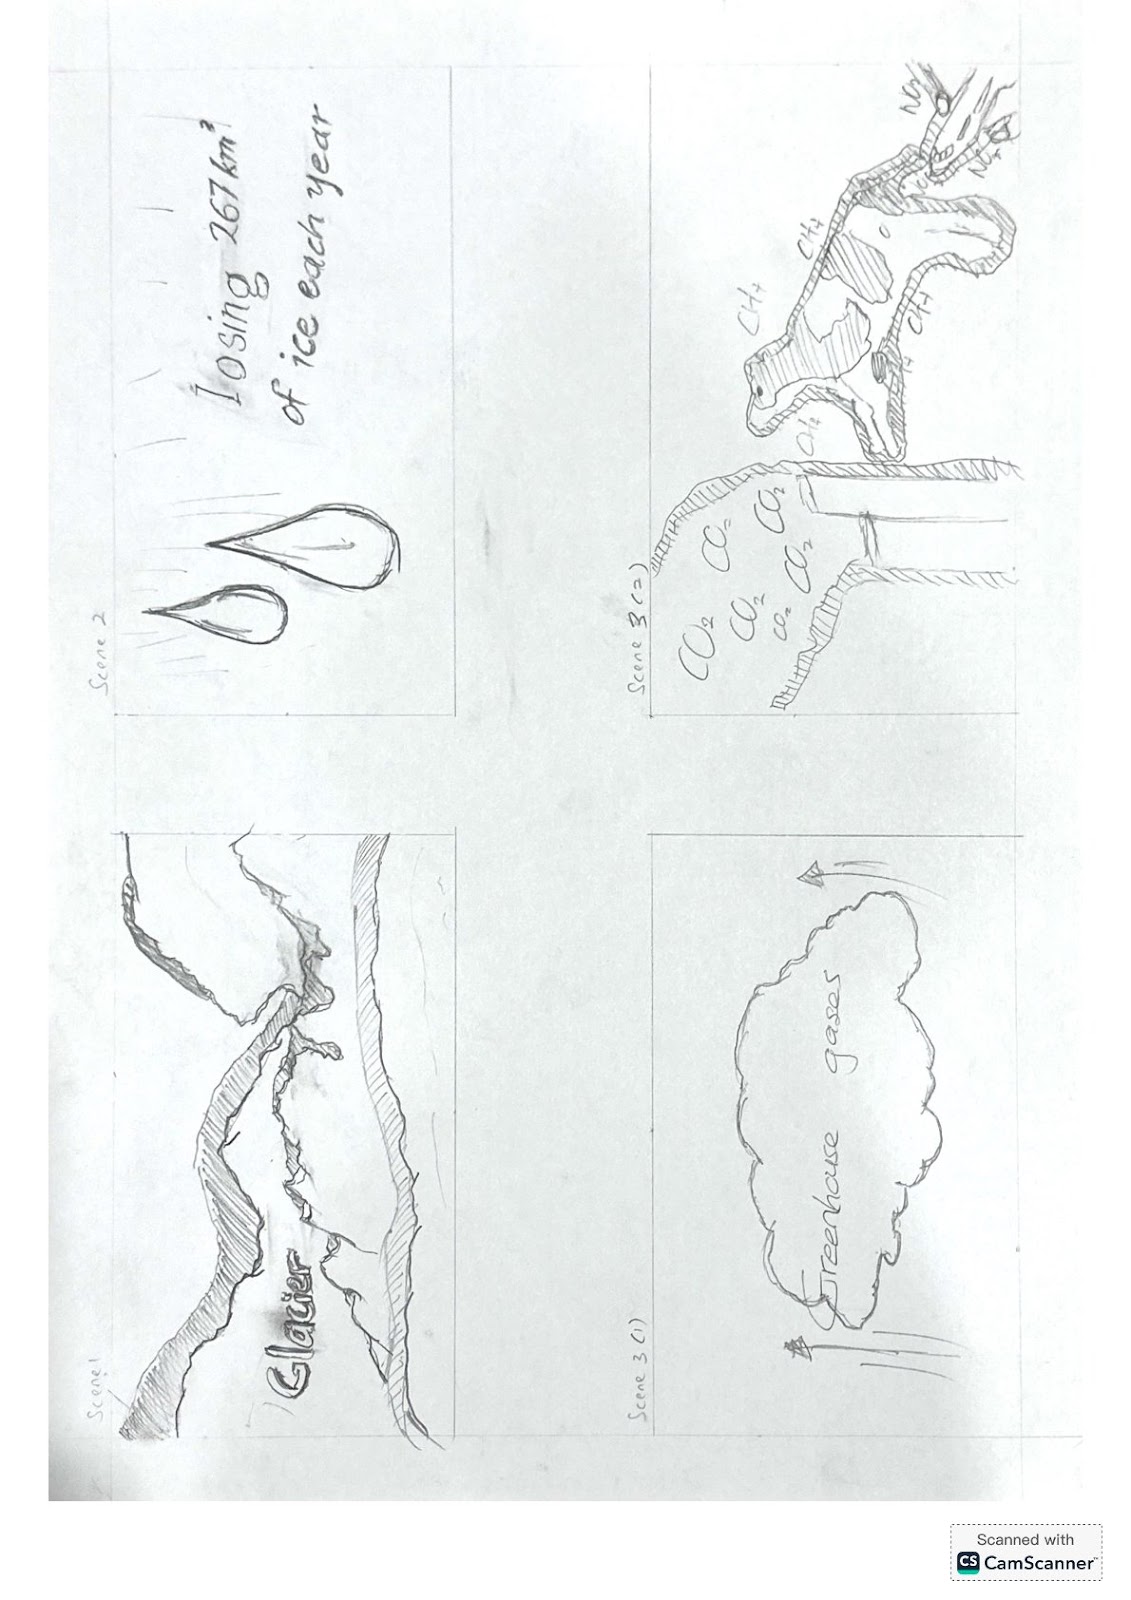
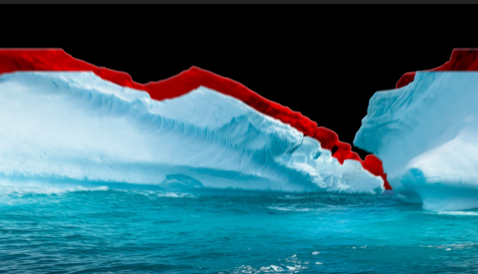
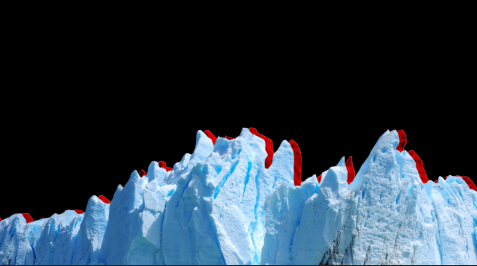
The video begins with a zoom out wide shot of a glacier to set the tone of environmental concern. Those red outlines on the glaciers show the early signs of climate change, showing nature in distress due to rising global temperatures. This visual introduces the audience to the emotional weight of the topic.
Duration:
0.0s – 4.0 seconds
Visual Effect:
Film distortion effect , Parallax effect, Slow zoom out
Animation Principle:
Staging - we clearly define the setting and draw the viewer's eye to the glacier as a point of interest..
Slow In & Slow Out - the movement of the zoom is smooth, slowing into and out of the transition to create a natural-looking, film-like effect.
Appeal - the composition and framing are visually engaging, creating the scene to be emotionally engaging and memorable.
Animation Technique:
Camera Layer & Null Object – used in After Effects to instruct the slow zoom-out action in order to create a more cinematic look.
Parallax Movement – produced by separating foreground, midground, and background layers and animating them at different speeds in order to develop depth.
Overlay Textures – film grain and distortion used as adjustment layers or blending modes in order to create tension and atmosphere
Sound Effect:
Synthetic sound effect; ice breaking effect: A synthetic ice berg breaking effect is used to add depth and narrative clarity.
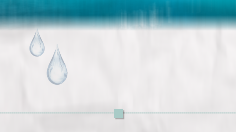
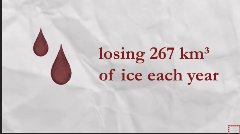
Scene 2: Water Droplet Turned Red
Explanation:
Two water droplets form from the melting glacier and fall with the colour turns red, which symbolize the initial effects of global warming. The text “losing 267 km3 of ice each year” fits with the narrative and the subtitle. It represents how even small changes in nature have deeper meanings and consequences, such as an emblem for environmental imbalance.
Duration:
4–8 seconds
Visual Effect:
“Roughen” effect for text, “Masking” effect for water drops, Film distortion effect.
Animation Principle:
Anticipation – the slow build-up of the droplet prepares the audience to fully enjoy its majestic fall and color transition.
Timing – exact control of the timing of the droplet fall and the emergence of the text creates emotional rhythm.
Color and Contrast (Staging) –the transition from clear to red water highlights the emotional and symbolic purpose of the scene.
Animation Technique:
Mask Path Animation – used to animate the evolution over time of the water droplet, from transparent to red colour.
Text Animation with Roughen Edges – employed to render the statistic unstable and in urgency, through entry using opacity and scale keyframes.
Blend Mode/Adjustment Layer – film distortion subtly overlaying the whole frame for continuity of mood.
Sound Effect:
Hard sound effects; water drop effect: The water drop adds emotions to symbolises that Earth is bleeding, showing the viewers the urgency of a crisis is happening.
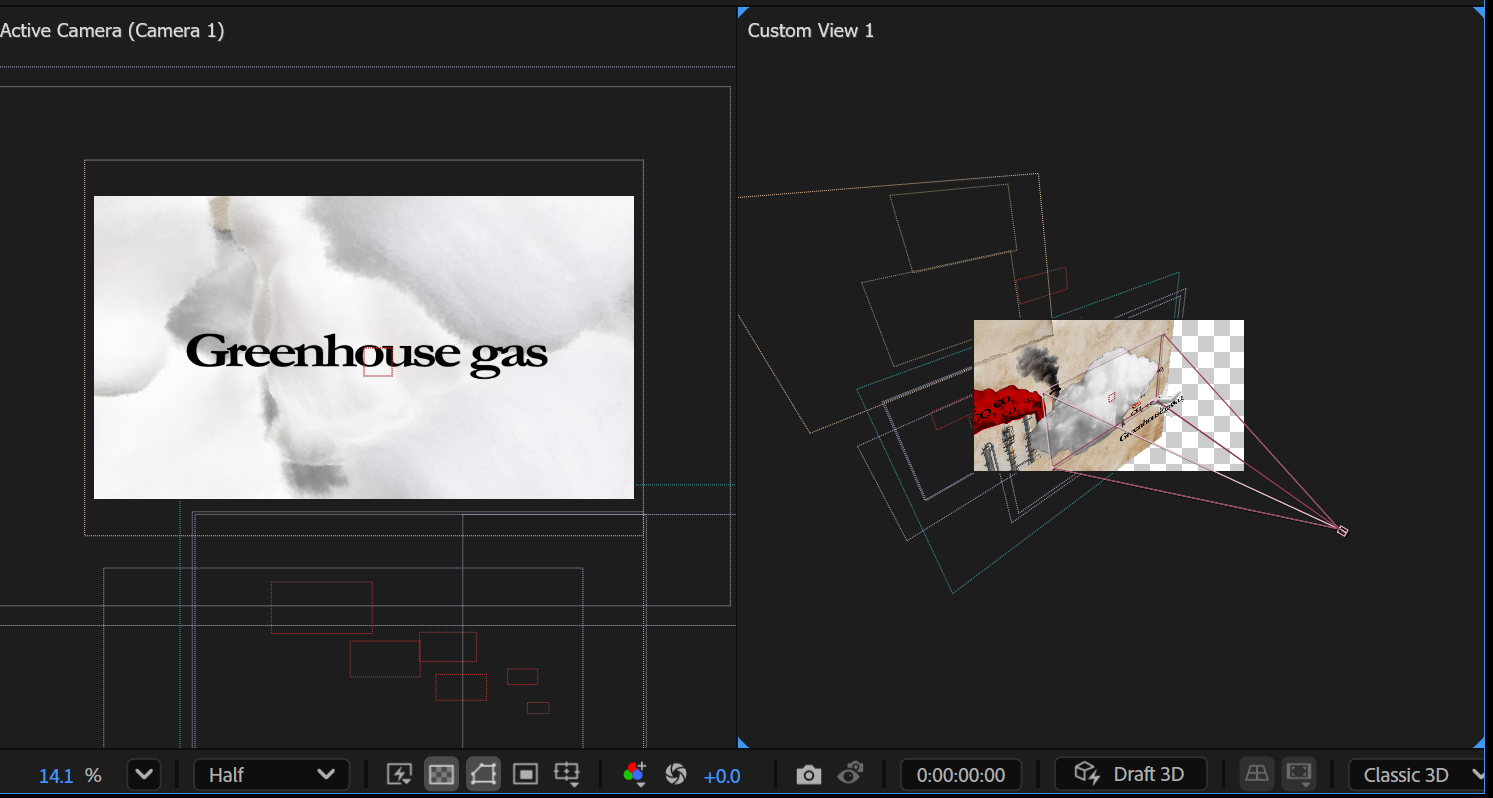
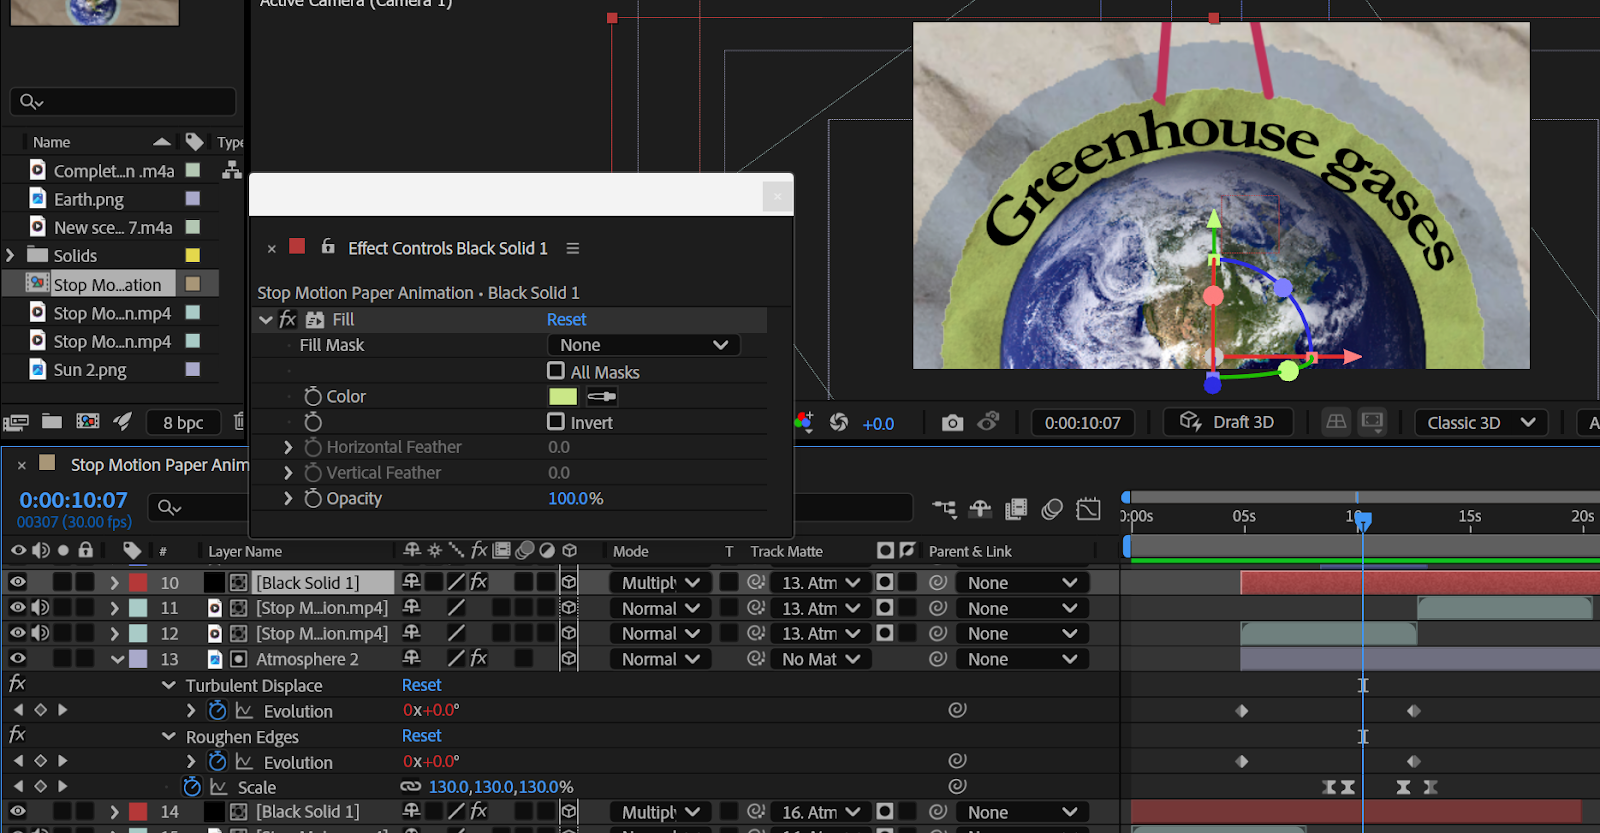
Scene 3(1) : Greenhouse Gases Introduction
Explanation:
The scene begins with an intense blanket of clouds that moves away from the background. The words "greenhouse gases" appear in the center of the screen. As the camera zooms into the words, the clouds turn green, which is symbolic of the buildup of poisonous gases in the atmosphere. The camera then slowly pedestal down to build a visual gradient, representing the rising influence of trapped gases and the rise in global temperature caused by it. This is a visual metaphor employed to create an instant link between pollution, atmospheric change, and climate change.
Duration:
8 –12s seconds
Visual Effect:
“Masking” Effect, Film distortion effect, Parallax effect
Animation Principle:
Staging – the positioning of the "greenhouse gases" at the one thirds of the scene focuses the viewer's attention and sets the intention of the scene.
Follow Through and Overlapping Action – as the camera dollies in through the text, the action follows through into the changing colour of the cloud.
Color Transformation (Exaggeration) – the instantaneous change to green is an exaggeration of the harmful nature of these gases.
Arc and Timing –the camera Dolly in movement is part of a natural downward arc, timed to stress the visual plunge into climate change.
Animation Technique:
Camera Layer + Null Object – Dolly in and pedestal down in controlled motion for immersive movement
Mask Expansion and Feathering – applied to cloud layers to create animating spreading and green colour
Hue/Saturation Keyframing – change of white to green color in cloud layers
Parallax Layering – multiple layers of clouds traversing at multiple speeds to achieve depth
Motion Blur & Film Grain Overlay – for realism and continuity with earlier scenes
Sound Effect:
Synthetic sound effect; whoosh effect: The whoosh effect signals the change in a pacing, from slow to fast, as the camera moves into the words.
Scene 3(2): How Greenhouses Gases Formed
Explanation:
CO₂(Carbon Dioxide), released from the factory, CH₄(Methane) released by human or agricultural sources and N₂O(Nitrous oxide) released from combustion vehicle are introduced as key greenhouse gases that trap heat. The floating gas icons mark where they are in the atmosphere and bring the source of the problem visually before the audience.
Duration:
12–18 seconds
Visual Effect:
Parallax effect, Film distortion effect.
Animation Principle:
Staging – clearly separates each gas and its source, making the message easy to understand.
Follow Through – gases float upward with realistic drag and easing to simulate movement through the air.
Exaggeration – bold gas icons and labels emphasise visibility and importance of the issue.
Animation Technique:
Parallax Layering – The factory, cow and the aeroplane move at different speeds to add dimensional depth.
Blend Mode/Adjustment Layer – film distortion subtly overlaying the whole frame for continuity of mood.
Sound Effect:
Hard sound effects; factory, cow and aeroplane sounds: These effects synchronise the visual cues and provide the character an identity.
Scene 3(3)&(4), Scene 4
Scene 3(3) & 3(4) : Gases May Trapped in Atmosphere
Explanation:
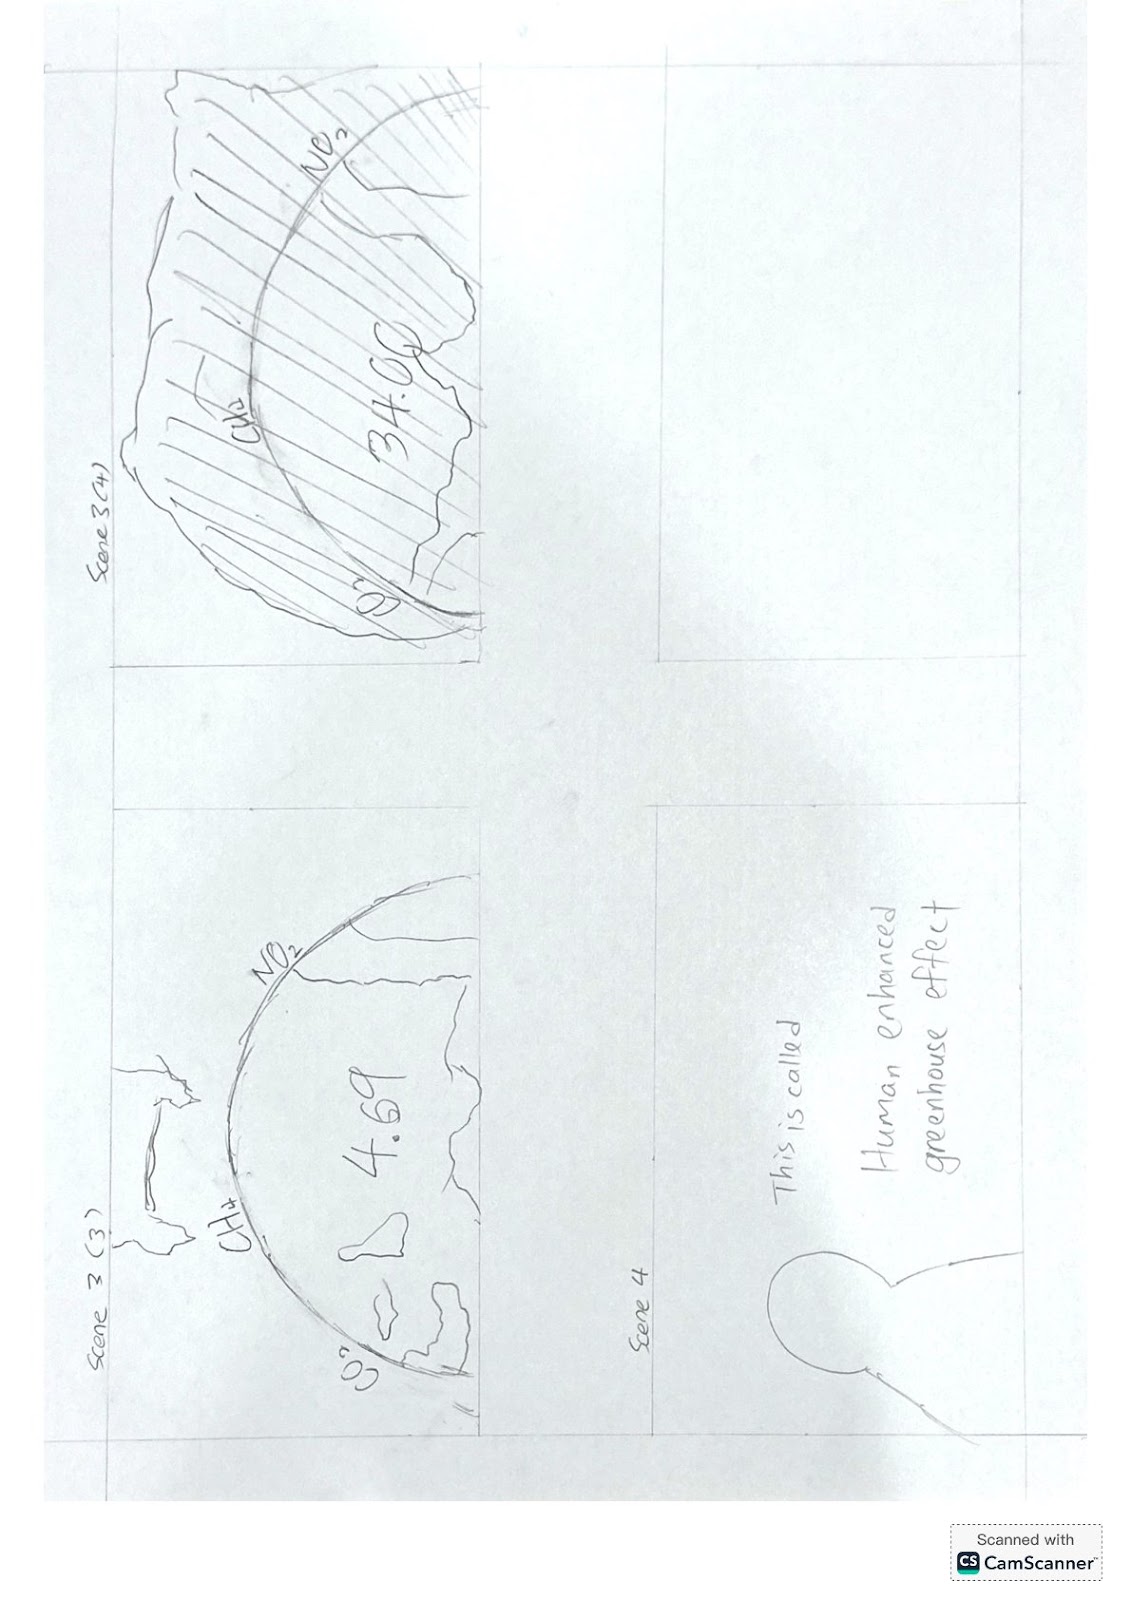
In this scene, the greenhouse gases such as Carbon Dioxide (CO₂), Methane (CH₄), and Nitrous Oxide (N₂O),are shown accumulating and forming a thick cover over Earth's atmosphere. The cover is symbolically represented as a huge clear "plastic wrap" over the earth,representing how these gases trap heat and prevent it from escaping into space, like a pressure cooker effect, with the temperature on the planet continually climbing upward. This has a visual representation of the greenhouse effect that condenses its very nature into an emotionally engaging sequence.
Duration:
18 – 26 seconds
Visual Effect:
Parallax effect, Film distortion effect.
Animation Principle:
Parallax effect – used on Earth, atmosphere, and gas layers to provide spatial depth and global scale
Film distortion effect – preserves visual tone of unease and environmental tension
Animation Technique:
Staging – the Earth is placed in the center, clearly surrounded by the gas layer to guide viewer attention.
Exaggeration – the "plastic wrap" metaphor is exaggerated visually to make the greenhouse effect immediately understandable.
Squash and Stretch (symbolic use) – the slightly swollen atmosphere layer conveys a feeling of pressure and stored energy.
Sound Effect:
Hard sound effect; plastic bag rustling, beeping sound:
Plastic crinkling sound and beeping sound can invoke tension and discomfort.
Scene 4: Human-Enhanced Effect (Typography Motion Graphic)
Explanation:
Typography is utilized to describe the Human Enhanced Greenhouse Effect in simple and engaging ways. It helps the viewer understand how heat gets trapped in the Earth's atmosphere with the use of kinetic word motion and emphasis.
Duration:
26 –29 seconds
Visual Effect:
Dynamic kinetic typography with highlight animations
Animation Principle:
Anticipation – a slight delay before key terms appear builds viewer focus
Emphasis – visual and motion emphasis reinforces the message
Timing – carefully timed text entry and exit keeps the message easy to follow and impactful
Appeal – smooth, clean, and intentional movement makes the educational content more engaging
Animation Technique:
Text Animator (After Effects) – used to control position, scale, rotation, opacity of individual words or letters
Scale and Color Keyframes – for emphasizing important scientific terms
Motion Blur – adds realism to fast text movement
Ease In/Out + Overshoot – makes transitions natural and less mechanical
Layered Text Layout – alternating static and moving text layers to maintain visual hierarchy
Scene 5+6, 7.1, 7.2 and 7.3
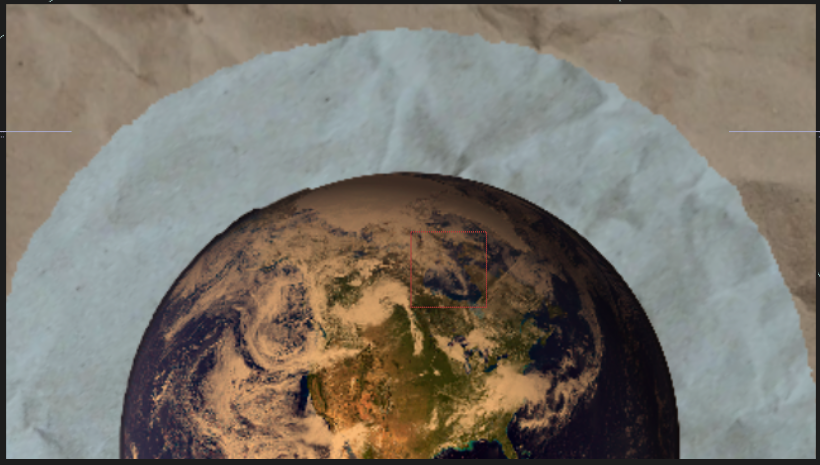
Scene 5: Earth and the Atmosphere
Explanation:
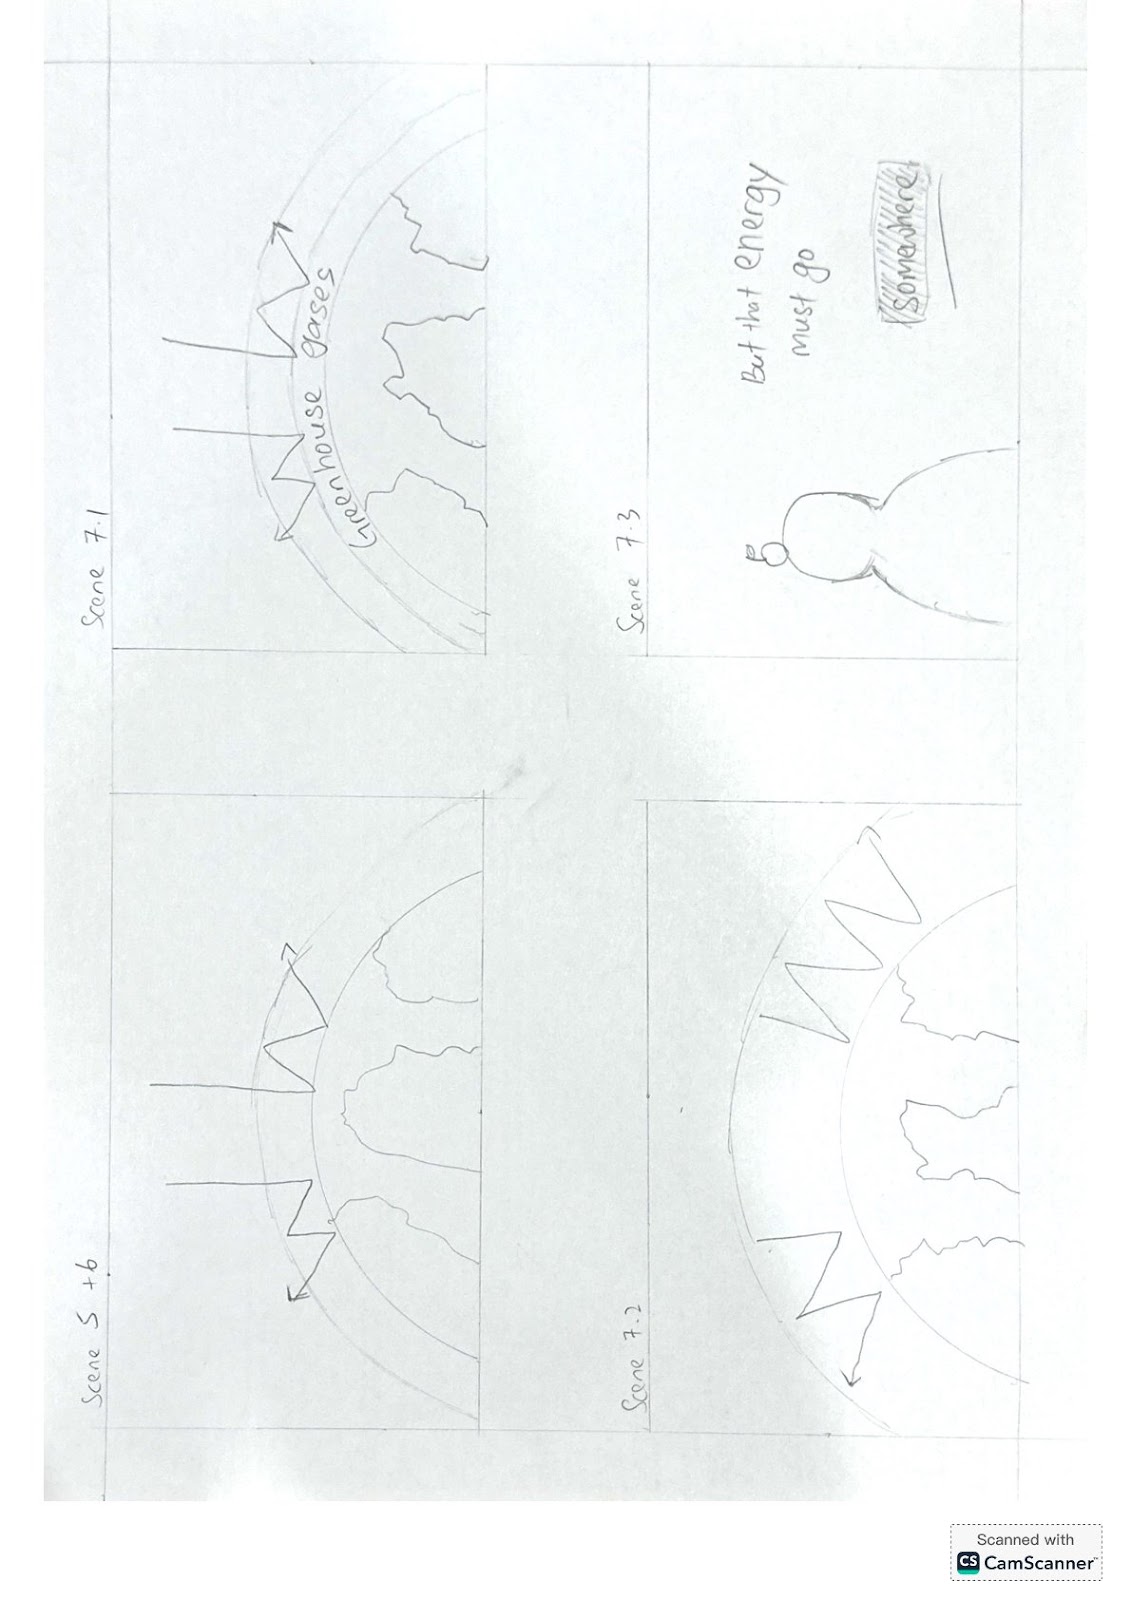
Earth with a layered atmospheric ring shows a protective barrier. This visual serves to contextualise where greenhouse gases accumulate and where the heat-trapping begins when radiation is absorbed by the Earth.
Duration:
29-34 seconds
Visual Effect:
Glow effect, Film distortion effect, Parallax effect
Animation Principle:
Staging – clear and centered composition highlights the Earth and its atmospheric structure.
Animation Technique:
3D Layer Rotation – Earth placed in 3D space with a null object to control smooth spinning
Glow Effects – applied to shape layers or adjustment layers to represent atmosphere
Ellipse Paths – thin, low-opacity stroke ellipses used for atmosphere ring
Light Layering – soft r radial light used to simulate absorption of radiation
Camera Depth – slight parallax between Earth and orbit lines to enhance dimension
Sound Effect:
Synthetic sound effect; laser beam effect: The laser beam sound shows the radiation from the sun is penetrated into the atmosphere
Scene 6: Absorption of Radiation
Explanation:
This scene visually demonstrates sunlight reaching Earth, with rays striking the planet and some sections being absorbed into the surface. The glowing points of impact emphasize the natural process of solar radiation entering the atmosphere. However, this balanced system is hinted to be disrupted due to the increasing thickness of greenhouse gases, which is subtly introduced through lighting imbalance and film distortion. The moment sets the foundation for explaining how the energy exchange becomes dysfunctional when heat cannot escape, leading to global warming.
Duration:
34-37 seconds
Visual Effect:
Light beam effects, glowing impact on Earth surface, Film distortion effect, Parallax effect
Animation Principle:
Secondary Action – glow pulses and light flickers add realism to the absorption effect
Timing – precise synchronization between sunbeam arrival and ground glow to clarify cause and effect
Staging – strong contrast between dark space and bright beams to focus attention
Exaggeration – brightness of the absorption points is intensified to symbolize heat buildup
Animation Technique:
Beam Effects / Shape Layer Lines – animated with pen tool to create sunlight rays
Glow & Opacity Keyframes – simulate intensity of energy absorption by the Earth
Camera Zoom & Parallax – mild camera push-in while background layers move slower for 3D illusion
Adjustment Layer with Film Distortion – applied subtly to mimic radiation disturbance
Sound Effect:
Synthetic sound effect; Beeping sound: This creates stress, anxiety, or panic where earth has a limit on the amount of energy that it can absorb.
Scene 7(1): Greenhouse Gases Absorb Heat
Explanation:
In this scene, the focus shifts to how greenhouse gases not only allow sunlight and heat to enter Earth’s atmosphere, but also absorb a portion of that radiation themselves. While it’s normal for the Earth’s surface to absorb heat, the excess buildup of greenhouse gases causes more radiation to be trapped and released within the atmosphere. This absorption intensifies the warming effect, emphasising how the heat is no longer escaping as it should. The looping motion of glowing arrows visually represents the heat becoming stuck and re-emitted within the atmosphere.
Duration:
37–41 seconds
Visual Effect:
Glowing arrows with repeated motion path,Film distortion effect, Parallax effect
Animation Principle:
Repetition – the continual motion of arrows reinforces the idea of trapped, recycled heat
Timing – smooth, evenly timed motion helps communicate a cycle of buildup
Secondary Action – slight pulse or glow on arrows adds visual interest and suggests energy
Staging – the heat arrows are prominently placed between Earth and the atmosphere to clarify their meaning
Animation Technique:
Path Animation with Loop Expressions – used to create continuous bouncing heat arrows
Glow & Color Grading – arrows tinted in warm hues (red/orange/yellow) to convey heat
Opacity & Scale Keyframes – add variation and rhythm to the arrow flow
Parallax Layer Setup – different motion speeds for Earth, arrow, and atmospheric layers to give spatial dimension
Adjustment Layer with Distortion Map – to simulate visual “heat haze” over the scene
Scene 7(2): Greenhouse Gases Release Heat
Explanation:
This scene further explains the effect of trapped heat, like some of the radiation is absorbed by the greenhouse gases in the atmosphere, while the remaining heat is absorbed by Earth itself. This dual absorption leads to a rapid increase in global temperature. The scene visually represents the radiation energy gradually filling the atmospheric layer and Earth's surface. It reinforces the idea that the more greenhouse gases there are, the more heat remains within the Earth system.
Duration:
41–44 seconds
Visual Effect:
Opacity, Film distortion effect, Parallax effect
Animation Principle:
Staging – the placement of Earth and its surrounding glow clearly illustrates where the heat is going
Slow In & Slow Out – smooth transition of heat build-up through controlled opacity changes
Secondary Action – subtle pulsing or glowing movements represent energy absorption and retention
Exaggeration – visual glow is intensified to highlight the danger of excessive heat retention
Animation Technique:
Opacity Keyframes – used to gradually reveal heat zones in the Earth and atmosphere
Glow Effects on Shape Layers – to represent energy build-up visually
Fractal Noise or Gradient Fill – applied to Earth’s surface and atmospheric layers for heat effect texture
Parallax Layer Animation – different depth layers (Earth, heat, atmosphere) animated to enhance dimensionality
Adjustment Layer with Heat Distortion – simulates thermal waves over the frame
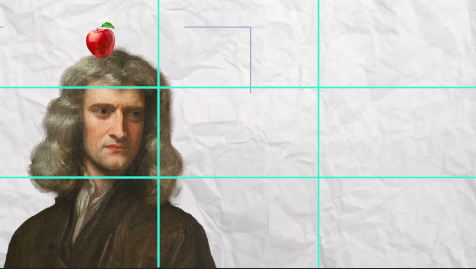
Scene 7(3): The Newton’s Third Law
Explanation:
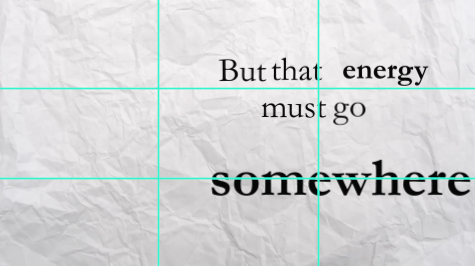
This scene creatively links scientific logic with environmental consequences. The typography “But that energy must go somewhere” appears on screen alongside an illustration of Isaac Newton. A red apple falls and hits his head, a symbolic reference to Newton’s Third Law: “For every action, there is an equal and opposite reaction.” This metaphor is used to suggest that the continued trapping of heat in Earth's atmosphere (action) will inevitably cause environmental impacts (reaction), such as rising temperatures and natural disasters. It’s a clever, thought-provoking transition from the scientific to the societal consequence.
Duration:
44–47 seconds
Visual Effect:
Motion typography, Film distortion effect
Animation Principle:
Anticipation – the build-up before the apple hits Newton draws attention and adds comedic tension
Timing – precise fall of the apple and reaction of text timed to mimic a cause-effect rhythm
Exaggeration – apple impact is emphasized for humorous and metaphorical effect
Secondary Action – A stroke in the background adds continuous motion and reinforces the greenhouse context
Animation Technique:
Position & Rotation Keyframes – for the apple fall and bounce off Newton’s head
Sound Effect:
Hard sound effect; pencil stroke:
The stroke sound further emphasises the pencil stroke, highlighting the key info that we wanted to convey.
Scene 8 , 9
Scene 8: Effect of Climate Change ( Typography on Motion Graphic )
Explanation:
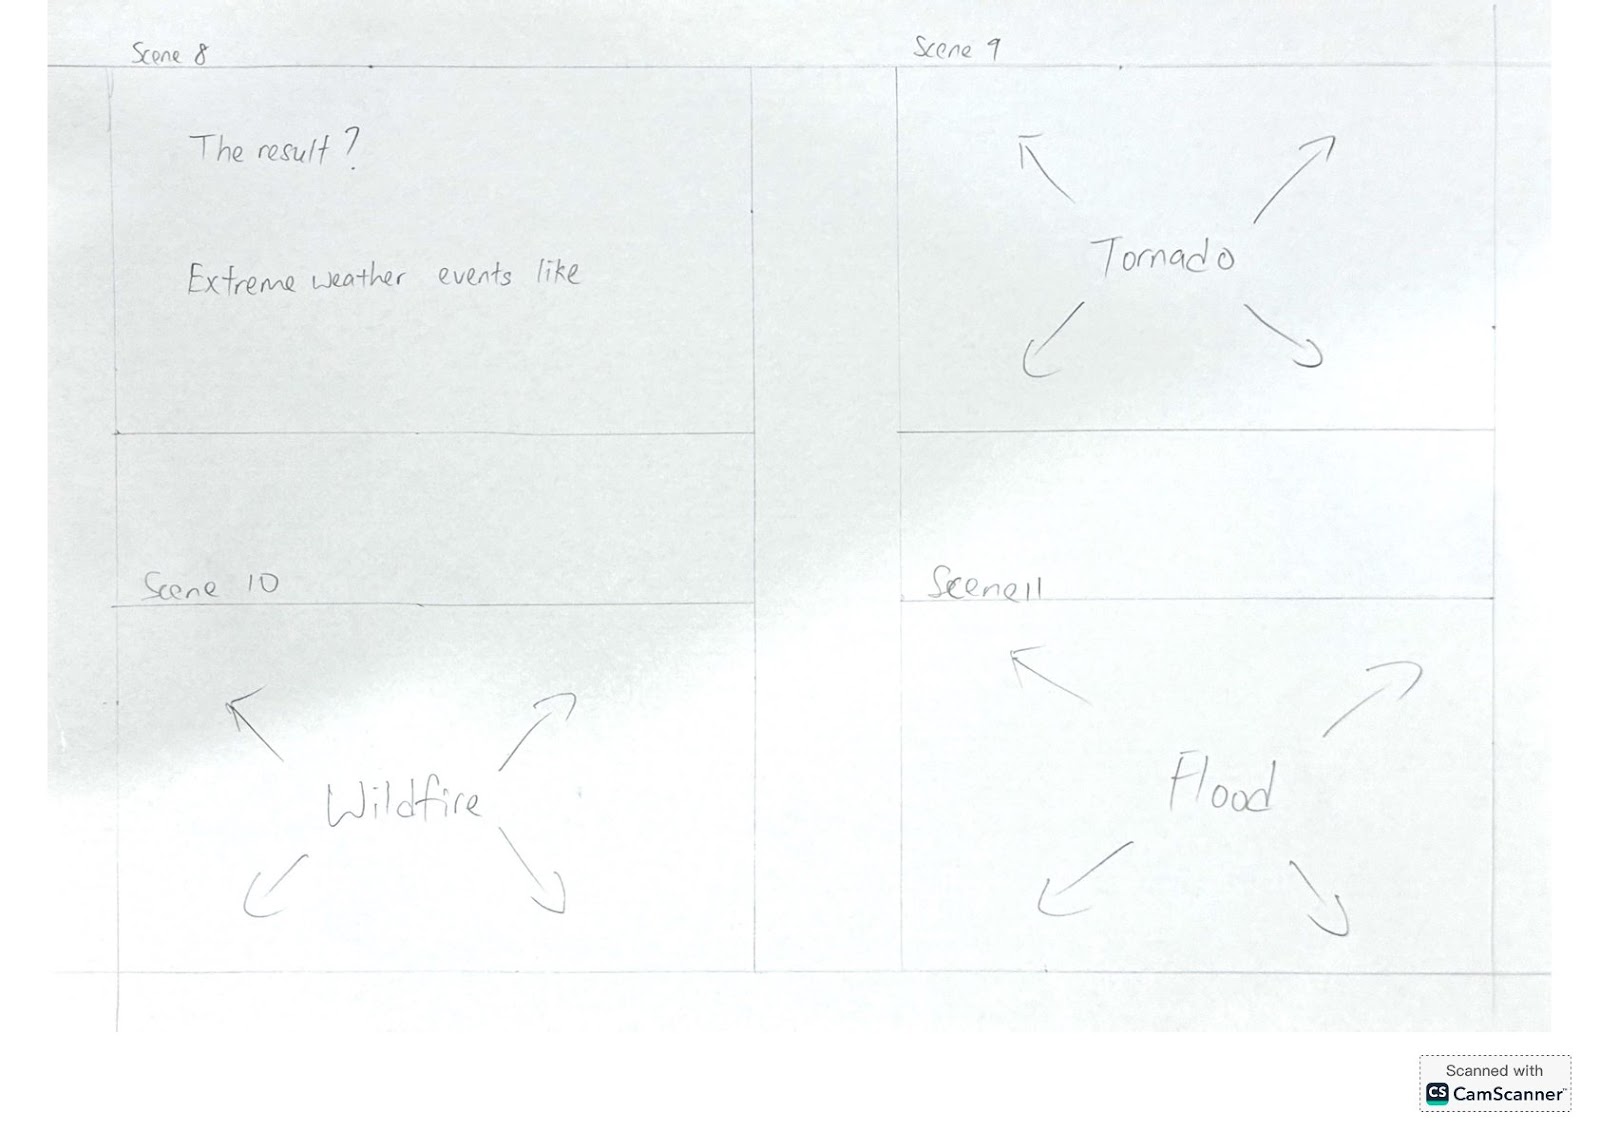
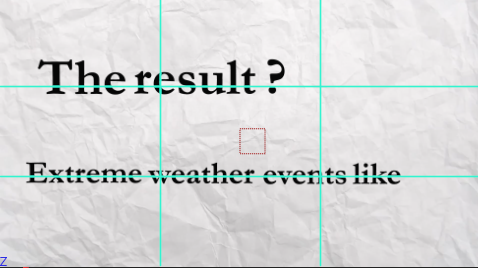
This scene introduces the consequences of climate change using kinetic typography. The phrase “The result?” appears boldly on screen, immediately drawing attention and setting a serious tone. The camera then tilts and pans downward to reveal the next set of words: “Extreme weather events li…”. The text is further emphasised with zoom and subtle shaking to highlight the urgency and gravity of the climate crisis.
Duration:
47–50 seconds
Visual Effect:
Film distortion effect, Parallax effect
Animation Principle:
Anticipation – the slow build-up before the dramatic camera tilt increases tension
Exaggeration – shaking and zooming effects enhance emotional impact
Staging – clean composition makes the message immediately clear and visually dominant
Timing – the precise delivery of “The result?” followed by the next phrase creates a narrative rhythm
Animation Technique:
Text Scale & Position Keyframes – used to zoom and animate text with intensity
Wiggle Expression – applied to text for subtle shaking
Camera Tilt & Pan (Null Object) – controls movement from top phrase to bottom text reveal
Parallax Layering – slight motion difference between background and text layers
Film Distortion Overlay – applied via adjustment layer to add tension.
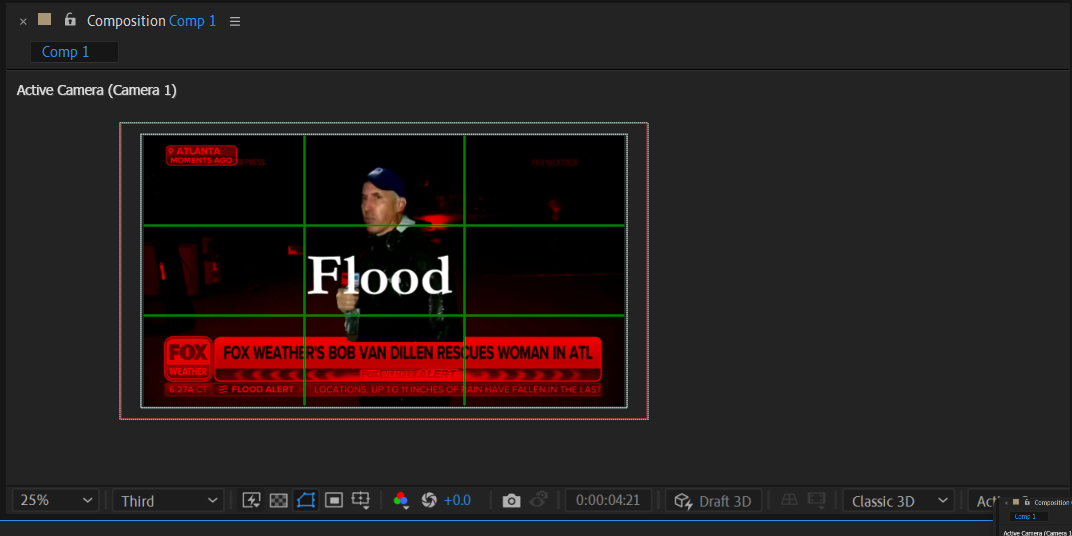
Scene 9: Disasters News
Explanation:
This scene presents a collage of news footage and visual representations of extreme weather events, such as tornadoes tearing through landscapes, wildfires engulfing forests, and floods submerging cities. These visuals serve as real-world examples of the consequences of climate change, making the topic more relatable and emotionally impactful. The rapid succession of visuals mimics the overwhelming and chaotic nature of these disasters, reinforcing the urgency for climate action.
Duration:
50–54 seconds
Visual Effect:
Hard cut-in scenes ,Film distortion effect, Parallax effect
Animation Principle:
Staging – each disaster is clearly defined and transitions smoothly to maintain clarity
Exaggeration – environmental effects are intensified to heighten impact
Timing – rapid yet readable scene transitions mimic news pacing
Appeal – dramatic and cinematic composition increases emotional engagement
Animation Technique:
3D camera – used to slide between scenes smoothly
Parallax Scene Setup – separate elements like Reporters, to be animated independently
Zoom FX – simulates handheld news footage or disaster impact
Adjustment Layer for Distortion & Grain – to unify the tone and add realism
Sound effects:
No sound effects are used as the reporters voice over are enough to present this scene to be highly urgent.
Scene 10: The Solution
Scene 10: The Solution
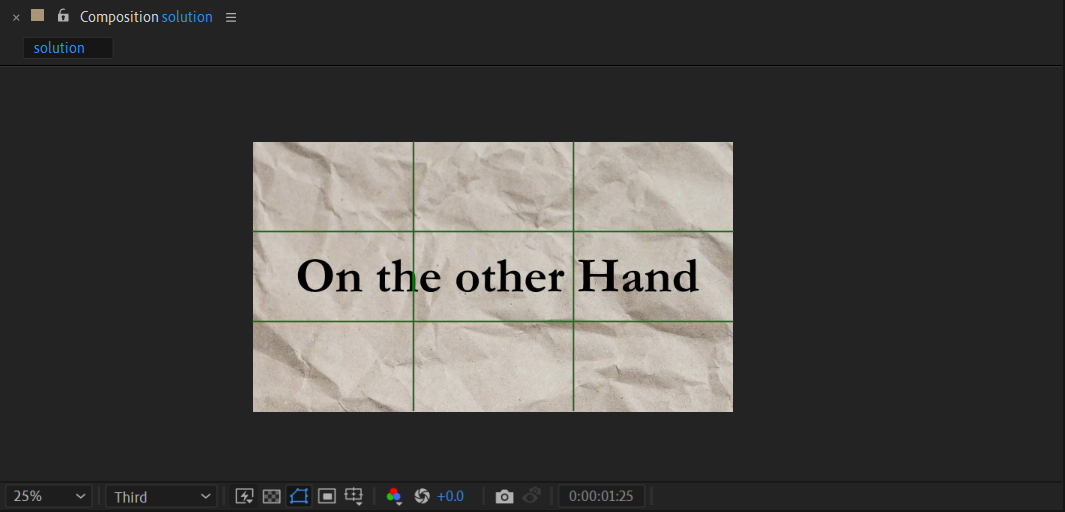
Explanation:
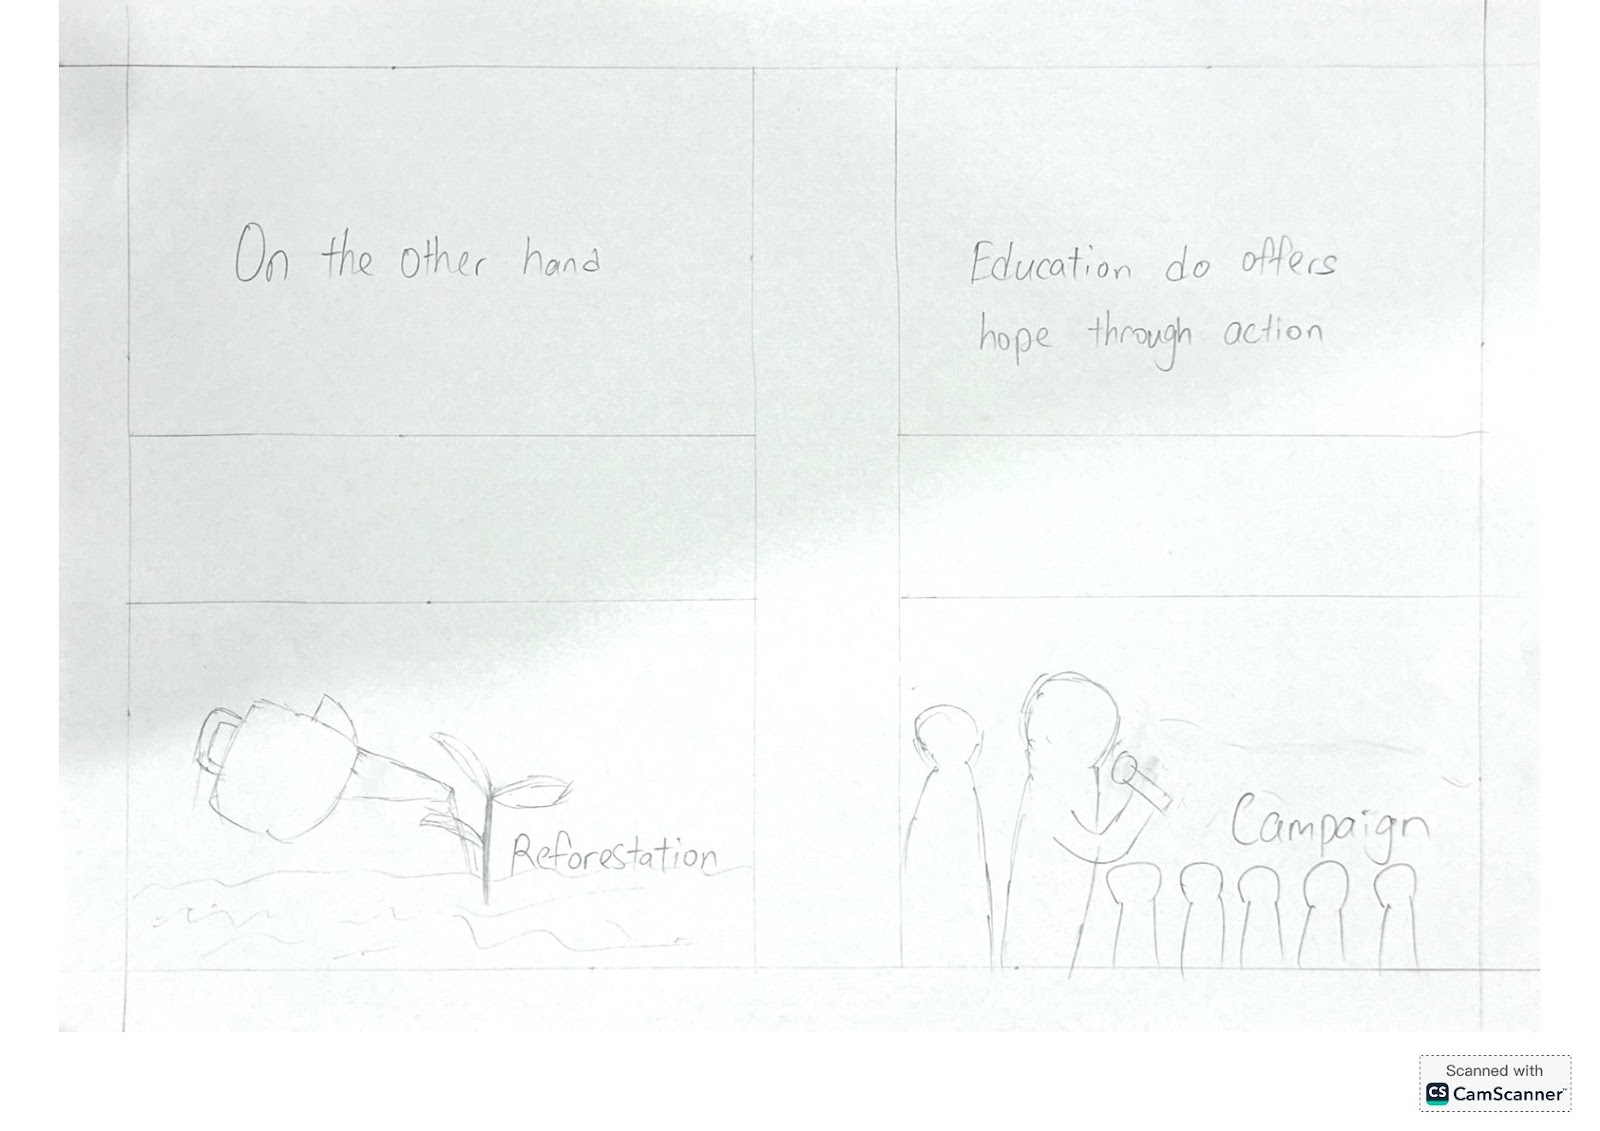
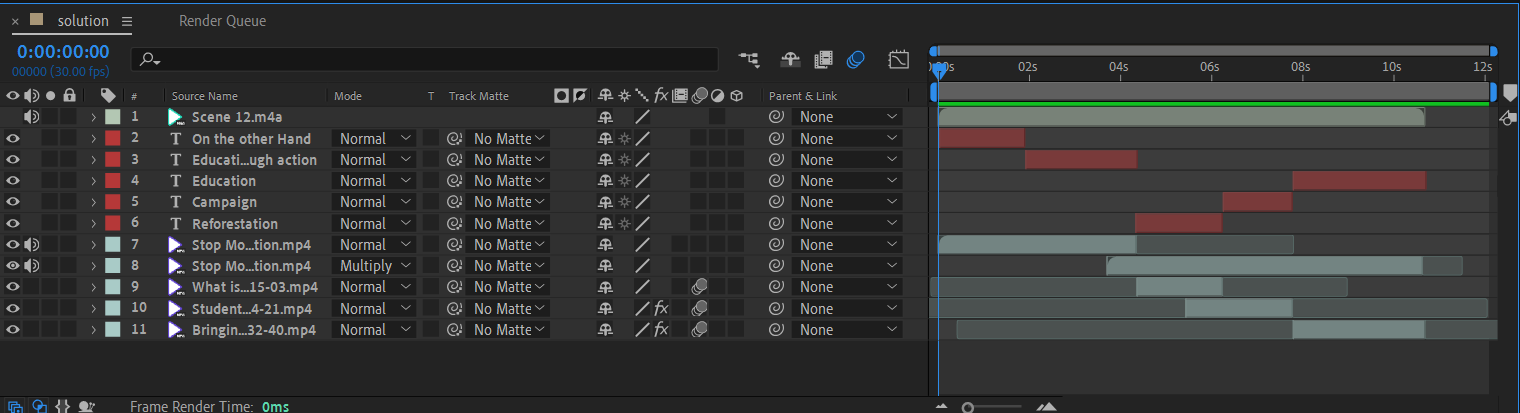
The scene opens with the line, “On the other hand, education does offer hope through actions such as…” which signals a shift in tone from warning to solution. This transition introduces positive climate actions with clean, uplifting visuals. Each solution such as reforestation, awareness campaigns, and education is represented by animated icons, reinforcing that individual and collective action can make a difference. The calm, structured design contrasts with the chaotic visuals from previous disaster scenes, symbolising the possibility of recovery and renewal.
Duration:
54–65 seconds
Visual Effect:
Cut-in scenes, Film distortion effect, Parallax effect
Animation Principle:
Staging – each solution is given visual space to stand out, with clean layouts and clear hierarchy
Appeal – warm color palette, soft lines, and gentle transitions promote positivity and hope
Timing – smooth, evenly spaced entrances of each icon keep the rhythm calm and focused
Animation Technique:
Opacity and Position Transitions – used for soft intro of each solution block
Ease In/Out Motion Curves – for clean and polished entry/exit of elements
Scene 11: The Explode Earth
Scene 11: The Explode Earth
Explanation:
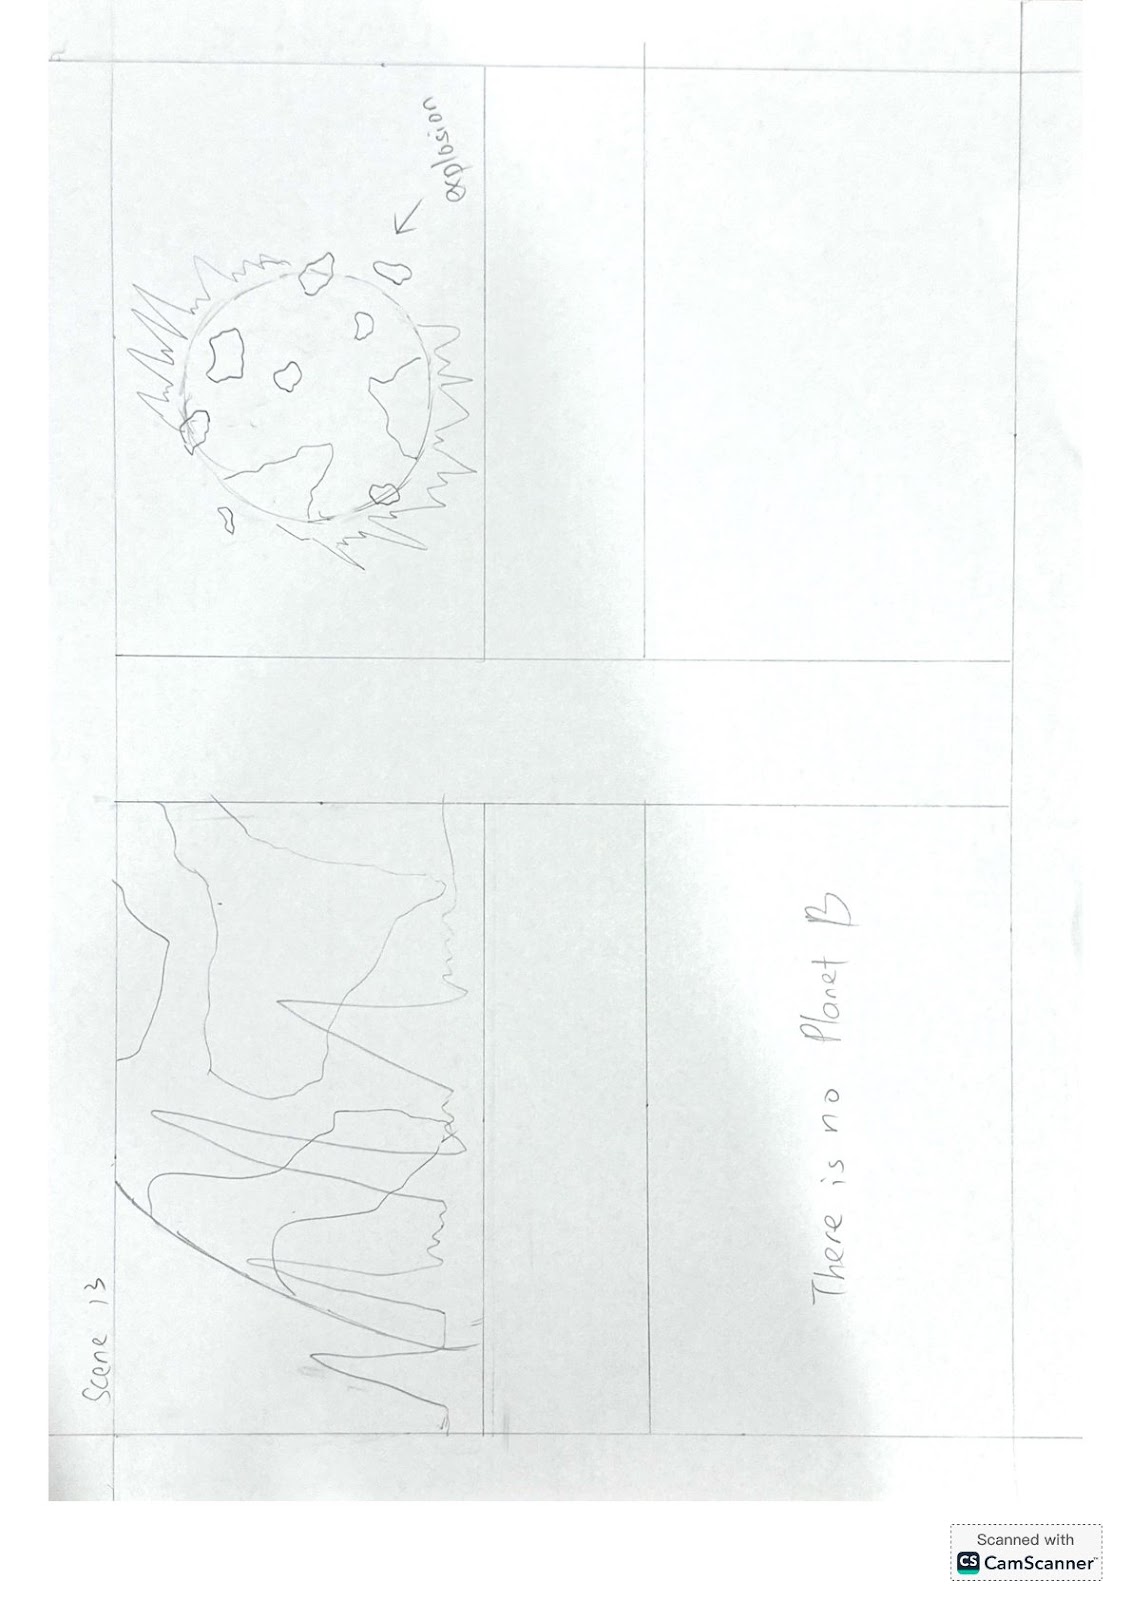
The video closes with a powerful and emotional climax. The Earth is shown slowly spinning with the overlay with the ECG, then suddenly it explodes visually representing the irreversible damage that unchecked climate change could cause. This is immediately followed by the bold message “There’s No Planet B,” which emerges dramatically amidst floating particles and dust. The scene delivers a final, haunting reminder of the consequences of inaction, aiming to leave a lasting impression on the viewer.
Duration:
65–82 seconds
Visual Effect:
“Time Remapping” effect, bold text emerges with particles ,Film distortion effect, Parallax effect
Animation Principle:
Anticipation – Earth spins slowly, building suspense before the sudden break
Exaggeration – the scale of the explosion dramatizes the severity of the issue
Timing – slow to fast motion enhances shock and draws attention to the final message
Staging – the message “There’s No Planet B” is centered, clear, and timed perfectly for emotional impact
Animation Technique:
Shatter or Fracture Plugin – used to simulate the Earth cracking and exploding
Time Remapping – to create dramatic pacing by slowing the build-up and snapping to the explosion
Text Reveal with Particle Emitter – message appears with trailing dust and floating debris
Glow & Flicker FX – applied to particles and typography for extra visual drama
Sound Effect:
Synthetic sound effect; explosion effect:
By controlling intensity, timing, texture, and emotion, the explosion we made can make an explosion feel devastating, exhilarating, surreal, or even tragic to the viewers.
4.0 DESIGN PROCESS


Pic: The Applications Used in this Animation
In this group assignment, we utilized design and editing programs to create the video. Adobe Photoshop was used in graphic content creation and editing such as graphics, background images, and cut-out objects for later incorporation into animation. Adobe Premiere Pro took center stage when it came to editing the video, where scenes were arranged, voiceovers inserted, subtitles added, and overall timing adjusted. For motion graphics and animation, we used Adobe After Effects, with which we were able to animate photos, insert transitions, and incorporate visual flow into the video. For free, high-quality images and videos, we applied to Pixabay, and from it, we were able to enhance our content without the risk of copyright. These tools all served support for some stage of the designing process and helped us create a polished and engaging final-product.
4.1 DESIGN PROCESS ON AFTER EFFECTS AND PREMIERE PRO
Scene 1 - Glacier Appear

Pic: The Glacier word and the Background

Pic: The “Glacier word” setting
First and foremost, we set the first and second scene time duration 7s , then we imported the paper effect video as the background. Then we added the “glacier” text, and added the “fill” effect, which adjusted the direction (0 x 73.0°), distance ( 9.0 ) to make the glacier word have a shadow effect. We add the shadow as the red colour to collaborate our theme “Save The World”, which brings up the “danger planet” message.
Pic: The “Glacier 1”
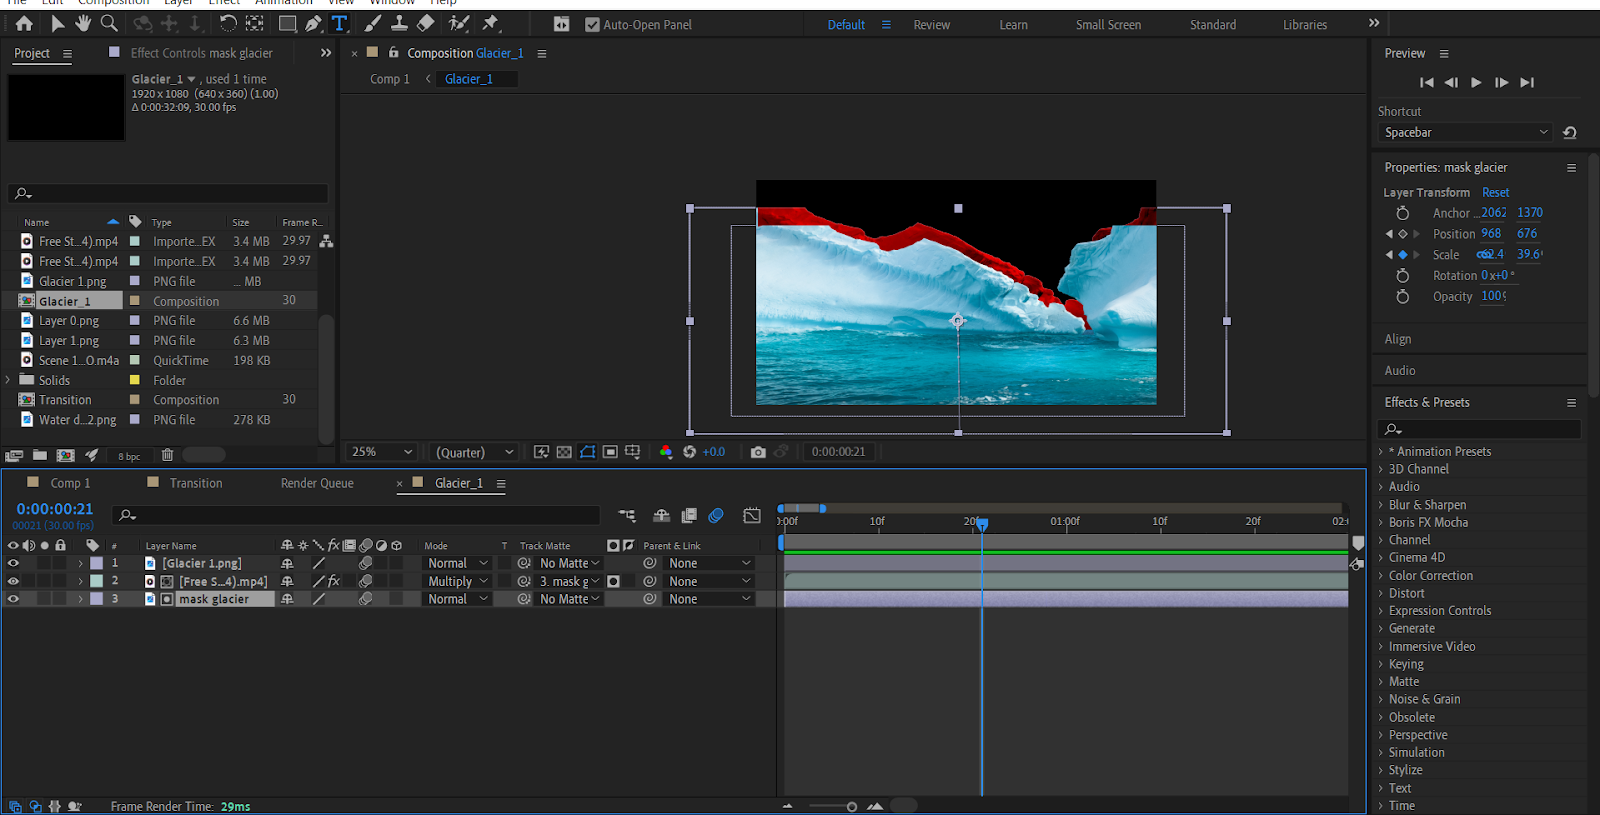
Pic: The “Glacier_1” Setting
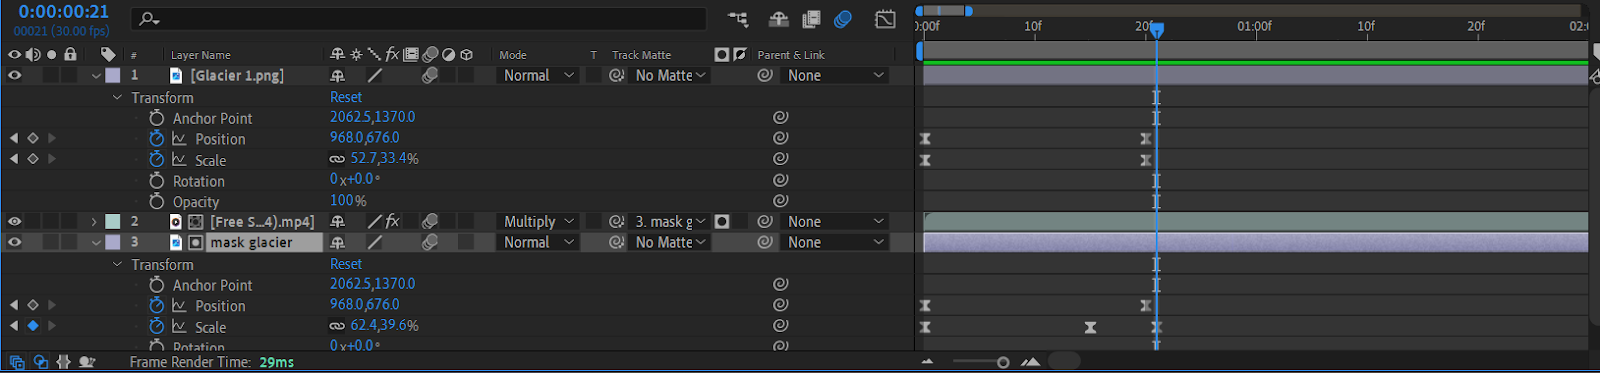
Second, we imported the “glacier 1.png” into the scene from Adobe Photoshop which already cropped it out as the png. Then we add & adjust the keyframe from position ( from 932.0, 1728.0 to 968.0,676.0 ) , scale ( from 28.1,16.7% to 52.7,33.4%) to make it “pop out” to the screen at the duration 0.0s to 0.2s. Then we duplicated & named the “glacier 1 mask layer .png” and set position ( from 932.0, 1728.0 to 968.0,676.0 ) and the scale (from 28.1,16.7% to 62.4,39.6%).
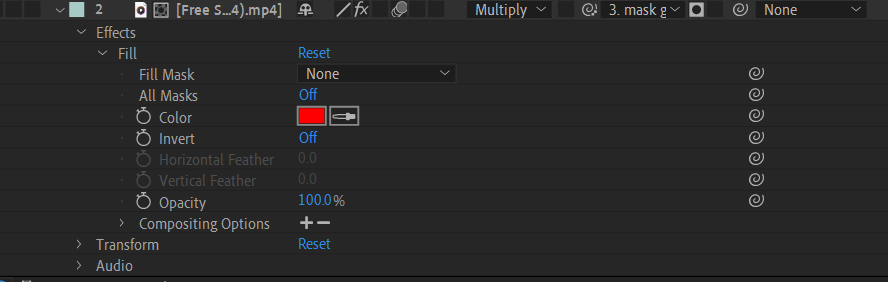
The purpose of this scale difference with the original glaciers is because we want to set this as the outline like the tear paper effect. Next, I imported again a paper effect video and pulled the track matte to the “glacier 1 mask layer.png” and changed the mode to “multiply”. After that, we add the “fill” effect and change to “red colour”. Additionally, We create the pre-compose for this called “ Glacier_1”.
Pic: The “Bingshan” layout
Pic: The “Bingshan” Setting
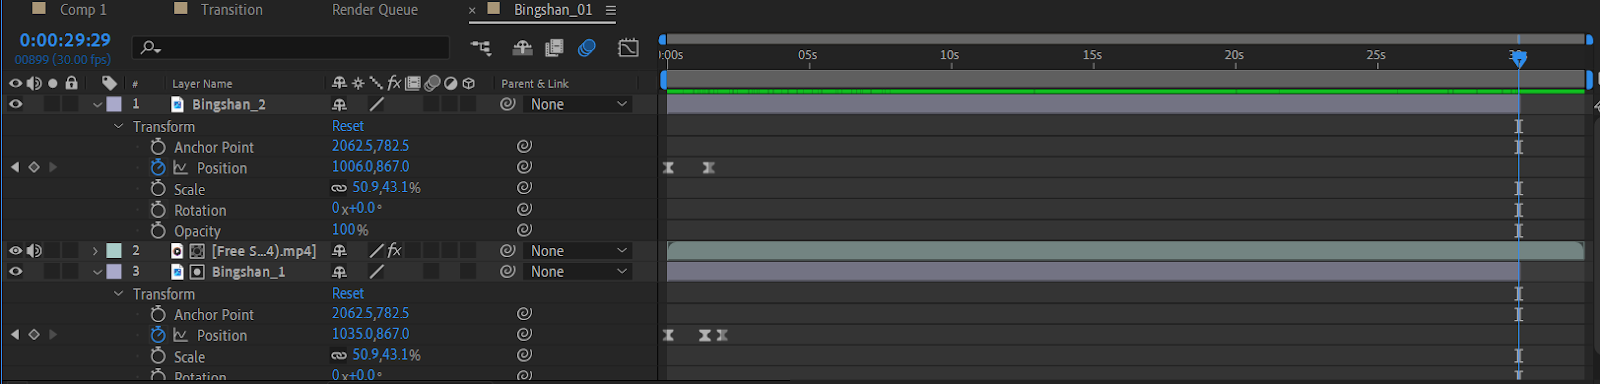
Next, we imported the “Bingshan 2.png” to the scene from Adobe Photoshop which already cropped as the png format. After this, we add the position’s keyframe (from 988.0, 1516.0 to 1006.0,867.0) at the time duration from 0.0s - 1.12s, to make the “pop out” effect from the below to the screen after the “Glacier_1 layout” comes out. Then, we duplicate the “Bingshan 2.png” and call it “Bingshan_1.png” and set the position's keyframe ( from 988.0,1516.0 to 1035.0,867.0) to create an outline. Then, we imported again a paper effect video and pulled the track matte to the “Bingshan_1.png” and changed the mode to “multiply”. After that, we add the “fill” effect and change to “red colour”. Additionally, We create a pre-compose for this called “ Bingshan_1” .

Pic: The “ Bingland” Layout


Pic: The “Bingland” Setting
Besides that, We imported the “Bingland 3.png” to the scene from Adobe Photoshop which already cropped as the png format. After this, we add the position’s keyframe ( from 936.0,1400.0 to 952.0,1110.6) at the time duration from 1.14s to 2.03s. Next, we duplicate the “Bingland 3.png” called it “Bingland 2.png” and we add and adjust the scale’s keyframe from (51.6,41.5%) to (53.3,44.5%), to create the bingland outline. Then, we imported the paper effect video and pulled the track matte to the “Bingland 2.png” and changed the mode to “multiply”. After that, we add the “fill” effect and change to “red colour”. Additionally, We create a pre-compose for this called “ Bingland_01” .
Pic: The Combination of Glacier word, Glacier 1, Bingshan 1 and Bingland 1

Pic: The addition of camera composition

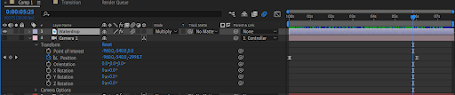
Pic: The Setting
After we finished this layout, we added the camera and set the position keyframe from ( –960.0, -540.0,-90.0) to ( –960.0, -540.0,-3000.0) to make the zoom out effect. Then, we added the null object , named it “Controller”, and add the position’s keyframe ( from 1920.0,1080.0,0.0 to 1920.0,16275.0,0.0) at the duration 0.0s - 5.25s. The purpose of adding this null object is to create the transition to Scene 2, the camera we set are for zoom out effect, then the null object are for the camera movement without adjusting the Camera.
Scene 2: Water Droplet Turned Red
Pic: Transition To Scene 2

Pic: Water Drops turns Red
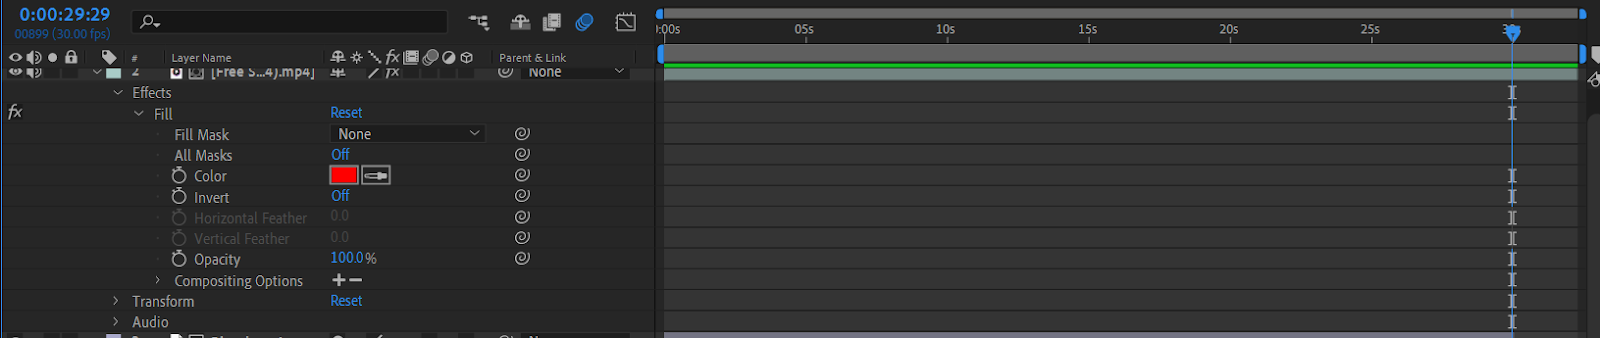
For Scene 2, the time duration will be 4.0s to 8.0s. Then, we imported the “Waterdrop.png” from the Adobe Photoshop, and we set the opacity’ keyframe from 0% to 100% at the duration 4.02s - 4.12s, is to fitting in with the transitions, then the water drop appear which shows the glaciers melting message. Then we add the “fill” effect and fill it in the red colour, then we add the mask layer with draw a shape by the pen tool, and i went back to the ‘fill” effect and create the composition option, then select the mask layer with adjust the effect opacity from 0% - 82%. The reason why we adjust the effect opacity to 82% is we want to keep the water drop design.

Pic: The “WaterDrop” Setting
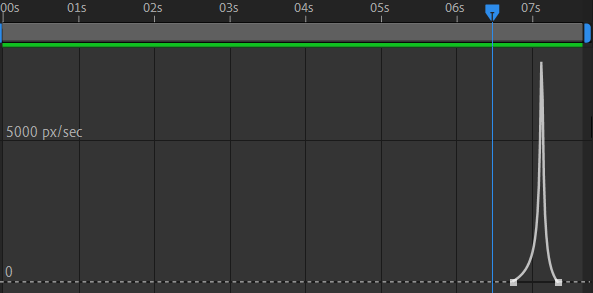
Pic: Speed Graph Adjustment for the Water Drop Position Keyframe
Not only that, we also keyframe the position from ( 472.0,528.0 to 488.0,-264.0) then we adjust the speed graph to make the water drops go out to the screen more smooth and quick. After that, we duplicated this “Waterdrop.png” named it “drops”, we changed the scale smaller to 36.8,38.5% These water drops fade in then turn red blood means our earth is bleeding because of the climate change.
Pic: The “ losing 267 km3 of ice each year” text

Pic: The Text Transition Setting
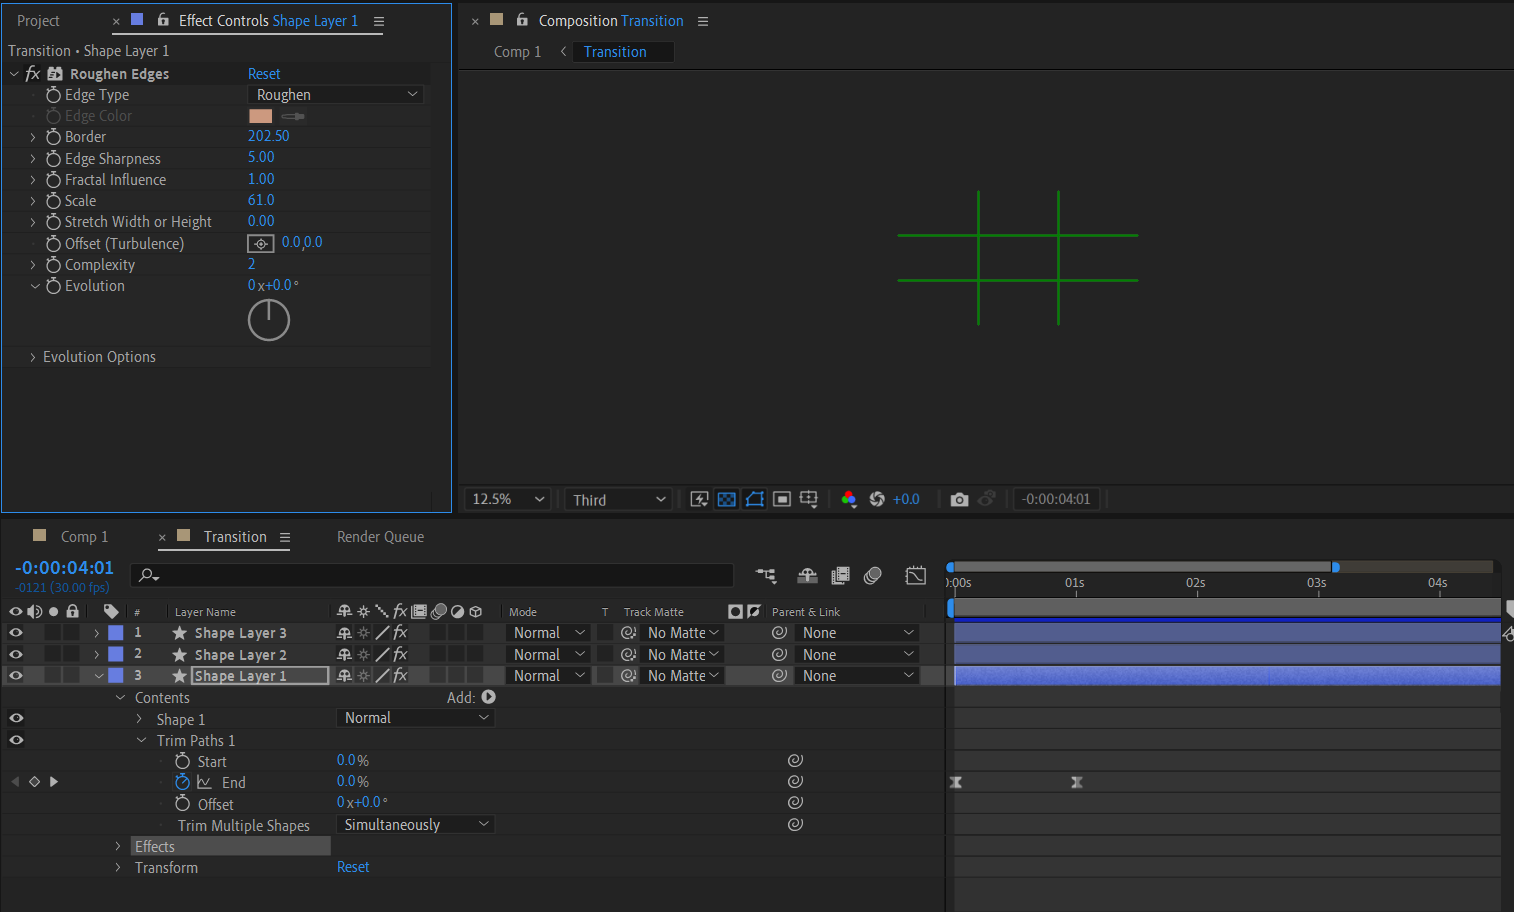
Pic: The Roughen Effect Setting
Then, we add the “losing 267 km3 of ice each year” text, then we add the “fill” effect with the red colour and the keyframe effect opacity from 0%-100%, so it will appear the text with the black colour then will turn into the red colour. Then we duplicate the position effect from the waterdrops, so the speed of the screen will tally with the water drop layer. After that, we add the transition for the text to appear, which is to create the shape by using the pen tool. After that, we add trim path end’s keyframe from 0% to 100% at time duration 0.0.s - 1.0s.
Next, we add the “roughen edges” effect. The edge type is “roughen”, the border will be 202.50, the edge sharpness will be 5.00, fractal influence will be 1.00, and the scale will be 61.00 with the complexity is 2.With this we duplicate two more shape layer and adjust the the shape till it can fill all the screen. Lastly, I selected these shape layers and created a pre-compose and named it “Transition” then we selected the “losing 267 km3 of ice each year” text and pulled the track matte button to the “transition” precompose layer.
Scene 3 - Greenhouses Gas
We begin by turning the viewport from 2D to 3D by enabling 3D layers for all layers (the cube button). This enables us to edit in a 3D space, allowing us to be more creative with our effects.

Next we create a camera layer and null object layer.
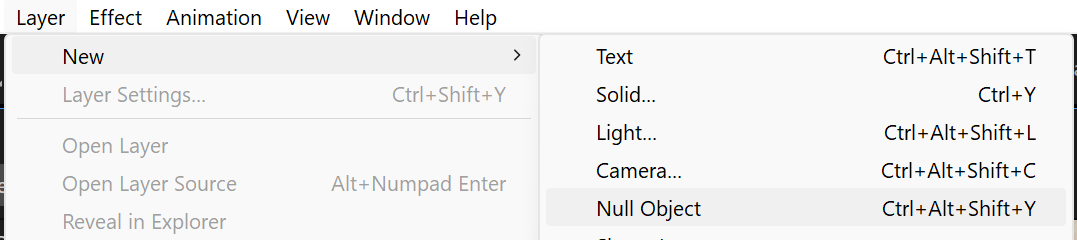
Linking a camera to a null object allows us to control the camera's movement and orientation using the null object as a central point of control. This technique is useful for creating complex camera animations and tracking movements within a 3D scene.
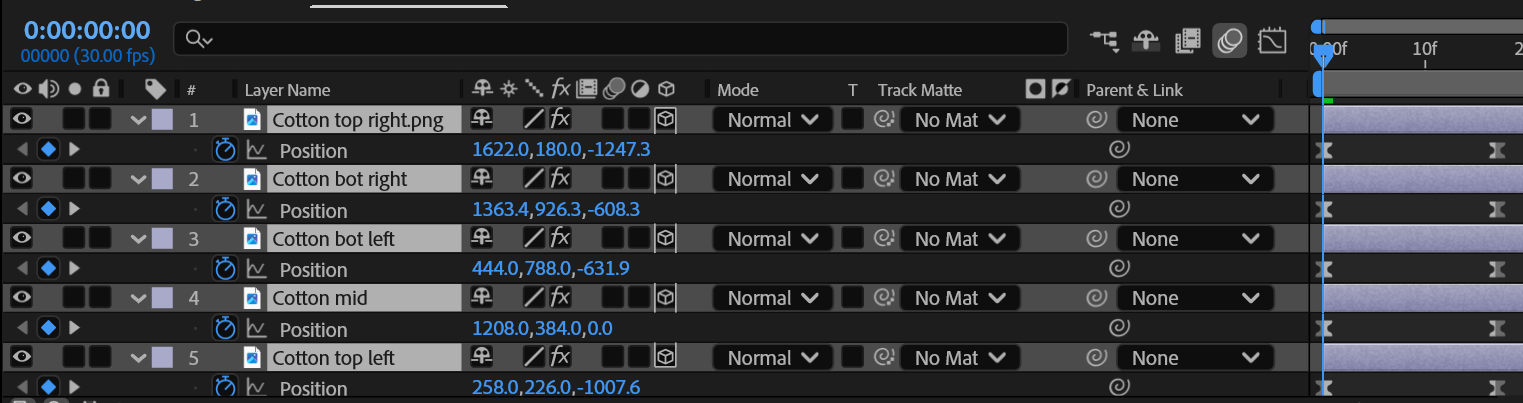
By adjusting the X, Y and Z axis, we positioned the objects and added keyframes on the 3D space that we wanted.
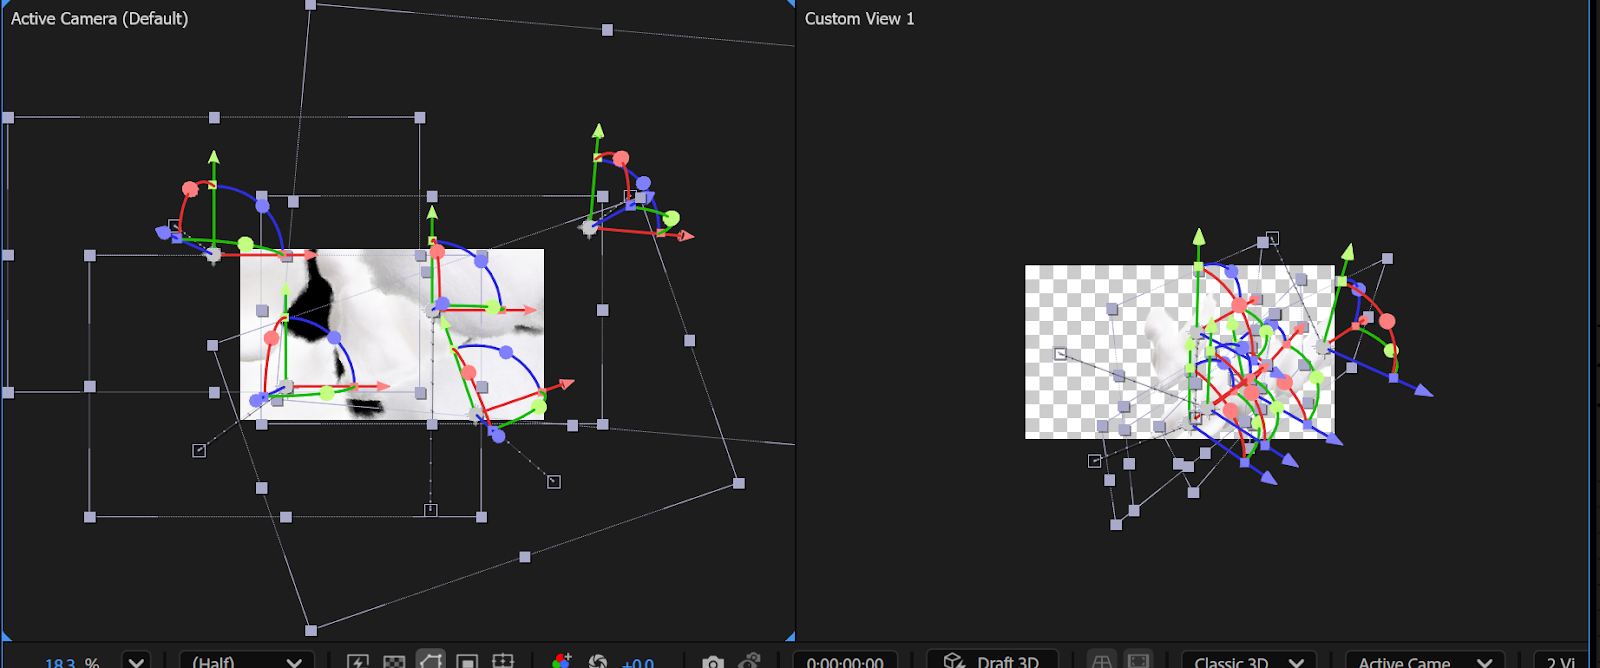
The keyframes allow us to set parameters for motions of the subjects, hence allowing us to achieve a parallax effect.
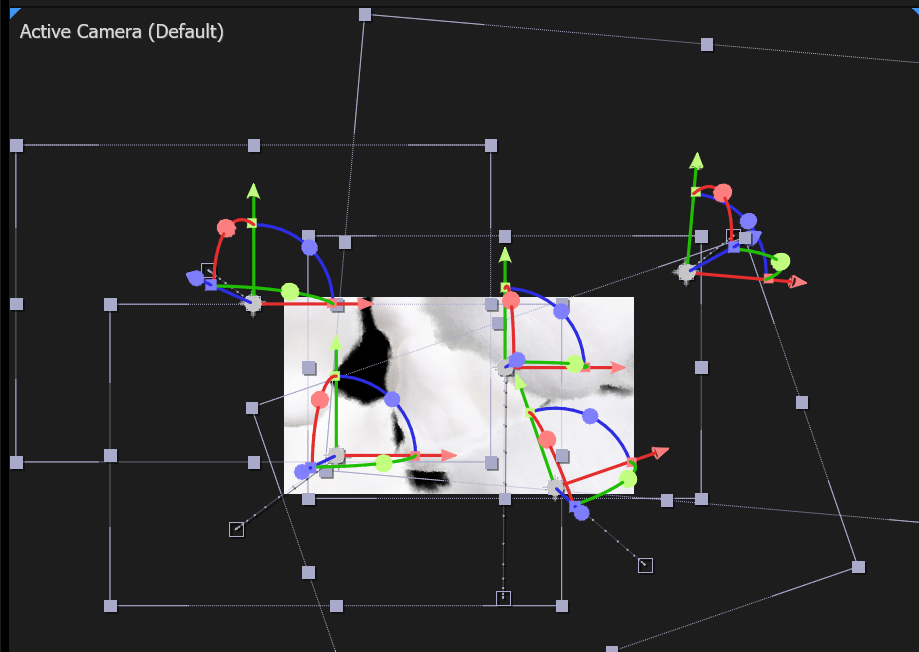
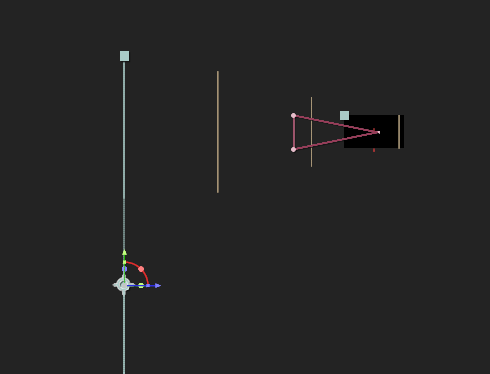
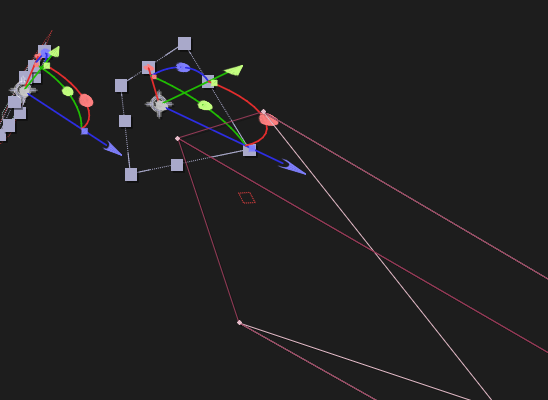
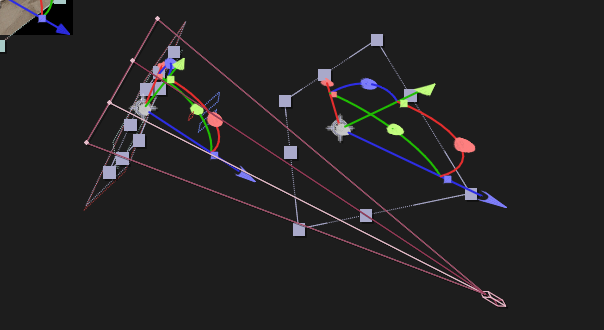
Active camera view at initial frame
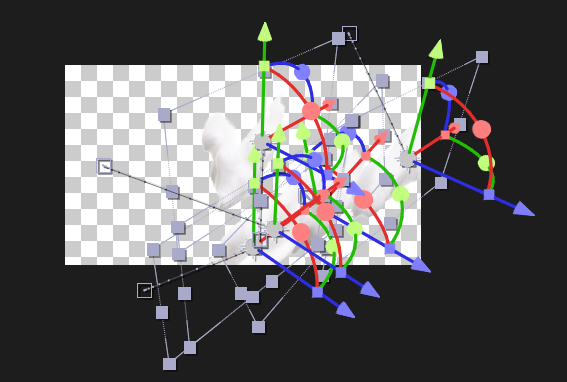
3D view of initial frame
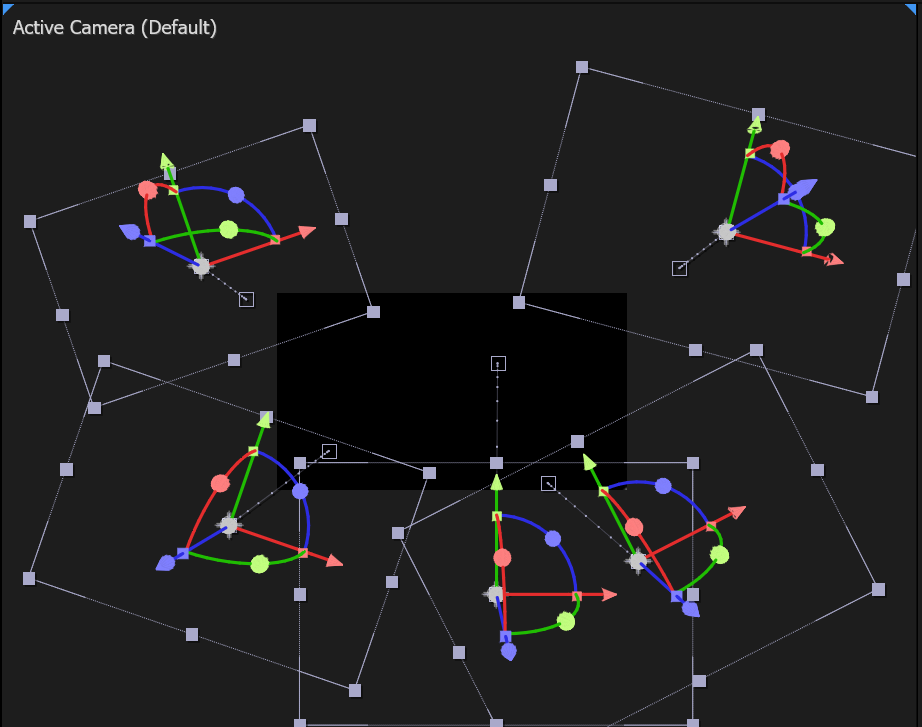
Active camera view at final frame
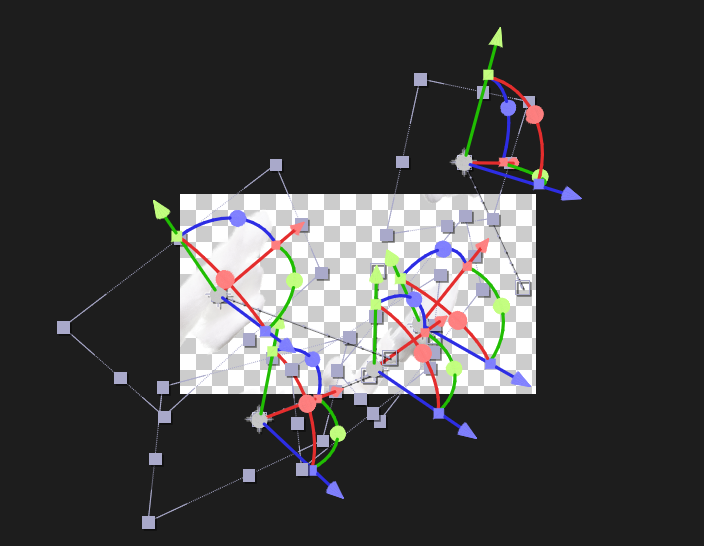
3D view of final frame
Next we repeat the same concept for the rest of the elements of the video. For example,
Push through effect through the words
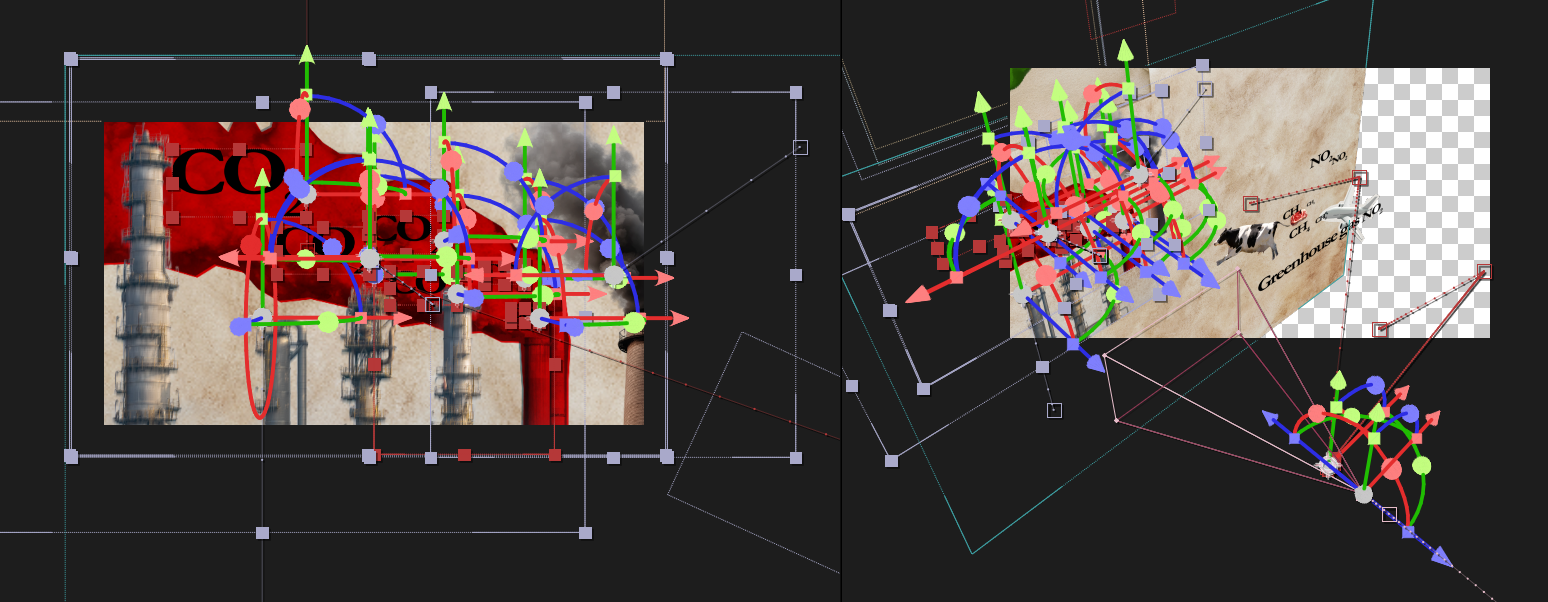
Parallax effect of buildings
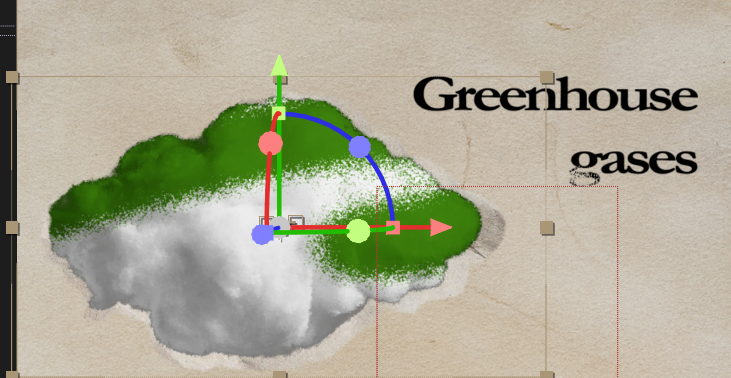
Greenhouse cloud transition
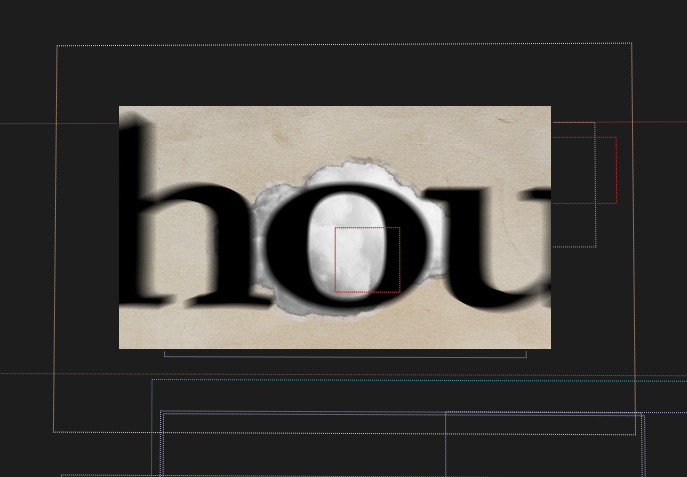
For the green cloud transition, we apply the concept of trim paths and masking.
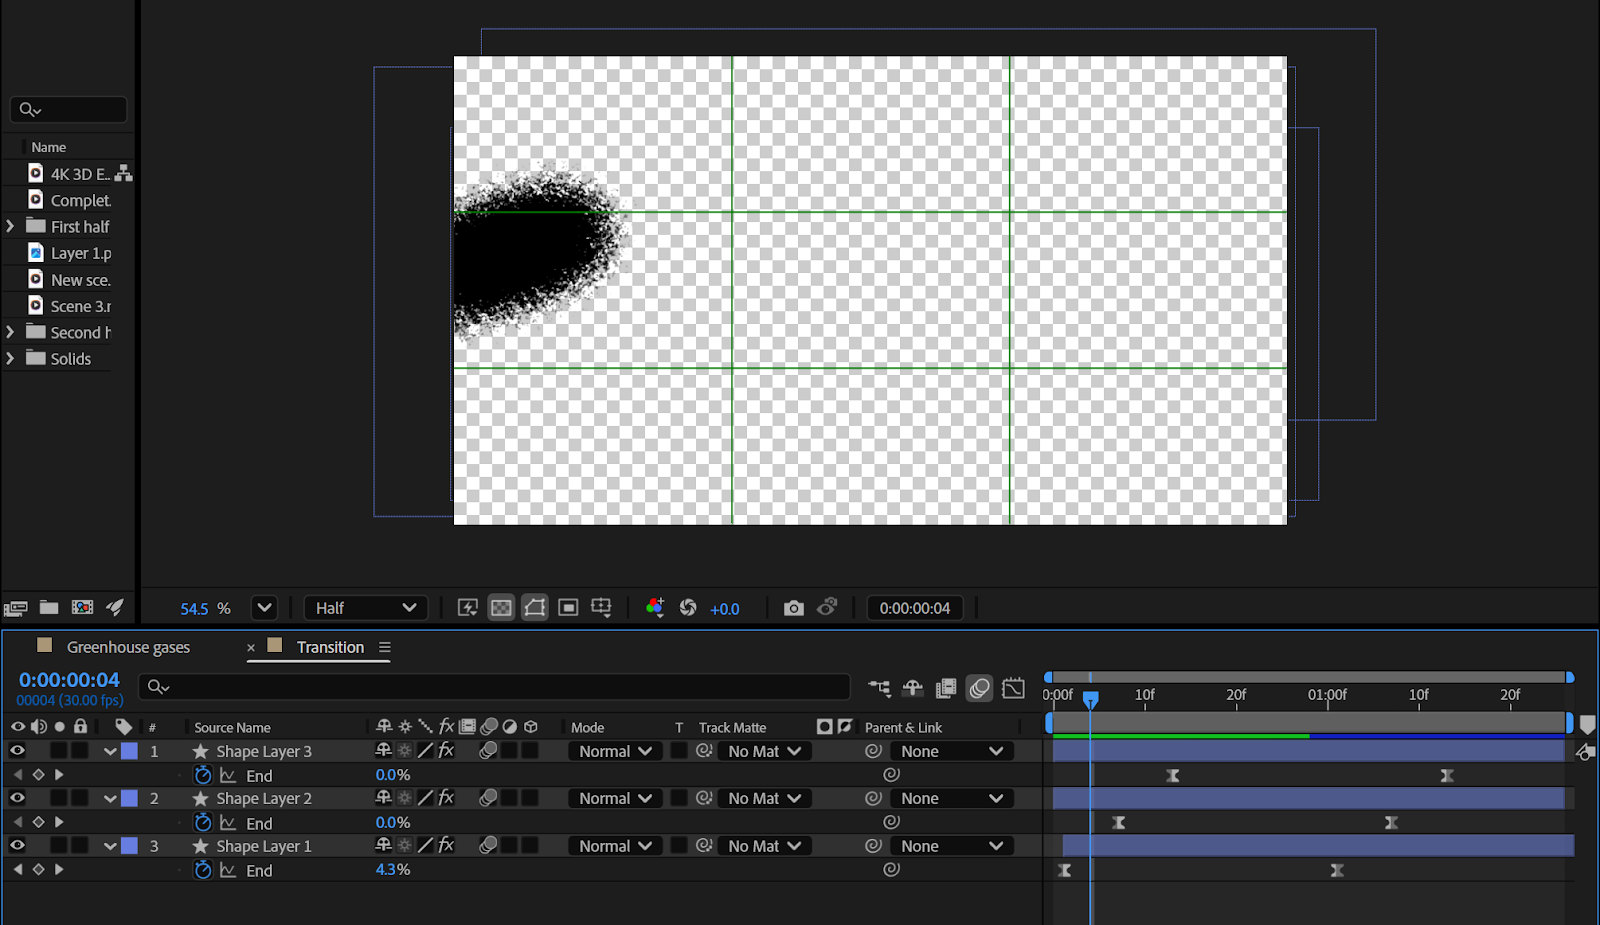
We drew three paths and keyframe the End part of the path, from 0% to 100%. Hence a moving path is achieved.
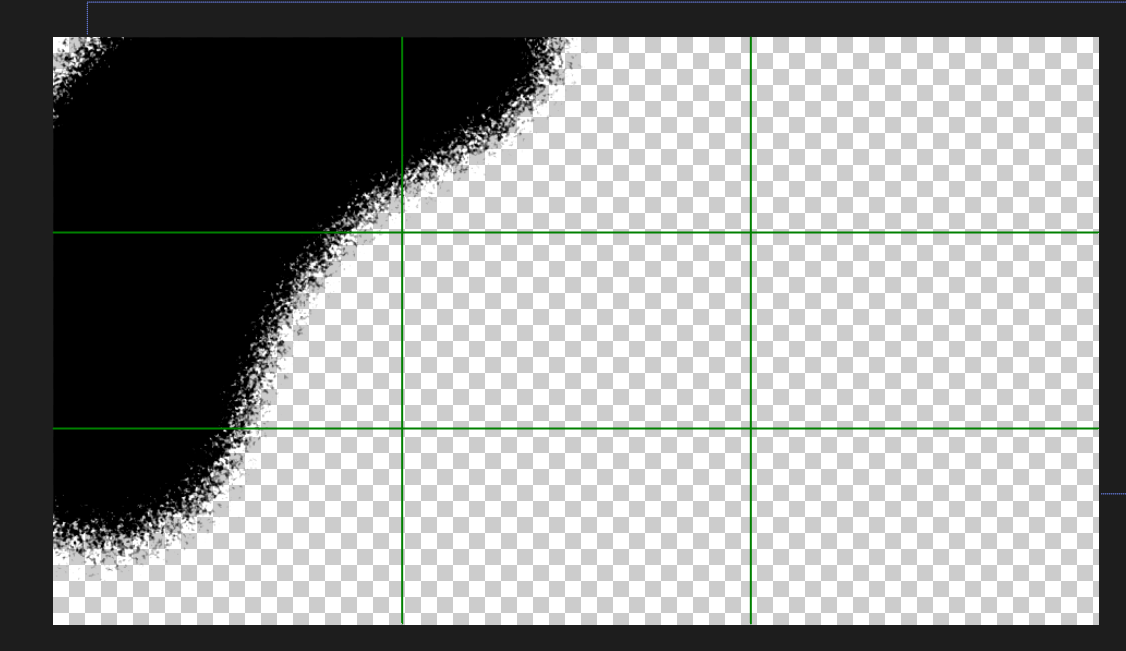
Frame 1

Frame 2
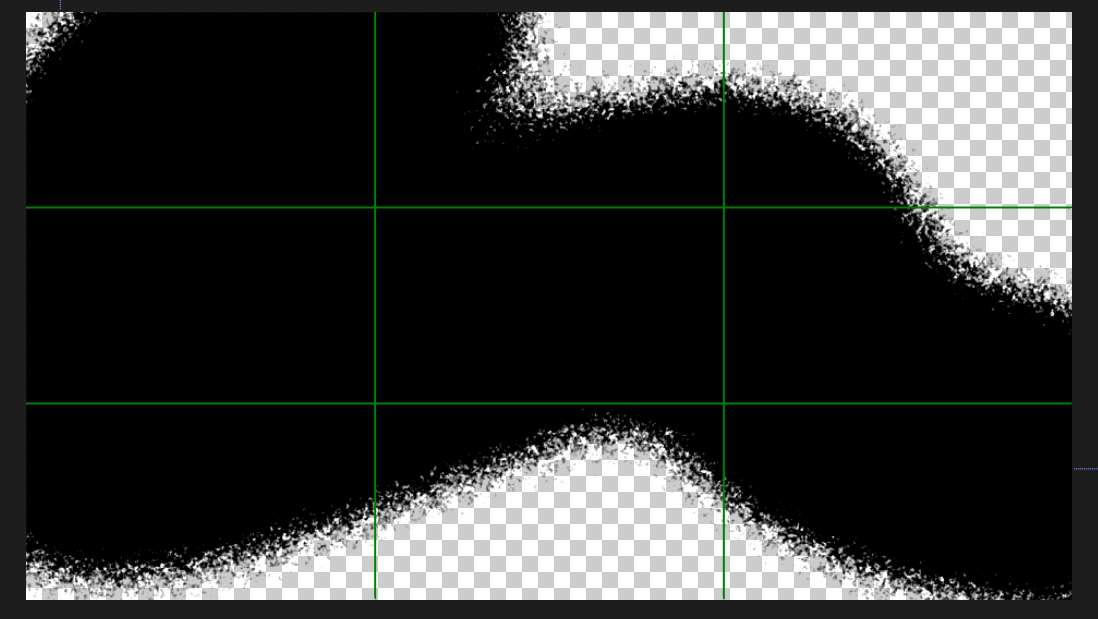
Frame 3

Then we composite this transition and named it transition. We alpha matte this transition to the original cloud, apply a fill layer to add the colour green on the cloud.
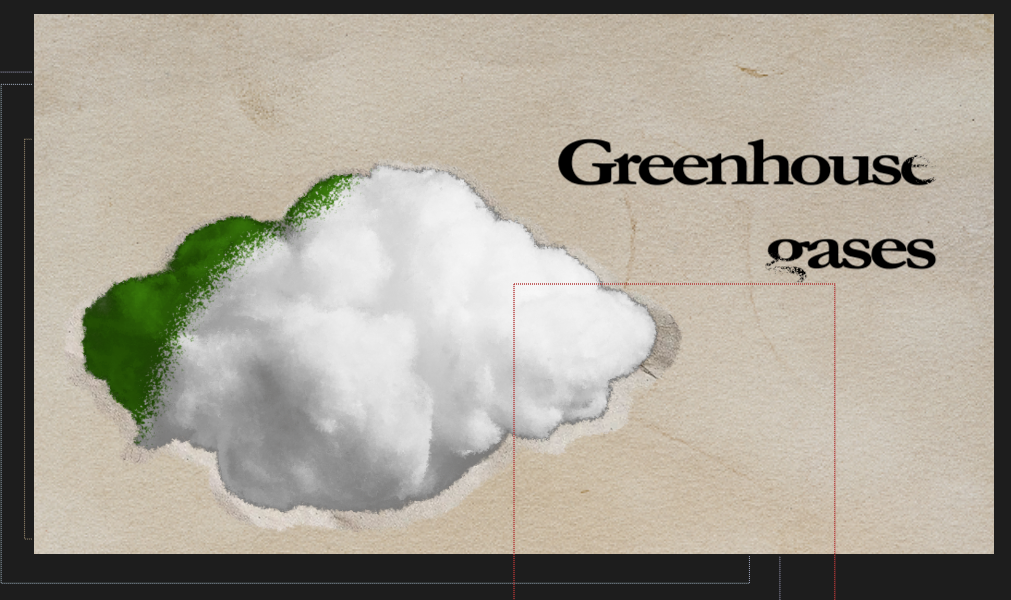
Frame 1
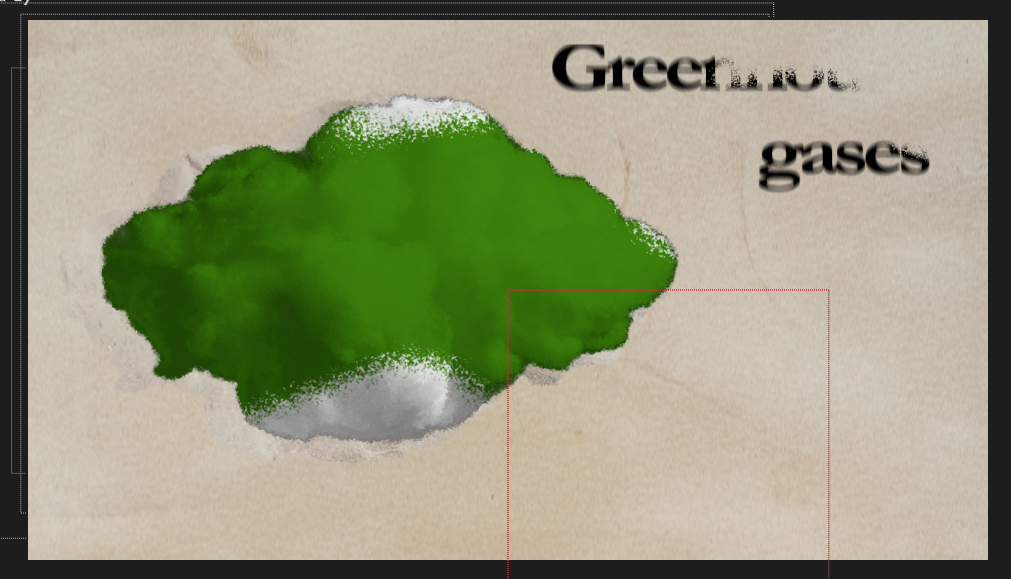
Frame 2
Scene 4 - Human Enhanced Effect
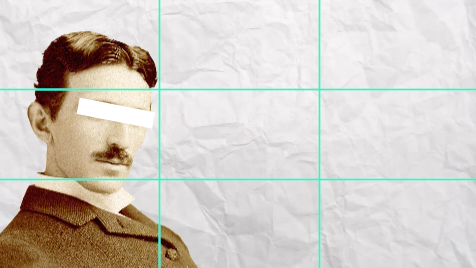
Pic : Nikola Tesla

Pic : Nikola Tesla Setting
We have dragged a rectangle to cover Nikola Tesla's eyes. Adding keyframes at “Position” for both layers. For the rectangle, add the keyframe on 0.00f (472.0, 1428.0) and the 2nd keyframe on 10f (472.0, 456.0) and press F9 to Easy Ease. For the Nikola Tesla, add the keyframe on 0.00f (364.0, 1656.0) and the 2nd keyframe on 10f (364.0, 684.0) and press F9 to Easy Ease. Hence, these two can appear from the bottom to the top.
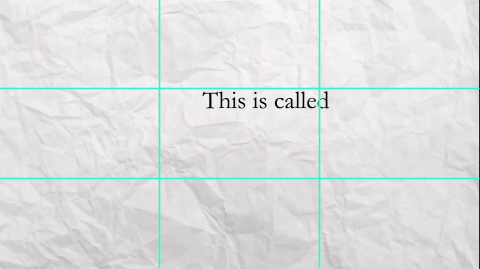
Pic : Text (This is called)
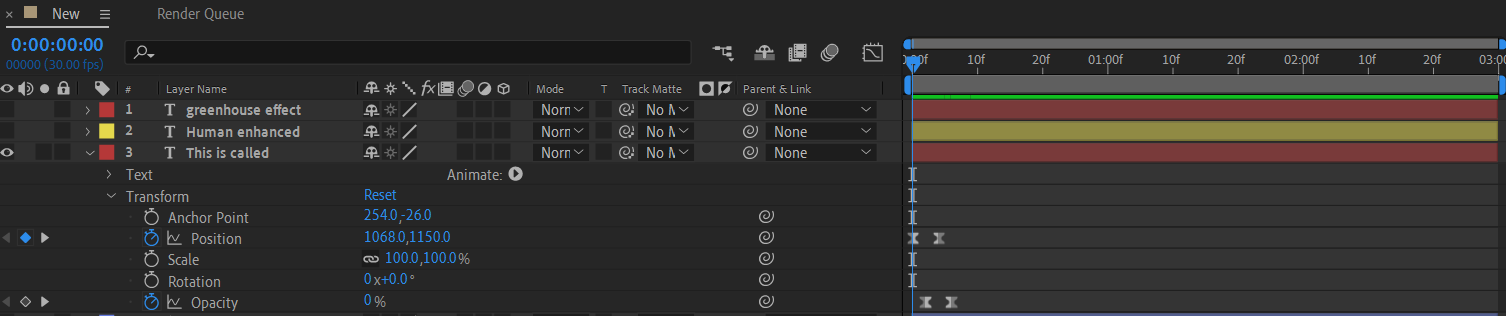
Pic : Setting_Text (This is called)
We added the keyframe at “Position” on 0.00f (1068.0, 1150.0) and the 2nd keyframe on 4f (1068.0, 410.0) and pressed F9 to Easy Ease. So, this text can appear from bottom to its position.
Then, we added the keyframe at “Opacity” on 2f (0%) and the 2nd keyframe on 6f (100%) and pressed F9 to Easy Ease, so that it can create a “pop up” effect.
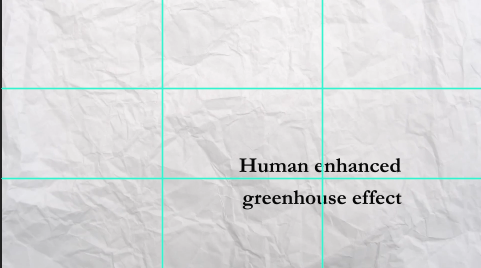
Pic : Text (Human enhanced greenhouse effect) before scale up
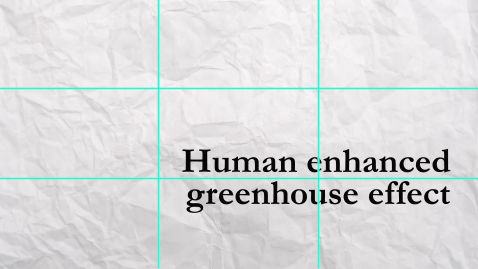
Pic : Text after scale up
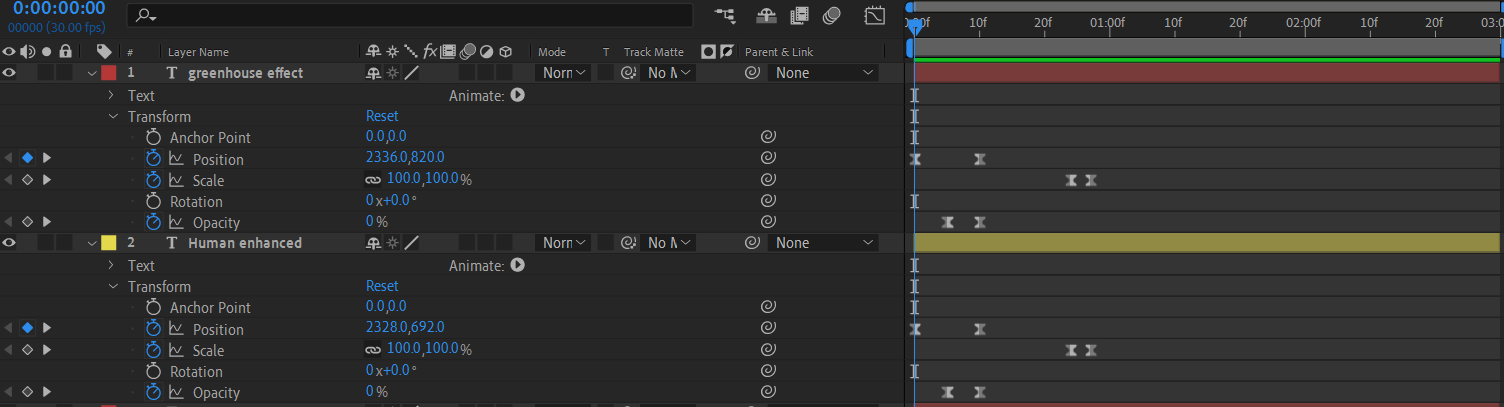
Pic : Text Setting
For the text “Human enhanced”, we added a keyframe at “Position” on 0.00f (2328.0, 692.0) and the 2nd keyframe on 10f (1272.0, 692.0) and pressed F9 to Easy Ease. For the text “greenhouse effect”, 1st keyframe added at “Position” on 0.00f (2336.0, 820.0) and 2nd keyframe on 10f (1280.0, 820.0) and pressed F9 to Easy Ease.
For the “Opacity”, we added the keyframe on 5f (0%) and the 2nd keyframe on 10f (100%) for these two texts and pressed F9 to Easy Ease, so that it can create a “pop up” effect.
For “Scale”, we added the keyframe on 24f (100.0,100.0%) and the 2nd keyframe on 27f (166.0,166.0%) for these two texts and pressed F9 to Easy Ease. Hence, when the voice over mentioned “Human enhanced greenhouse effect”, the text will have an enlarging effect.
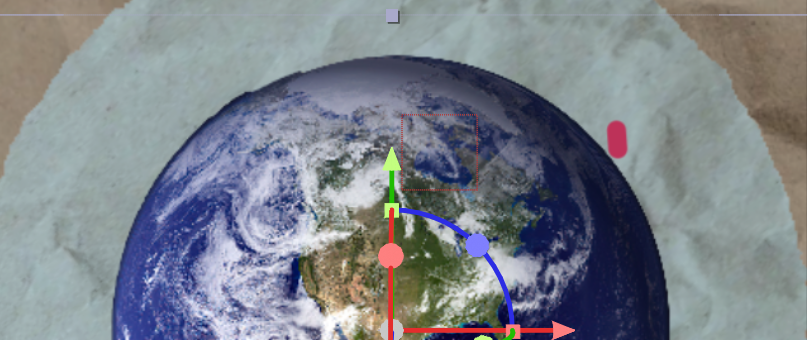
Scene 5 - Earth and the Atmosphere
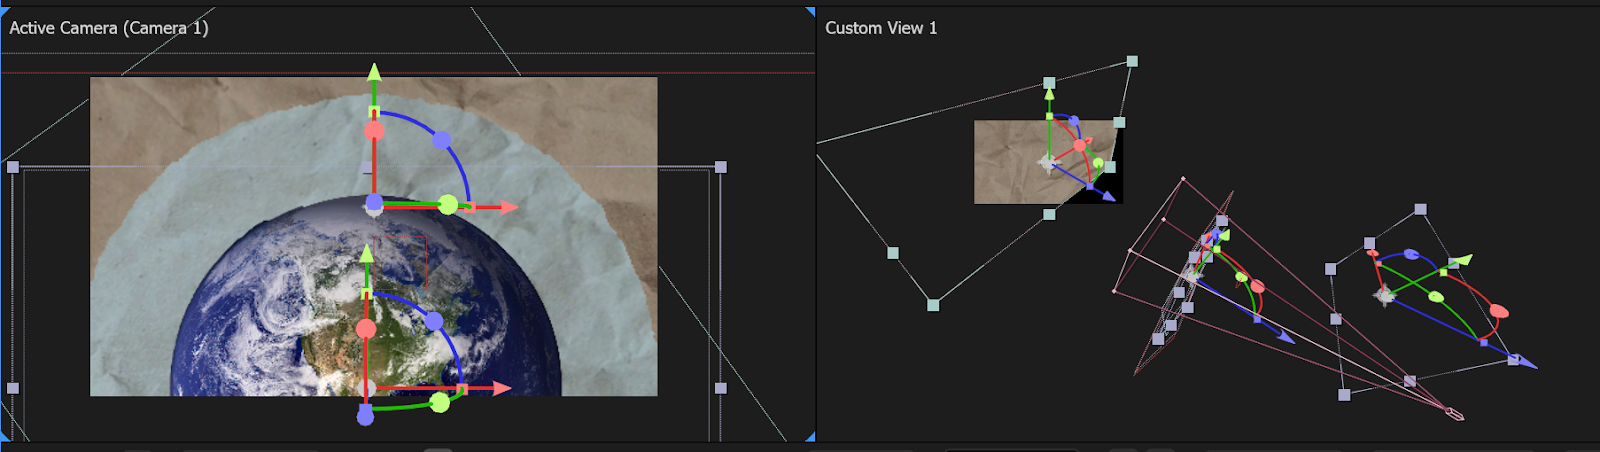
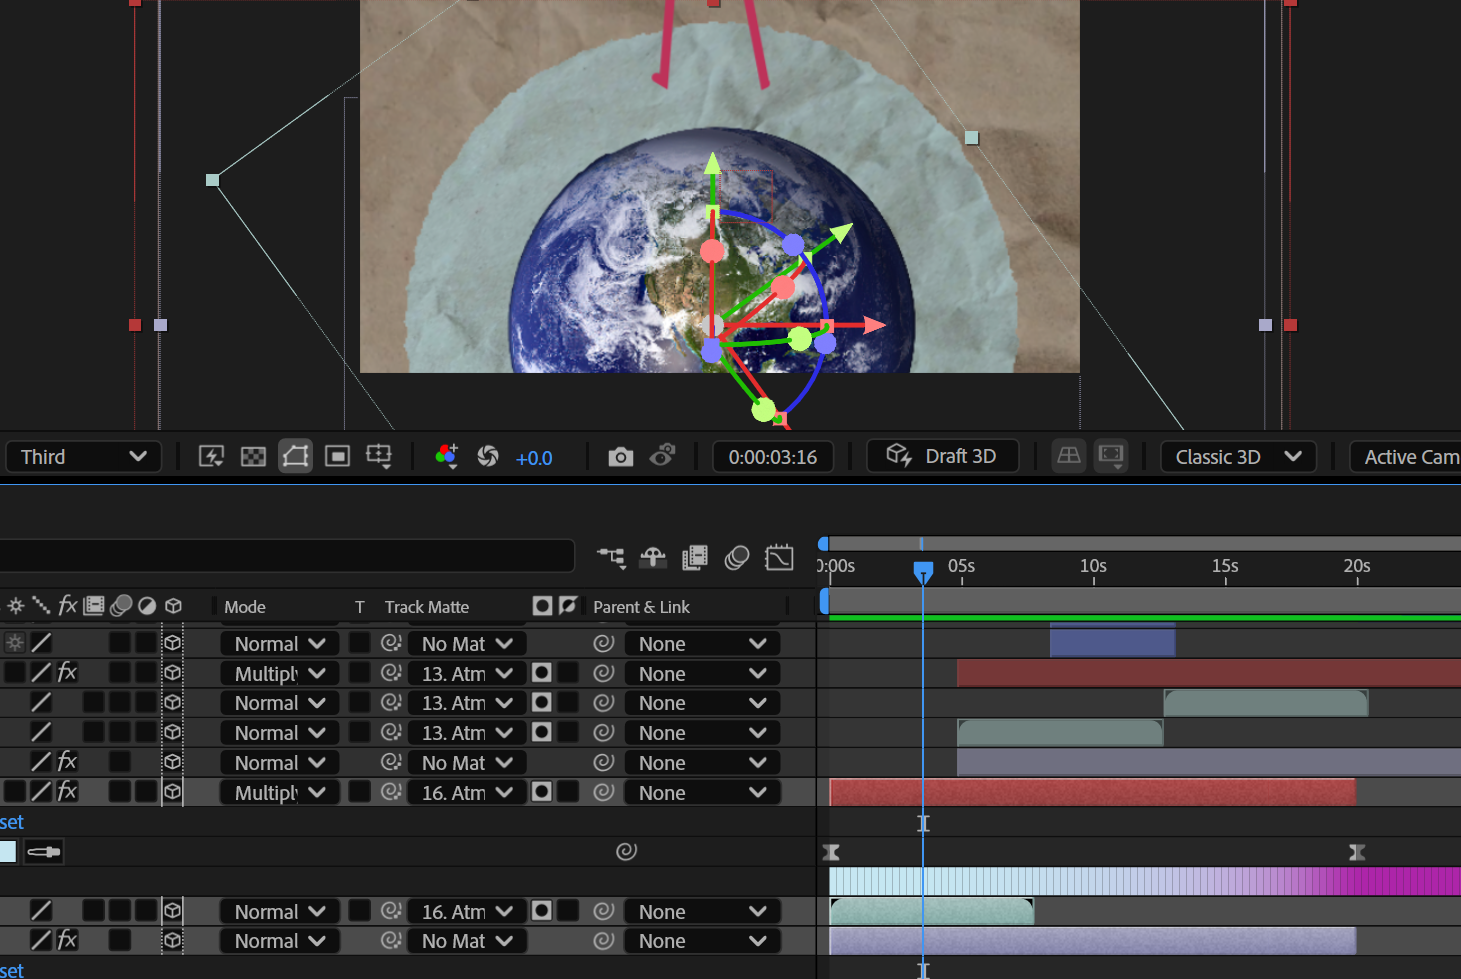
To achieve a parallax effect, the same concept is used.
We open another null and camera layer, while also enabling the 3D layer for all elements. We adjusted the X, Y and Z axis of Earth, Sun and Background respectively.
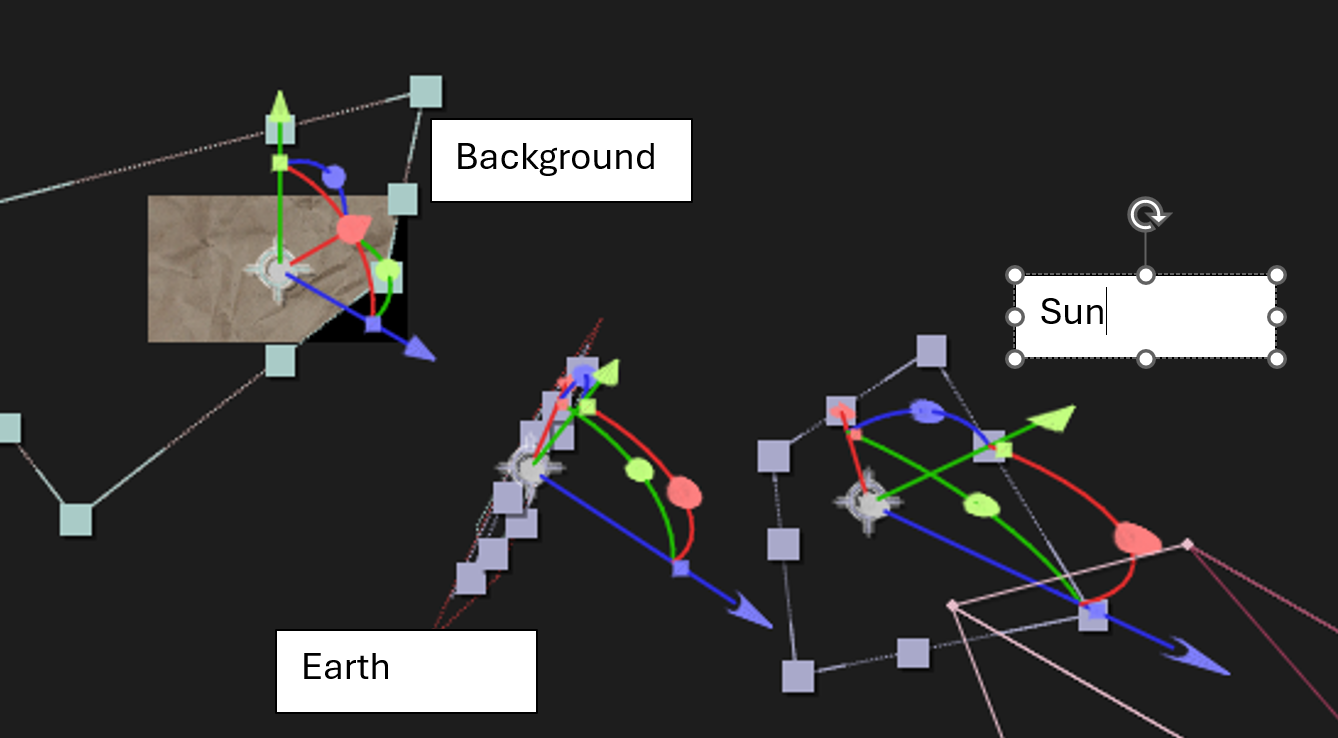
Initial camera position
After that, we adjusted the Z-axis of the null layer to move the camera “forward”.
Final camera position
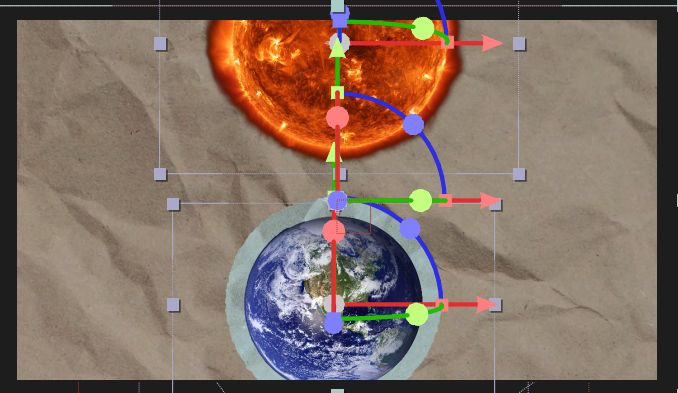
Initial camera position
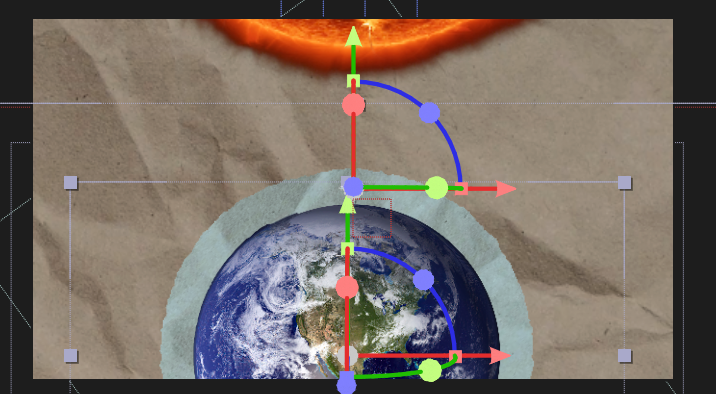
Final camera position
Scene 6 - Absorption of radiation (blue atmosphere effect)


We use the pen tool to draw the “radiation lines”.
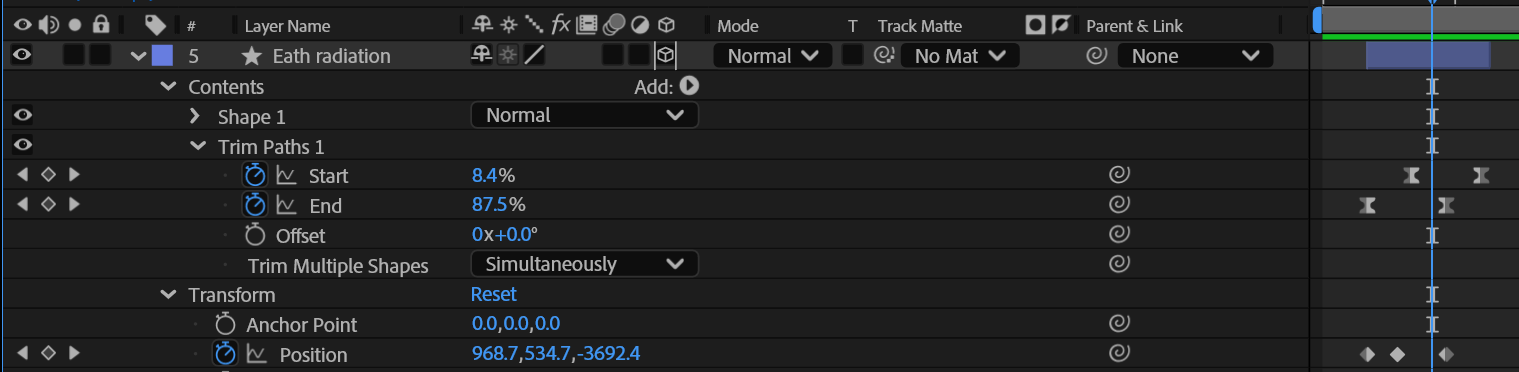
Again we add trim paths to the paths, adjust the keyframes of the end and start of the path. We achieved a moving effect of the radiation lines.
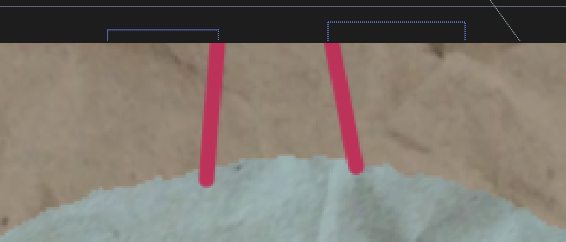
Initial path animation
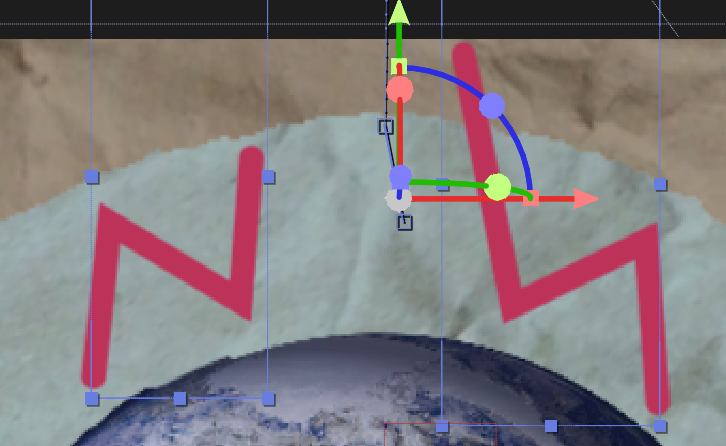
Final path animation
For the stop motion animation layer, we use an alpha matte on the stop motion animation layer to create a transparency effect based on the Atmosphere layer’s alpha channel. This allows us to produce a similar circular visual effect without directly altering the original Atmosphere layer.
Lastly, the blue atmosphere effect, there are three separate layers. Namely, Solid layer (Black solid), Stop motion animation, and atmosphere respectively.
The Solid layer is mainly used to change the colour of the atmosphere, from blue to red.
By keyframing the moment that we want the transition to occur, the atmosphere can change its colour on the right timing, that is from blue to purple.
Initial frame

Final frame
For the orange flashing effect, we create a duplicate of the Earth layer and apply a fill effect on that layer. We change the fill colour to orange.

By adjusting the keyframes of the opacity of the fill layer, we achieve a blinking effect.
Opacity at zero

Opacity at full
Scene 7.1 & 2: Greenhouse Gases Absorb & Release Heat
For the greenhouse gas layer, it is a copy of the blue atmosphere effect.
Instead of keyframing the colour of the atmosphere, we keyframe the size of the atmosphere layer, namely Atmosphere 2.

Keyframing the size of Atmosphere layer 2
Scene 7.3 - The Newton’s Third Law
Pic : Newton with an apple
Pic : “Position” Setting
For the “apple”, we added the 1st keyframe on 0.00f (685.0,-94.0), 2nd keyframe added on 19f (503.0,330.0) and 3rd keyframe added on 25f ( 413.0,170.0) and pressed F9 to Easy Ease. Hence, “apple” can appear from the top to the Newton’s head but the 2nd keyframe causes a stutter, so that can create a stuttering point to match the text “effect” enlarging effect.
For the “Newton”, we added the 1st keyframe on 0.00f (605.0,1808.0), 2nd keyframe added on 19f (423.0,1056.0) and 3rd keyframe added on 25f ( 383.0,872.0) and pressed F9 to Easy Ease. Hence, “Newton” can appear from the bottom to its position but the 2nd keyframe causes a stutter, so that can create a stuttering point to match the text “effect” enlarging effect.
Pic : Text before effects
Pic : Text after effects
Pic : Setting

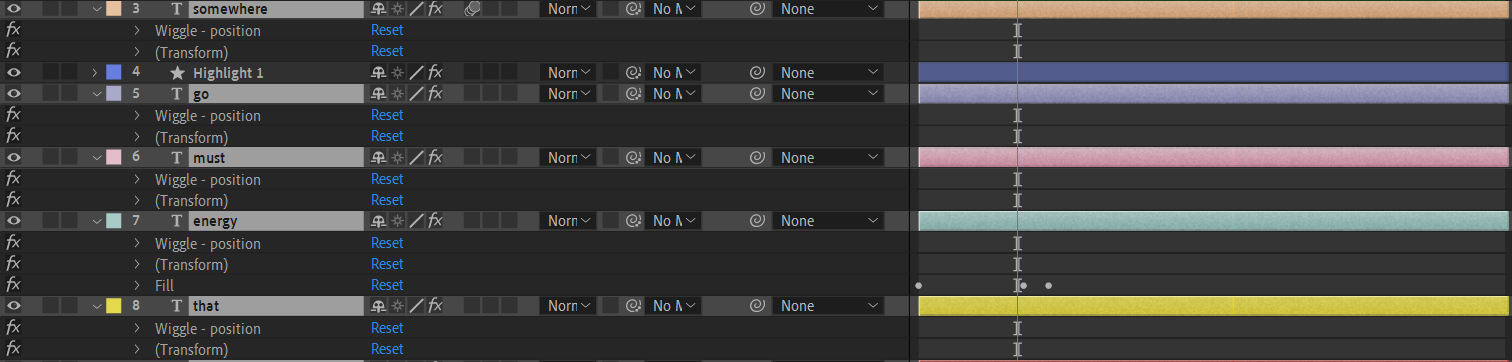
Pic : Wiggle Effect’s Setting
We added “Wiggle Effect” at every word and adjusted the Wiggle Speed to 6.0 and Wiggle Amount to 2.0.

Pic : “But” Setting
For the “Position”, we added Four keyframes and pressed F9 to Easy Ease:
0.00f (259.3,291.0)
10f (981.3,291.0)
26f (981.3,291.0)
1.02f (879.3,291.0)
For keyframes 1 & 2 , are the movement from right to the left, 3 is a pause before the next movement and 4 is the movement to the left a bit after word “effect” enlarging effect.
For “Opacity”, we added Two keyframes and pressed F9 to Easy Ease:
5f (0%)
10f (100%)
So that it can create a “pop up” effect.

Pic : “that” Setting
For the “Position”, we added Four keyframes and pressed F9 to Easy Ease:
3f (1195.0,-104.0)
13f (1195.0,286.0)
26f (1195.0,286.0)
1.02f (1093.0,286.0)
For keyframes 1 & 2, are the movement from top to the bottom, 3 is a pause before the next movement and 4 is the movement to left a bit after word “effect” enlarging effect.
For “Opacity”, we added Two keyframes and pressed F9 to Easy Ease:
7f (0%)
14f (100%)
So that it can create a “pop up” effect.
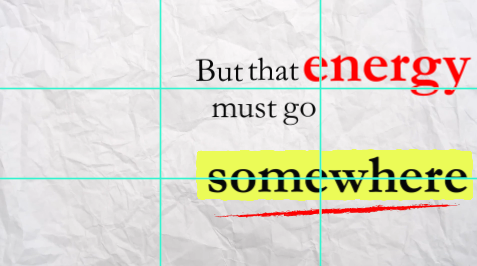
Pic : “energy” setting
For the “Scale”, we added 1st keyframes on 0.00f (151.6,151.6%), 2nd on 28f (131.6,131.6%) and 3rd on 1.01f (260.6,260.6%). For the 2nd and 3rd keyframes, is the word turn from smaller to bigger so that it can have a vision cue when the voice over mentioned this word.
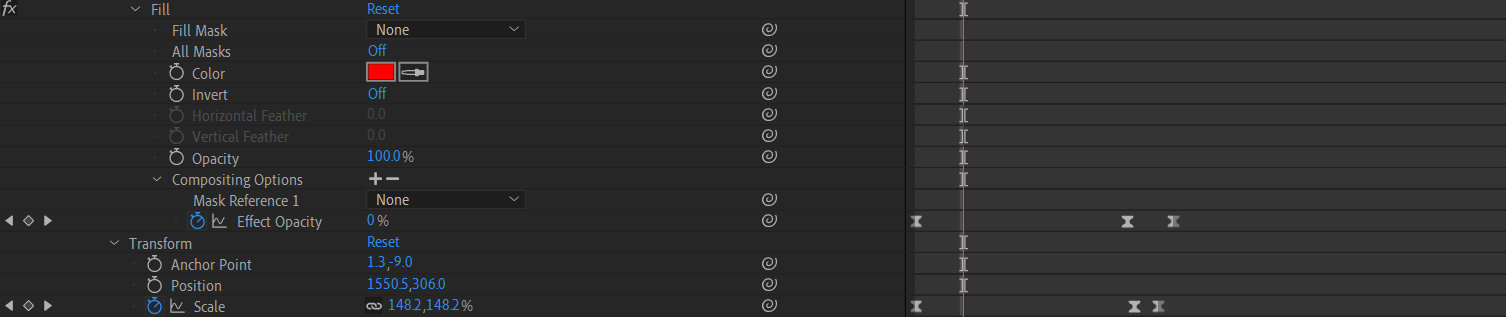
We added “Fill Effect” to this word then filled in with red colour to have a highlight when the voice over mentioned this word.
We added “Compositing Opinions” to adjust the “Effect Opacity”, 1st keyframe (0%), 2nd (0%) and 3rd (100%). This setting is to turn this word from black to red when the opacity is 100%, it will turn red when the voice over mentions this word.

Pic : “must” Setting
For the “Position”, we added Four keyframes and pressed F9 to Easy Ease:
4f (1184.0,50.0)
17f (1184.0,444.0)
25f (1184.0,444.0)
1.02f (978.0,444.0)
For keyframes 1 & 2, are the movement from top to the bottom, 3 is a pause before the next movement and 4 is the movement to left a bit after word “effect” enlarging effect.
For “Opacity”, we added Two keyframes and pressed F9 to Easy Ease:
10f (0%)
16f (100%)
So that it can create a “pop up” effect.

Pic : “go” Setting
For the “Position”, we added Four keyframes and pressed F9 to Easy Ease:
5f (2314.0,460.0)
18f (1406.0,460.0)
25f (1406.0,460.0)
1.00f (1200.0,460.0)
For keyframes 1 & 2, are the movement from left to the right, 3 is a pause before the next movement and 4 is the movement to the left a bit after word “effect” enlarging effect.
For “Opacity”, we added Two keyframes and pressed F9 to Easy Ease:
6f (0%)
18f (100%)
So that it can create a “pop up” effect.

Pic : “somewhere” Setting
For the “Position”, we added Five keyframes and pressed F9 to Easy Ease:
0.00f (2314.0,722.0)
24f (1250.0,722.0)
1.18f (1250.0,722.0)
1.25f (1286.0,722.0)
2.02f (1250.0,722.0)
For keyframes 1 & 2, are the movement from left to the right, 3 is a pause before the next movement and 4 & 5 is like a shaking by following the flow of the “Highlight”.
For “Opacity”, we added Two keyframes and pressed F9 to Easy Ease:
5f (0%)
13f (100%)
So that it can create a “pop up” effect.

Pic : Highlight Reveal
We used Pen Tool to drag out a line and then adjust the Stroke to 200px so that it can fully cover the word (something). Next, we added a Trim Path and then added 2 keyframes in End, 1st is on 1.10f (0.0%) and 2nd is on 2.01f (100%). Then, we have the highlight effect.

Pic : Line Reveal
We put a stroke picture in a PNG file which is the red line. We used Pen Tool to drag out a line and then adjust the Stroke to 54px so that it can fully cover the red line. For the “Stroke [Converted].png”, choose “Line_Reveal” at the “Matte”. Next, we added a Trim Path and then added 2 keyframes in End, 1st is on 1.29f (0.0%) and 2nd is on 2.02f (100%). Then, we have the “drawing a line” effect.
Scene 8 - Effect of Climate Change ( Typography on Motion Graphic )
Pic : Text
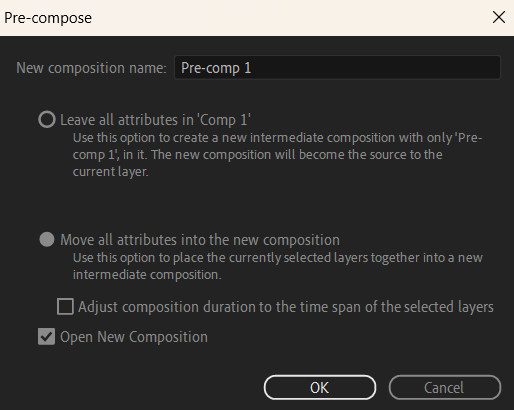
Pic : Pre-compose
We added text (“The result?” and “Extreme weather events like”) and then we pre-compose them.
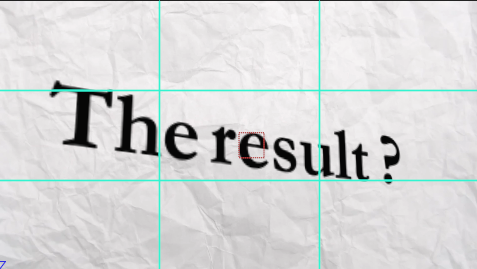
Pic : The result ?
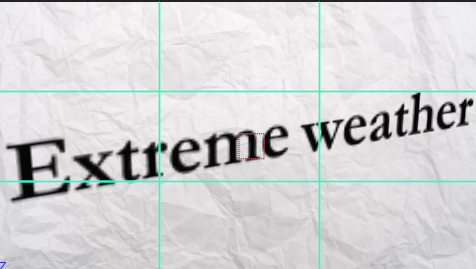
Pic : Extreme weather

Pic : events like

Pic : Setting
For “The result ?”
We add 1st & 2nd keyframes in “Position”:
0.00f (982.6,581.3,45.0)
1.05f (1283.8,850.7,-904.0)
We add 1st & 2nd keyframes in “X Rotation”:
0.00f (0x+1.0)
1.05f (0x-15)
We add 1st & 2nd keyframes in “Y Rotation”:
0.00f (0x+0.0)
1.05f (0x-30)
By adding these keyframes, we have a zoom in effect, then we have a 3D perspective view that looks from the bottom left corner.
For “Extreme weather”
We add 3rd keyframes in “Position”:
2.01f (1413.5,356.2,-1338.0)
We add 3rd keyframes in “X Rotation”:
2.01f (0x+15.0)
By adding these keyframes, we have the movement of the camera scroll down from “The result ?” and then angle changed from bottom to the top so that we have a 3D perspective view that looks from the top left corner.
For “events like”
We add 4th keyframes in “Position”:
2.22f (668.4,461.4,-1970.0)
We add 4th keyframes in “X Rotation”:
2.22f (0x+15.0)
We add 3rd keyframes in “Y Rotation”:
3. 2.22f (0x-30.0)
By adding these keyframes, the angle is the same with “Extreme weather”, it just scrolls from “Extreme weather” to here, so that we have a 3D perspective view that looks from the top left corner.
We add 5th keyframes in “Position”:
3.07f (982.6,581.3,45.0)
We add 5th keyframes in “X Rotation”:
3.07f (0x+1.0)
We add 4th keyframes in “Y Rotation”:
4. 3.07f (0x+0.0)
By adding these keyframes, we have a zoom out effect.
Scene 9 - The Disasters News
Pic: The disaster part (V1)
Pic:Disaster setting
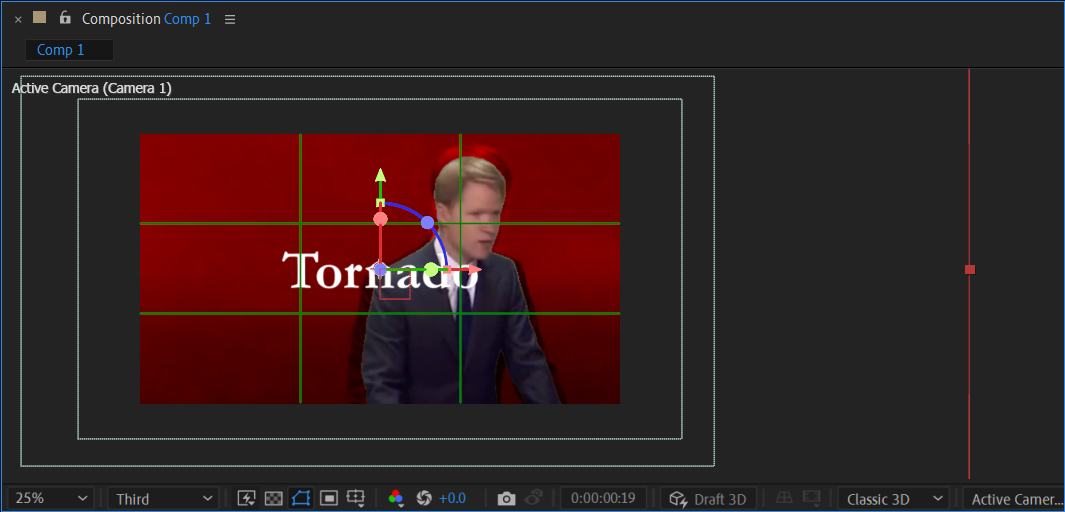
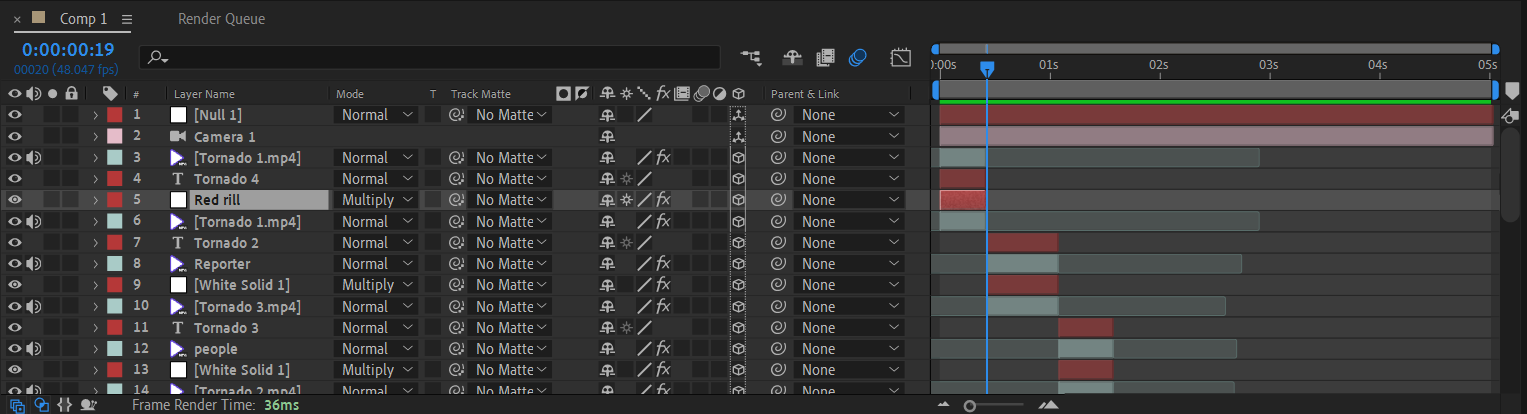
This scene consists of a total of 5 seconds. We are trying to tell the disaster that happened recently. We use the push through effect that is to make the scene feel like pushed towards the audience. The word "push" refers to a camera movement or a transition that brings the audience closer to the subject, either by physically moving the camera forward or by using a zoom or other visual effect to create a sense of closeness. This technique can be used to build tension, create intimacy, or emphasize a character's emotional state. It also applied as a video transition to create a dynamic shift between scenes or to reveal text elements with a dramatic effect. We choose red colour as the main color for this scene is to tell the audience the effect of climate change has seriously impacted the life of humans.
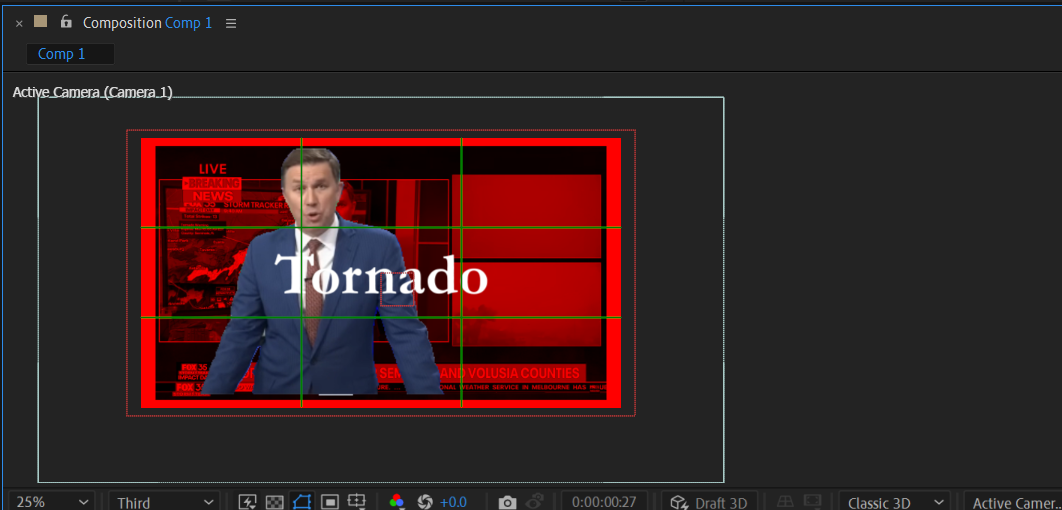
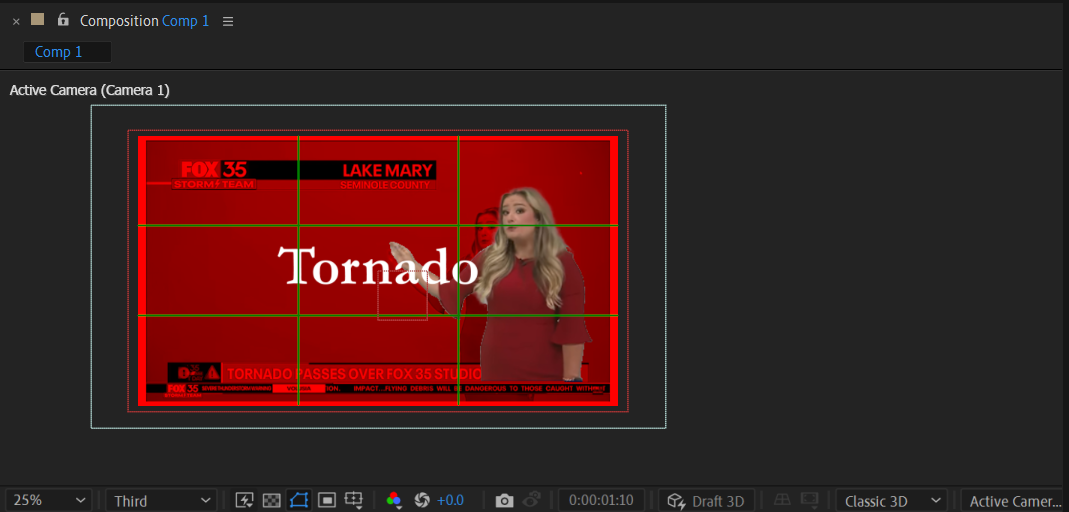
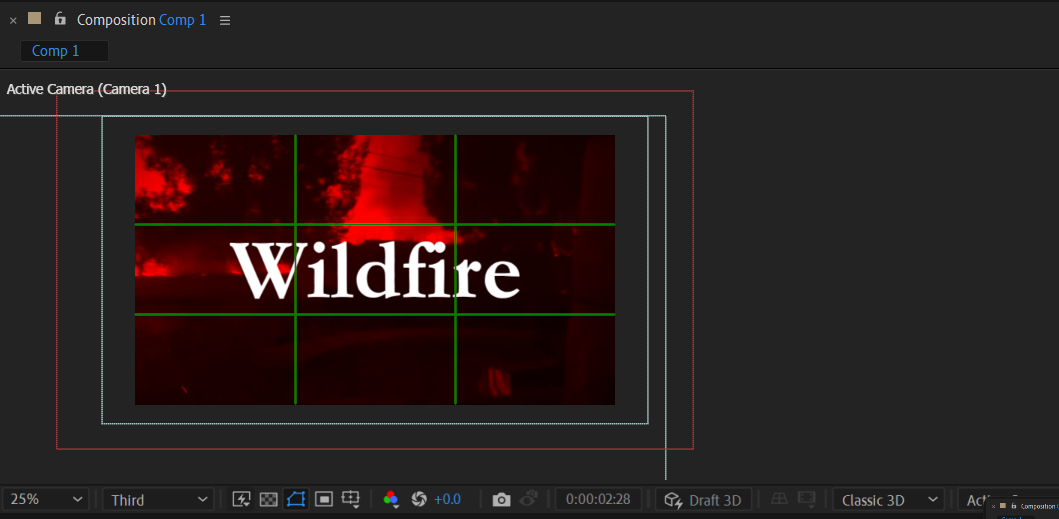
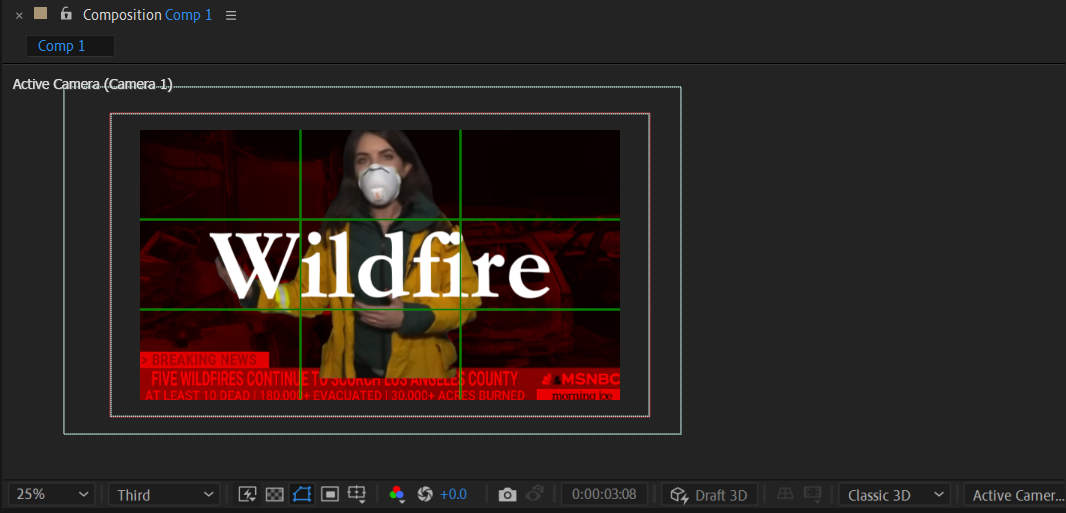
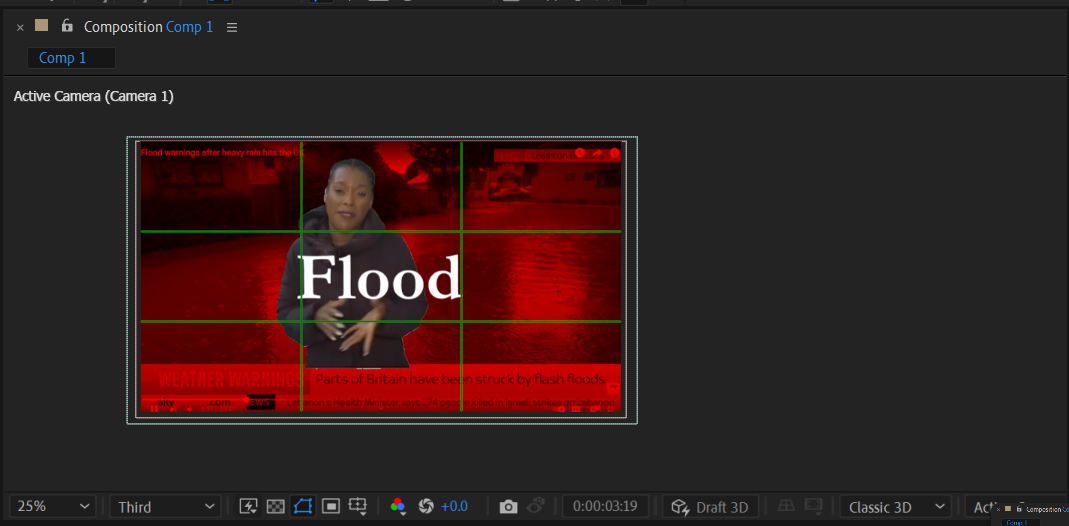
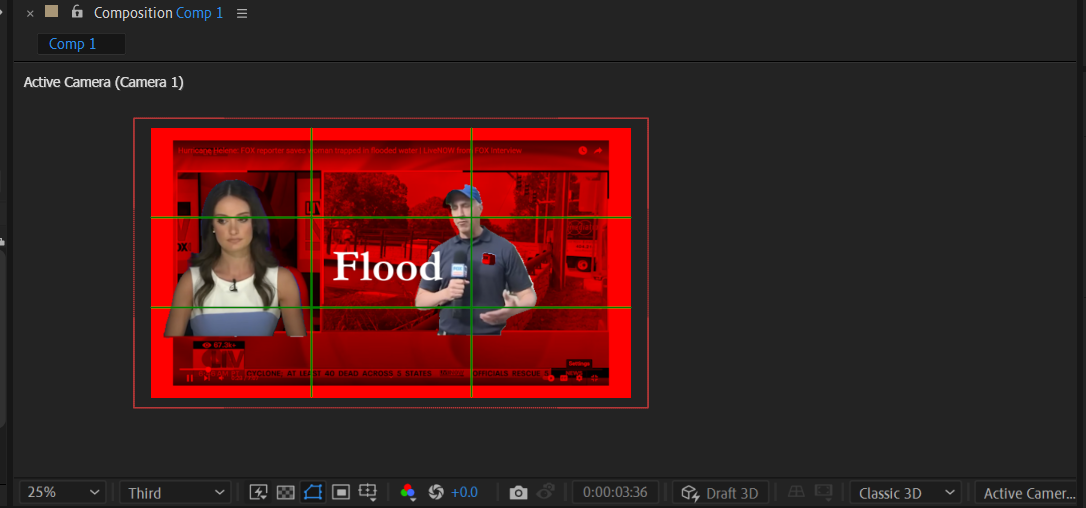
This scene has 9 total different videos playing continuously one after one. The first video shows a reporter saying tornado when the basement gets a notification about a tornado approaching. For every 9 video, we make the same thing, we rotoscoped out the reporter in the main video and layer it with red color fill and to make the reporter alone is subjected out from the main video and the text that suits the video like “Tornado”, “Wildfire” and “Flood”.
Pic:(V2)
Pic:(V3)

Pic:(V4)
Pic:(V5)
Pic:(V6)
Pic:(V7)
Pic:(V8)
Pic:(V9)
Scene 10 - The Solutions

Pic: Solution part

Pic: Text after effects

Pic: Text after effects
Pic: Text after effects
Pic: Text after effects

Pic: Text after effects

Pic: Text after effects
Pic: The setting for this solution part
We start this scene by putting the ‘typewriter’ effect to the subtitle “On the other hand, education does offer hope through action”. We put a keyframe on 9f to 1.08f for the part “On the other hand” and so make it type faster than the narration.

Pic: Text Setting
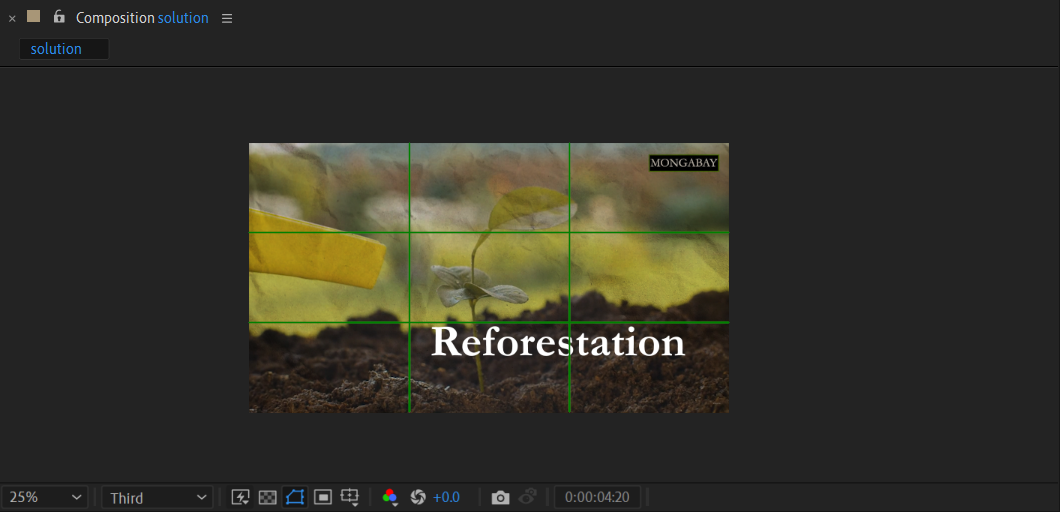
Pic: video of reforestation
We put a layer of paper motion graphic over the reforestation video to make the paper-like effect and the word “Reforestation” was located strategically to catch the viewer’s attention.
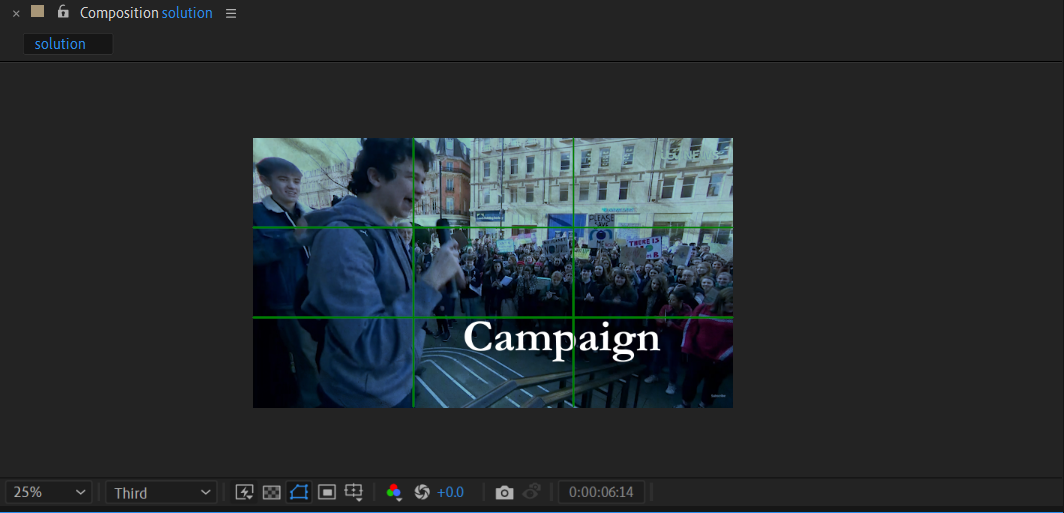
Pic: video of campaign
We also put a layer of paper motion graphics over the protesting video to make the paper-like effect and the word “Campaign” was located strategically to catch the viewer’s attention.
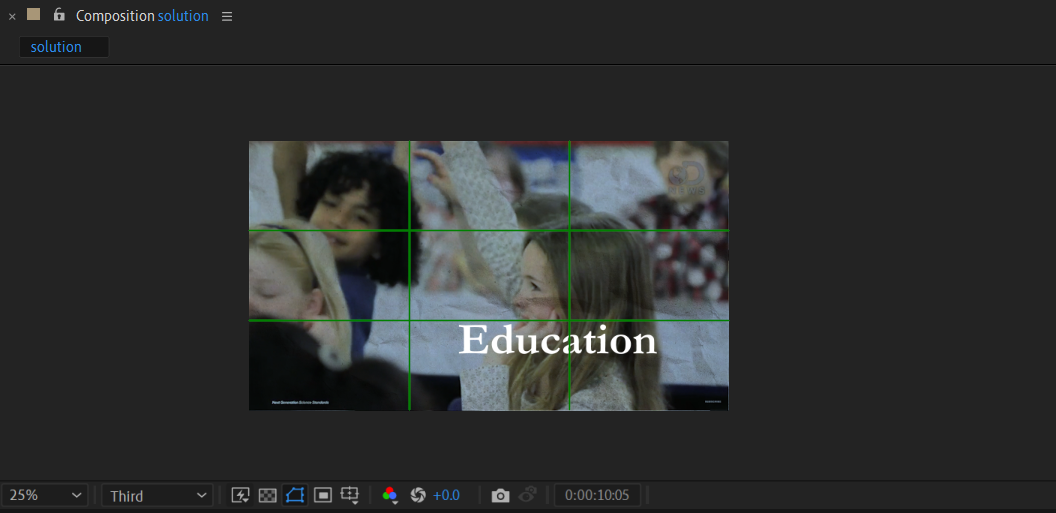
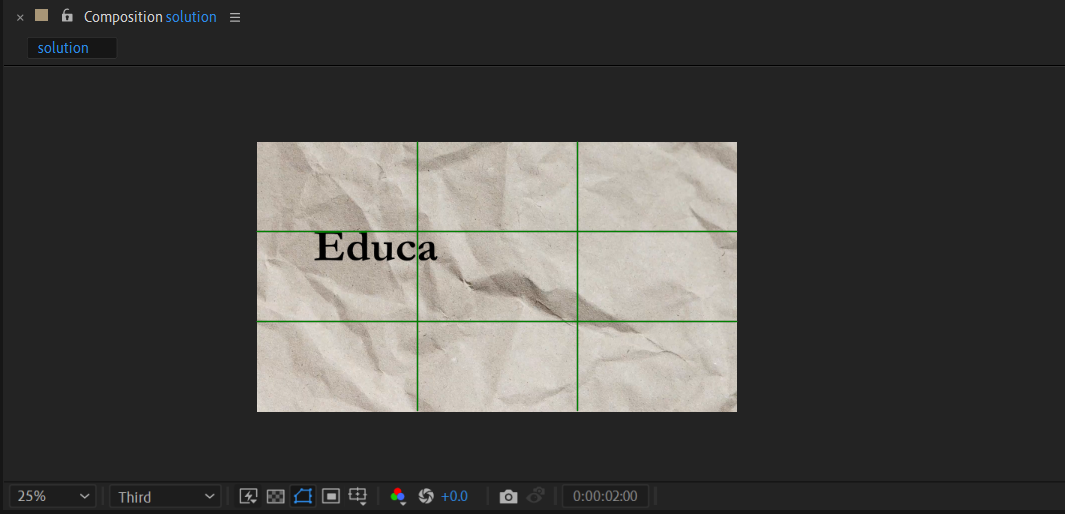
Pic: video of education
We also put a layer of paper motion graphics over the teaching video to make the paper-like effect and the word “Education” was located strategically to catch the viewer’s attention.
Scene 11: The Explode Earth
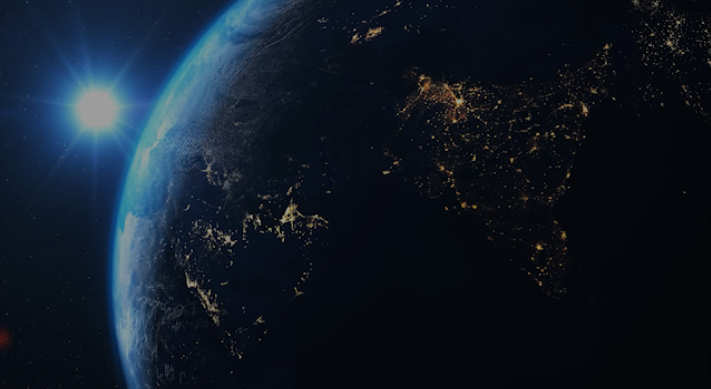
Pic: The “Earth Turning Video”
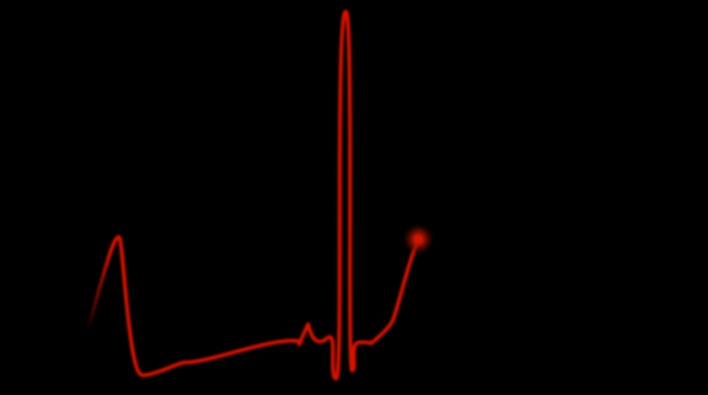
Pic: The ECG Video
For Scene 11, we imported the “Earth Turning Video” and the “ECG Video” to the Adobe After Effect, then we adjust the opacity for the “Earth Turning Video” to 61%, while for the “ECG Video” we set the opacity for 82%, and selected the mode to “Pin Light”. For this one, we want the “ECG Video” to overlap with the “Earth Turning Video”, to bring out the scenario of the “unhealthy Earth” message.
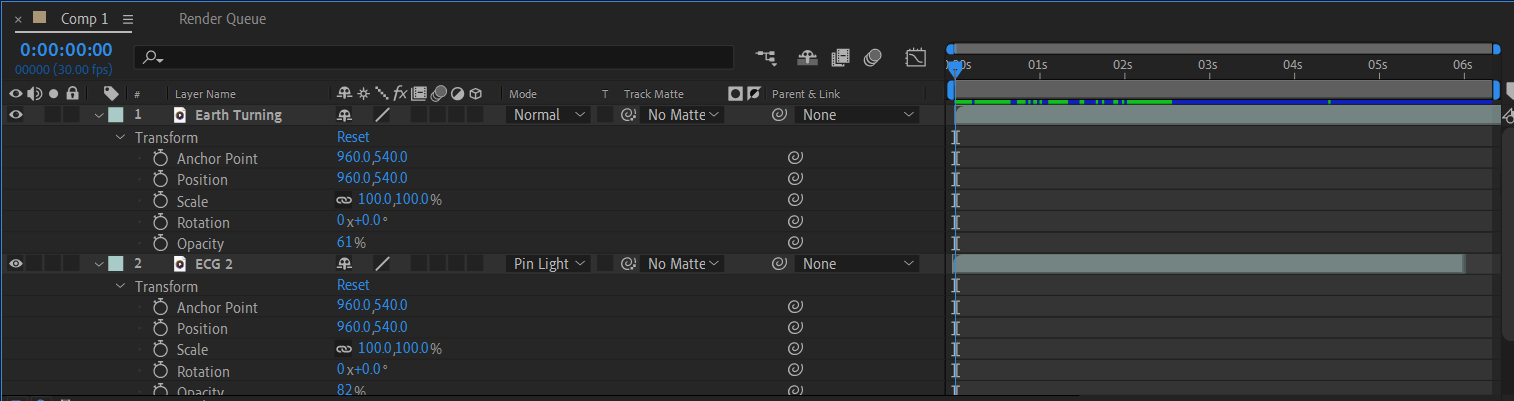
Pic: The ECG & Earth Turning Setting
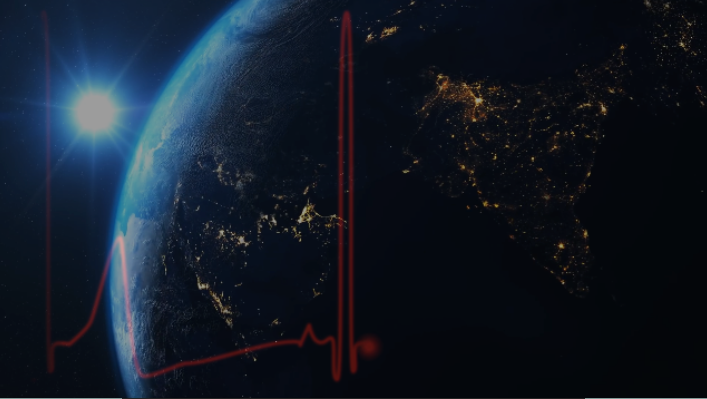
Pic: The Combination of ECG and the Earth Turning Video
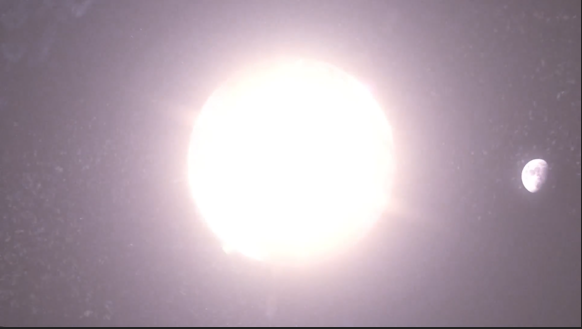
Pic: The Earth Explode
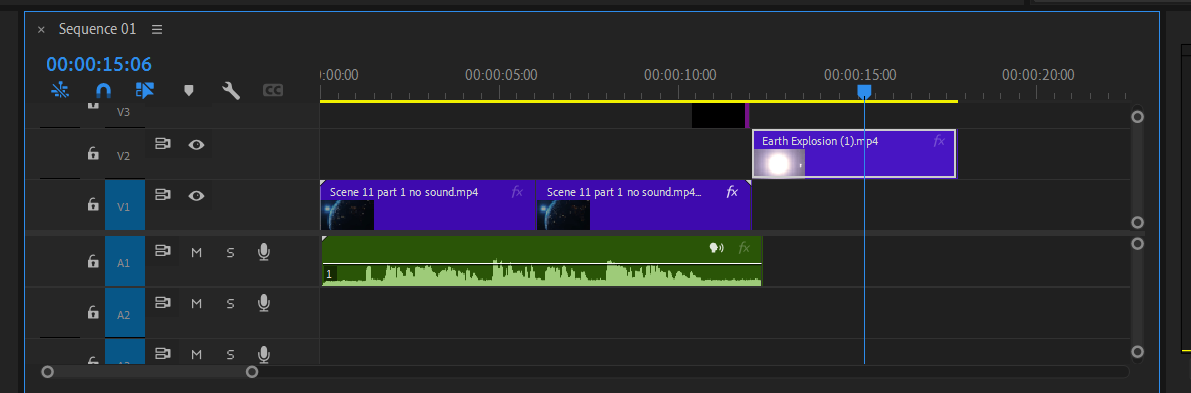
Pic: The Adobe Premiere Pro Setting
Then we imported the combination of ECG Video and the Earth Turning Video into the Adobe Premiere Pro. Then we felt that the video was too short so we duplicated it and added the “time remapping” effect for it. So it will create the reverse of the video. Next, we add the Earth Explode Video into it, then for the transitions between the Combination Video with the Earth Explode Video is too rough, so we add the “flash” effect for this transitions, we also adjust the keyframe for (RGB) White from 255 to 16 at the duration 10.11s to 11.29s. This transition effect can fit with the Earth Explode, which also brings the message that if humans keep these kinds of bad habits, keep releasing the carbon dioxide, maybe in the future our planet will explode.
4.2 SOUND DESIGN AND ADDITIONAL VISUAL EFFECTS
4.2.1 SOUND DESIGN
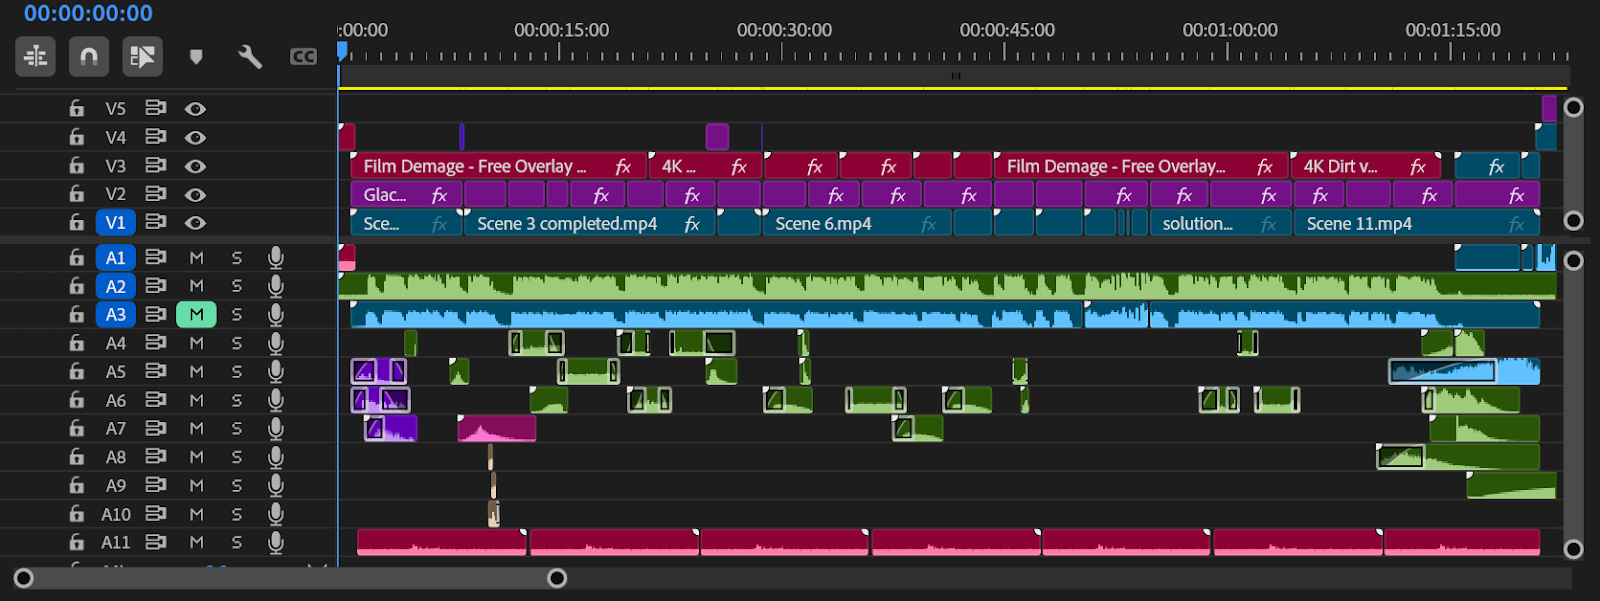
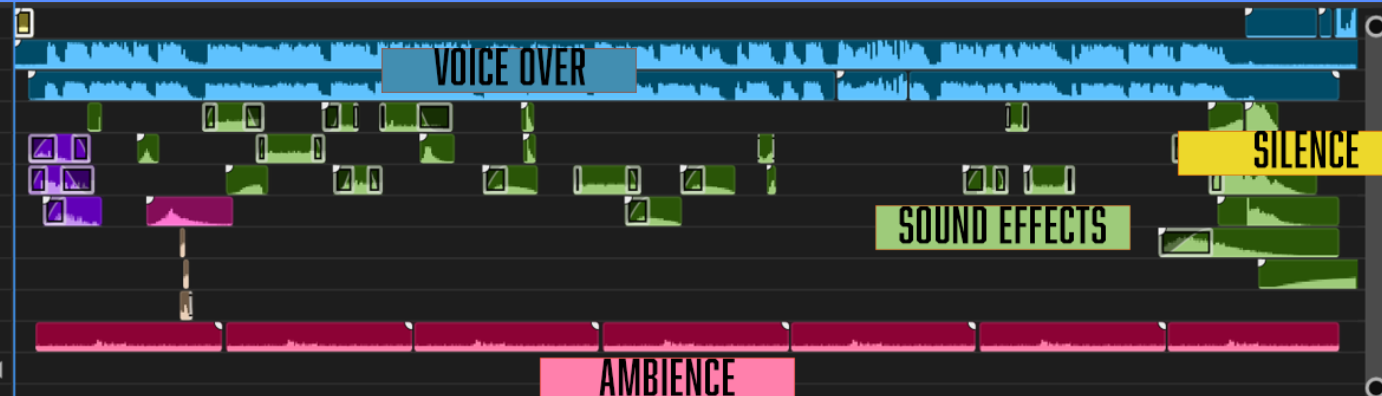
We split the sound design into 4 parts.
Voice over
Sound effects
Ambience
Silence
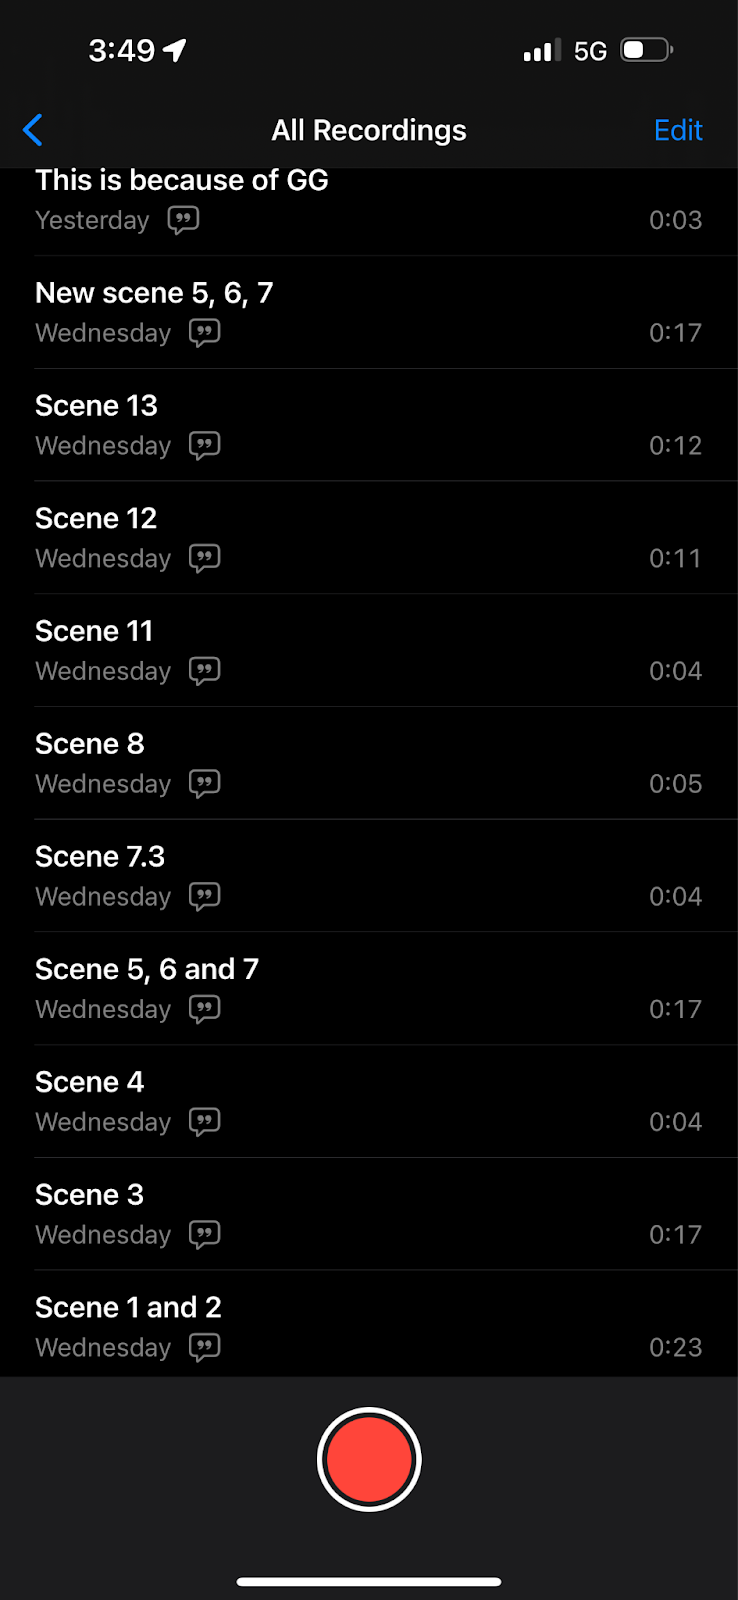
Voice over
For the voice over, we recorded a clean audio using my iPhone 14 Pro Max, we added distortion and lowered the duality of the sample to create a horror or dark tone of the voice over.
Using audition, under effects, Delay and Echo, Analog delay. I adjusted the audio to these settings.
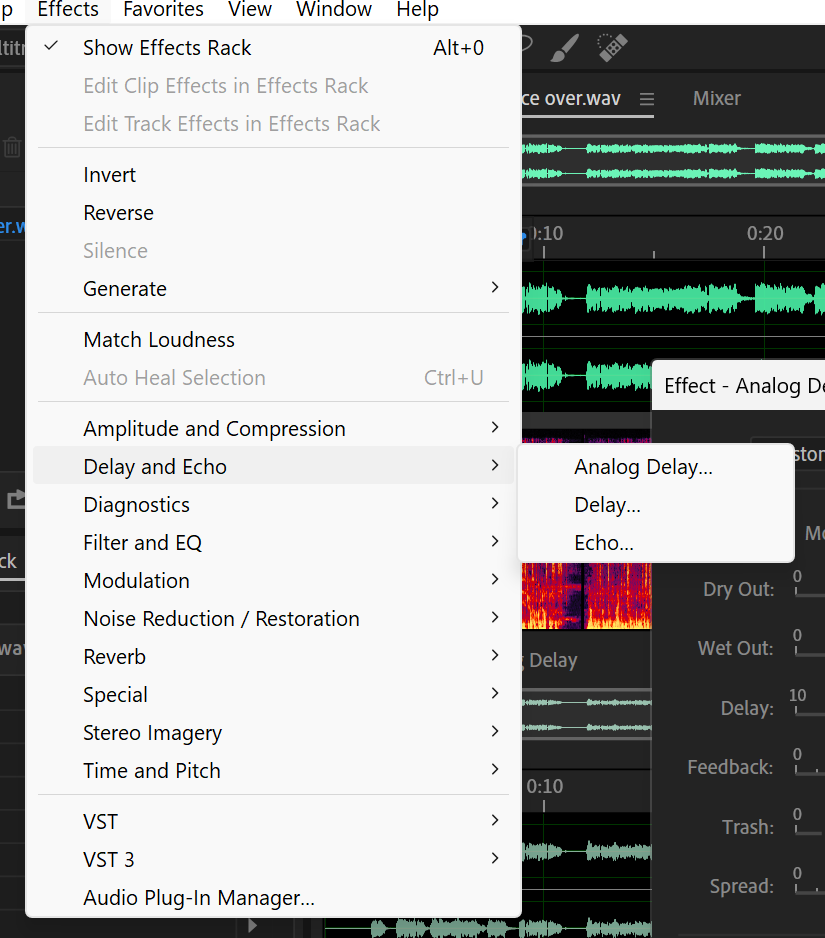

A reverb and echo effect is achieved.
SOUND EFFECTS
Every SFX used is found and downloaded from pixabay.

Most of the SFX are royalty-free, allowing us to use it freely with no copyright.
There are two types of SFX:
Hard effects: Pre-recorded or edited sounds that are closely tied to on-screen actions or events. They are often highly synchronized with visual cues.
Examples: Doors opening and closing, gunfire, explosions
Synthetic effects: Created using audio synthesis, manipulation of recordings, or layering techniques to build entirely new sounds. They are often non-naturalistic and imaginative.
Example: Sci-fi weapons, Magical spells, portals, robot movements

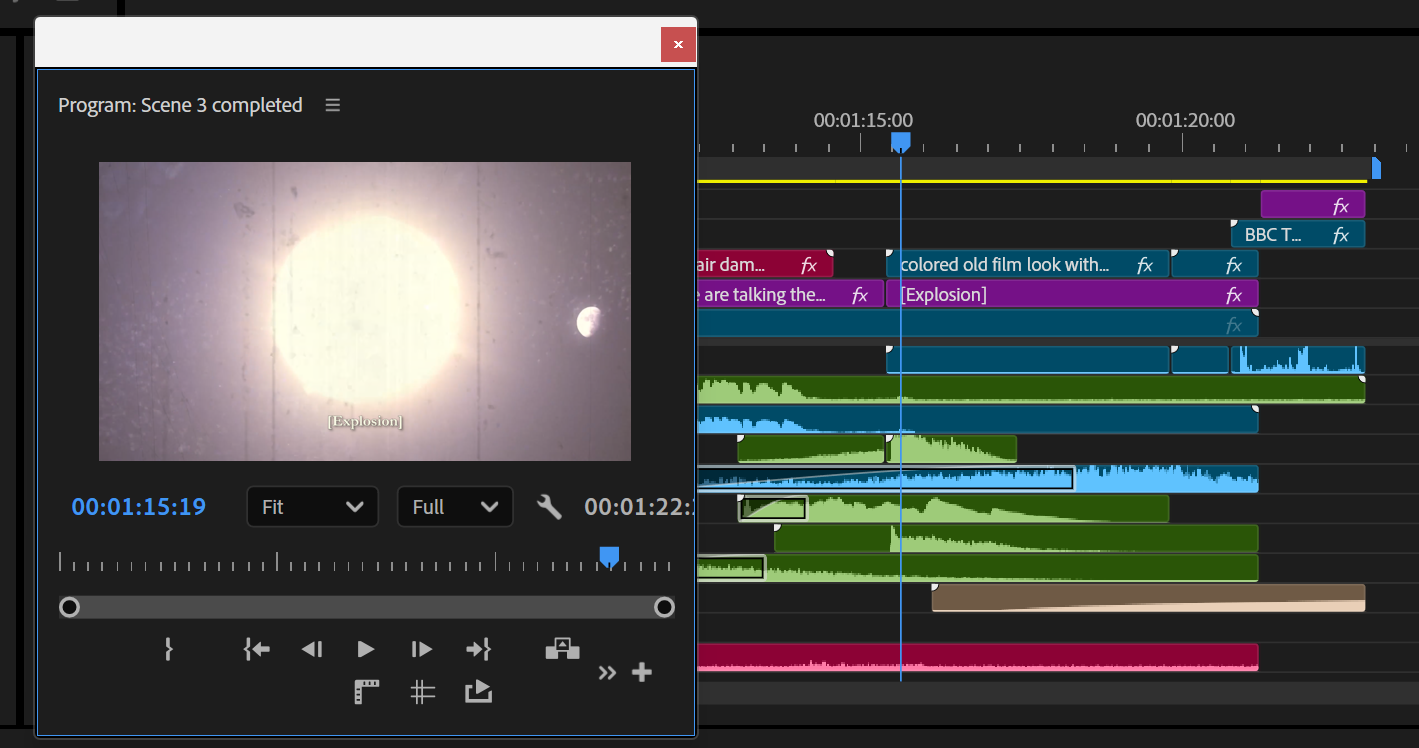
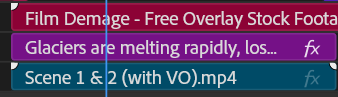
SFX are labeled in green
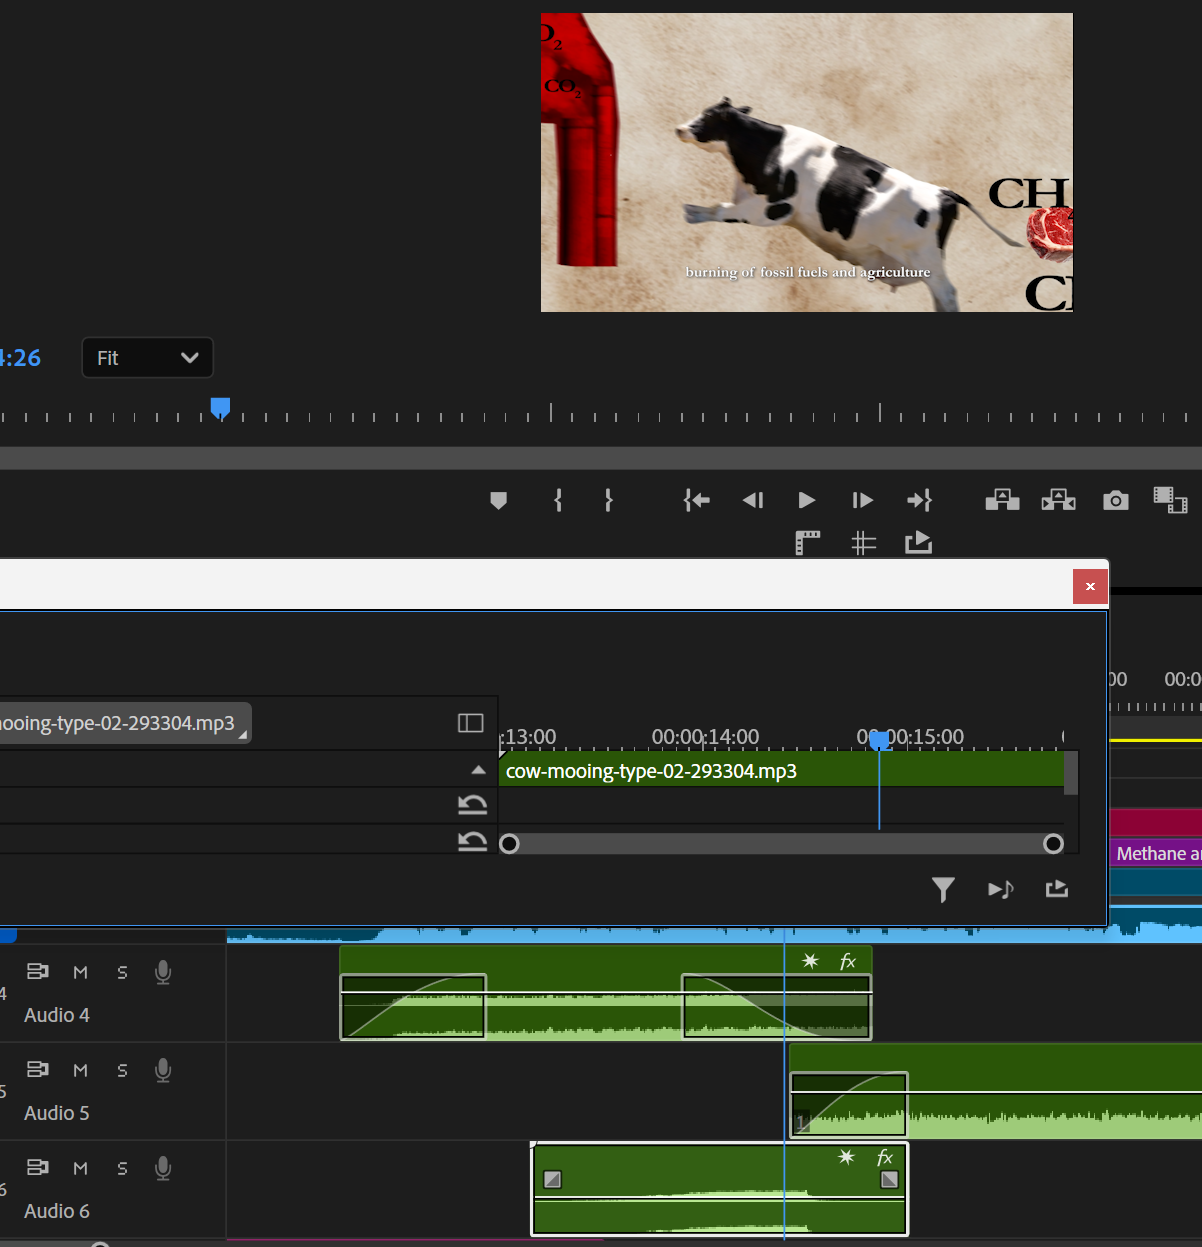
Hard effects such as cow moo, aeroplane flight, factory sound is placed at the frame where the element is visible.
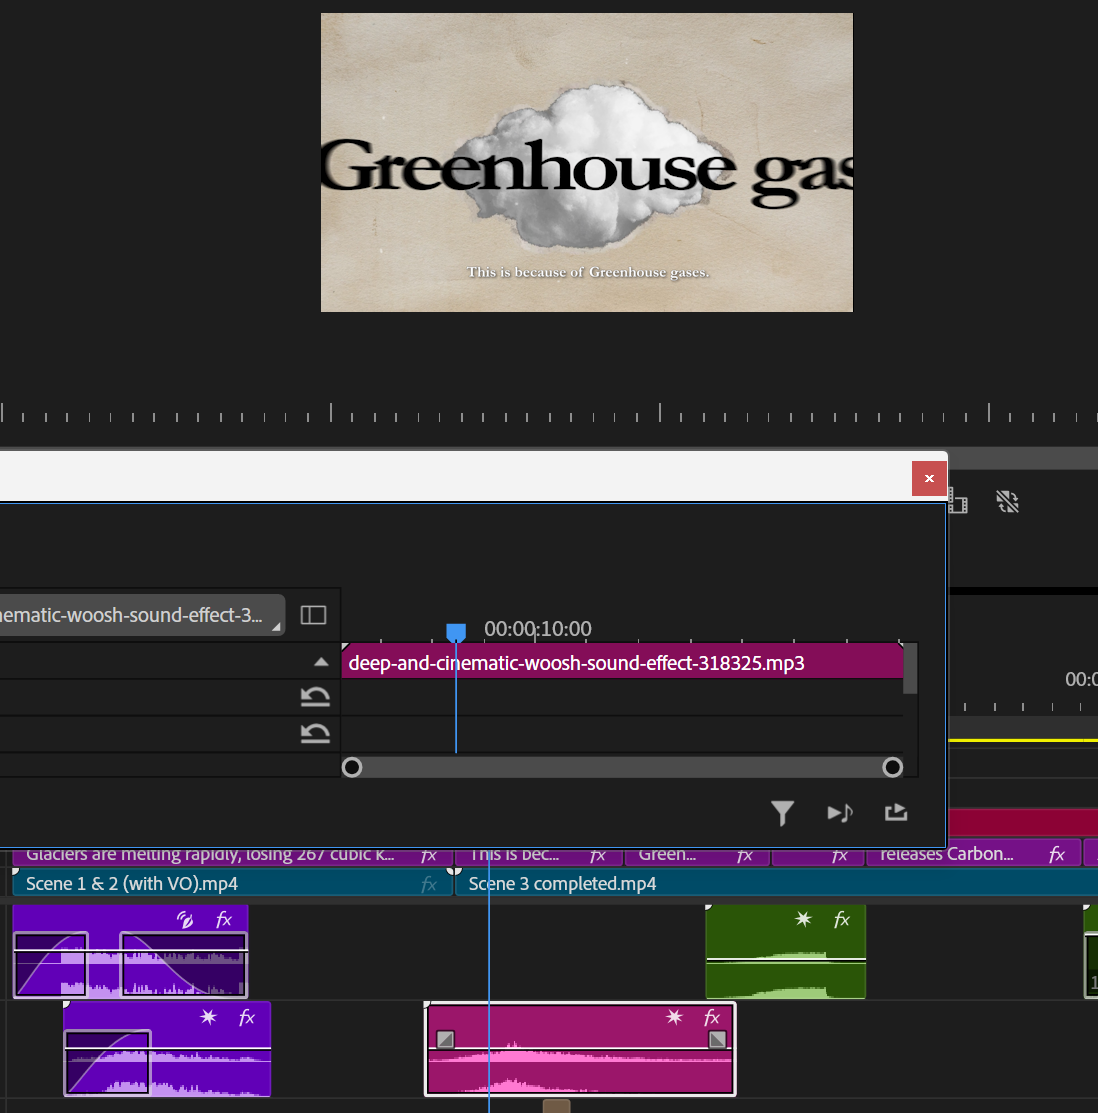
Synthetic effects like whoosh, exploration effects are added to add realism and depth to the video.
For example, this part where the camera zooms into the words to produce a whoosh effect.
Ambience
We added ambience at the final stage of the sound design process. For this, we chose a continuous VHS camera rolling sound to be set throughout the entire video, creating a nostalgic and immersive atmosphere.

VHS camera rolling sound effect labeled in red
Silence
We add a ringing sound effect after the explosion of Earth to increase the tension and emotional weight.
4.2.2 ADDITIONAL VISUAL EFFECTS

Film distortion effects and subtitles are added last to add attention to detail to our video.
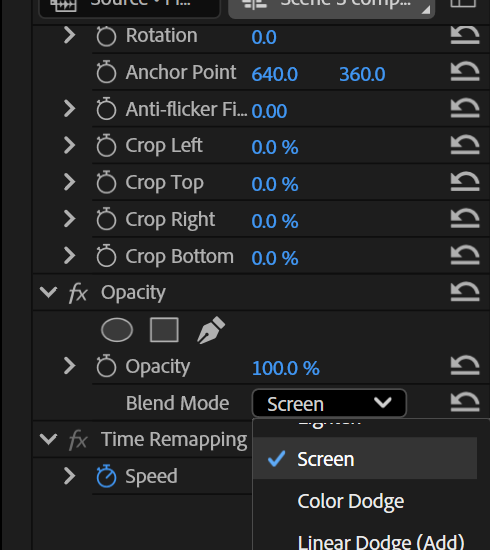
Film distortion effect (red colour) is added by layering the effect on top of the main visual (blue colour)
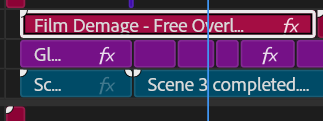
After that, we change the blending mode from normal to screen or multiply depending on the feel that we want on the particular scene.
Next, subtitles (purple) are added underneath the film effect throughout the whole video.
5.0 ANIMATION PRINCIPLE
In this video, we have used several animation principles that contribute to its professional and engaging style.
Firstly, timing and spacing are vital throughout, as each text or graphic element appears and disappears in precise sync with the voiceover, ensuring that the audience can easily follow the narrative without feeling overwhelmed. This control of rhythm creates the professional documentary tone that is common in VOX-style videos.
Secondly, the principle of anticipation is used effectively, elements often begin with a slight scale, fade, or positional shift before the main movement occurs. This prepares the viewer’s eye for what is coming next, making the motion more engaging and less mechanical.
Thirdly, ease in and ease out is another important technique often used in transitions. Elements do not appear or disappear suddenly, but instead speed up and slow down smoothly, creating a sense of natural movement and adding sparkle and softness to the visuals.
Next, staging plays a vital role in the information delivery process. Key information is usually strategically placed in the center of the screen, usually in a larger font, bold font or strong color contrast to immediately attract the viewer's attention. Supporting text or secondary visual elements are reduced in size or placed in less prominent areas of the composition to guide the viewer's eye and avoid confusion.
Ultimately, secondary action is also used in this video where additional elements such as icons, shapes, or subtle background motion can add energy to a scene without distracting from the main message. These subtle elements create visual interest and help keep the viewer engaged throughout the video.
All of these principles not only bring movement to the visuals, but also strengthens the storytelling and enhances the audience’s understanding and experience.
6.0 PROBLEM SOLVING
One of the first challenges encountered in creating the video was synchronising the voiceover with the animation. In the initial stages, the visuals did not match the pace and emphasis of the voiceover, which made the presentation feel uncoordinated and difficult to follow. To solve this, the voiceover audio was imported early into the timeline, and markers were added to highlight key words, pauses, and beats. This allowed the animation to be timed precisely to the narration, improving the rhythm and ensuring that each message appeared exactly when the audience needed to see it.
Another significant issue was the overload of visual information. Displaying too many text elements or graphics at once risked overwhelming the viewer and reducing the impact of the message. To address this, the content was broken down into smaller segments, with each idea introduced individually. This approach ensured that the audience could absorb one point at a time, and smooth transitions were used between scenes to maintain clarity and flow throughout the video.
The animation also felt flat and uninspired in its early stages due to basic motion and lack of visual rhythm. To enhance the overall quality, animation principles such as anticipation, easing, and scaling were applied. These techniques added energy and character to the movement, making transitions and entrances feel more natural and engaging. Fine-tuning through the graph editor further helped to polish the animations, giving them a more professional look and feel.
Maintaining visual consistency between different scenes also posed a challenge. Abrupt changes in animation style or layout could disrupt the viewer’s experience and reduce the coherence of the video. To solve this, a set of consistent transition styles such as directional wipes, scaling, and fades—were used throughout. Scenes were grouped into pre-compositions to manage complexity and ensure that each segment followed the same design language and visual flow.
Lastly, as the project expanded, managing the increasing number of layers and assets became problematic. The timeline grew cluttered, making it hard to find and adjust specific elements. This was resolved by naming all layers clearly, applying colour labels, and organizing assets into folders within the project panel, such as audio, pre-comps, text, and graphics. This not only streamlined the workflow but also made future edits and revisions much more efficient.
7.0 REFLECTION

Comments
Post a Comment