Xiao Chuen Design's animation serve as an intro to welcome all clients from all regions in open arms. Everyone can create, communicate, exchange and most importantly have fun with the process of designing.
2.0 Aim💪
Name: Xiao Chuen Design (小泉)
Motto: There are no bad designs, just bad designers.
Goal: To create a dreamy, fun and happiness themed motion graphic that engages potential clients around the globe.
The animation style is mainly inspired by the opening of a popular Chinese subscription based on-demand streaming platform, iQiYi.
Animation Principle: Anticipation, Squash and Stretch, Follow Through and Overlapping Action, Ease in, Ease out and Staging
Animation technique: Kinetic topography
This is to create engagement at the start of the intro. I make sure my hook is eye catching as possible within 3 seconds as in online media platforms, people have short attention spans. Hence it is important to create a strong initial impact and a first impression to keep the clients engaged.
A dreamy riser to build excitement for the reveal of the characters, enhancing dynamics and keeping the viewers engaged.
Words reveal
Frame 2: Words reveal
Duration: 0:00:00 - 0:03:00 seconds (continued)
Visual effect: Taper logo reveal (continued)
Animation Principle: Anticipation, Squash and Stretch, Follow Through and Overlapping Action, Ease in, Ease out
Animation technique: Kinetic topography
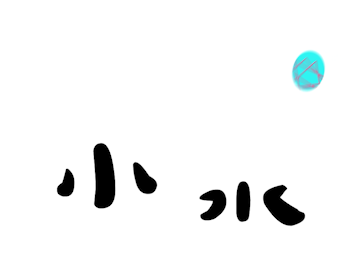
After the first 3 seconds, I introduce the first two characters of my logo by keeping it simple. Squish and stretch animation principle is used to make it feel lifelike and realistic.
I've use a relaxing xylophone tone that is associated to a more positive energy that everyone can relate to. It is a simple yet melodic sound, in which, perfectly complements the dreamy intro I'm heading to.
This part is to create a small but sudden "wow" effect for the audience. This part is crucial as I use key frames to make sure the transformation is animated as realistic as possible by adjusting the correct composition and choose which frame where the object will morph into another shape.
A short woosh is to highlight the fast paced morphing of the ball into a character, as there are a lot of energy being dissipated after the action.
Shake
Frame 5: Shake
Duration: 0:06:15 - 0:08:15 seconds
Visual effect: Wiggle Effect (Premier pro)
Animation Principle: Exaggeration, Timing, Ease in, Ease out, Anticipation, Squash and Stretch, and Straight ahead and pose-to-pose.
Animation technique: Kinetic topography
In this part of the animation is to built it climax, the shaking of the word “白” creates a chaotic scene, letting the audience to figure out what is going to happen next.
An atmosphere or dreamy riser is layered to build tension that a transition is about to take place.
Words reveal
Frame 6: Explosion to reveal colours and mascot
Duration: 0:08:00 - 0:09:00 seconds
Visual effect: Masking effect
Animation Principle: Timing, Squash and Stretch, Follow Through and Overlapping Action, Ease in, Ease out
Animation technique: Transition
This stage is the falling action of the animation where I reveal the colours of my logo through an explosion, surprising my viewers while telling them it is almost the end of my animation.
I use a bell ring sound for this part of the animation as it can produce a calming effect to the viewers. From a loud harmonic sound that diminishses over time.
Shake
Frame 7: Wiggle effect of English Words
Duration: 0:08:15 - 0:13:00 seconds
Visual effect: Wiggle Effect (Premier pro)
Animation Principle: Exaggeration, Timing
I added this effect for attention to detail. Although it is simple, I believe it makes the English words to not be left out from all the rest of the elements of the animation.
Words reveal
Frame 8: Catchy tone
Duration: 0:09:00 - 0:11:00 seconds
Visual effect: Bouncing effect
Animation Principle: Timing, Squash and Stretch, Follow Through and Overlapping Action, Ease in, Ease out
Animation technique: Morphing
This stage is the resolution of the animation. I animated a star changing is size and speed to be jumping across the English words to build focus around it as the voice over kicks in.
Voice over: Xiao Chuen Design (sister's voice)
I use a voice over as I believe it further humanised my animation and not making it feel to technological or digitalised.
I layered two sound effects namely a handpan music and a melody to match the voice over. The synced sound effects further brings life to the voice over, enhancing the happiness feel of the animation.
3.2 Animation Process 💫
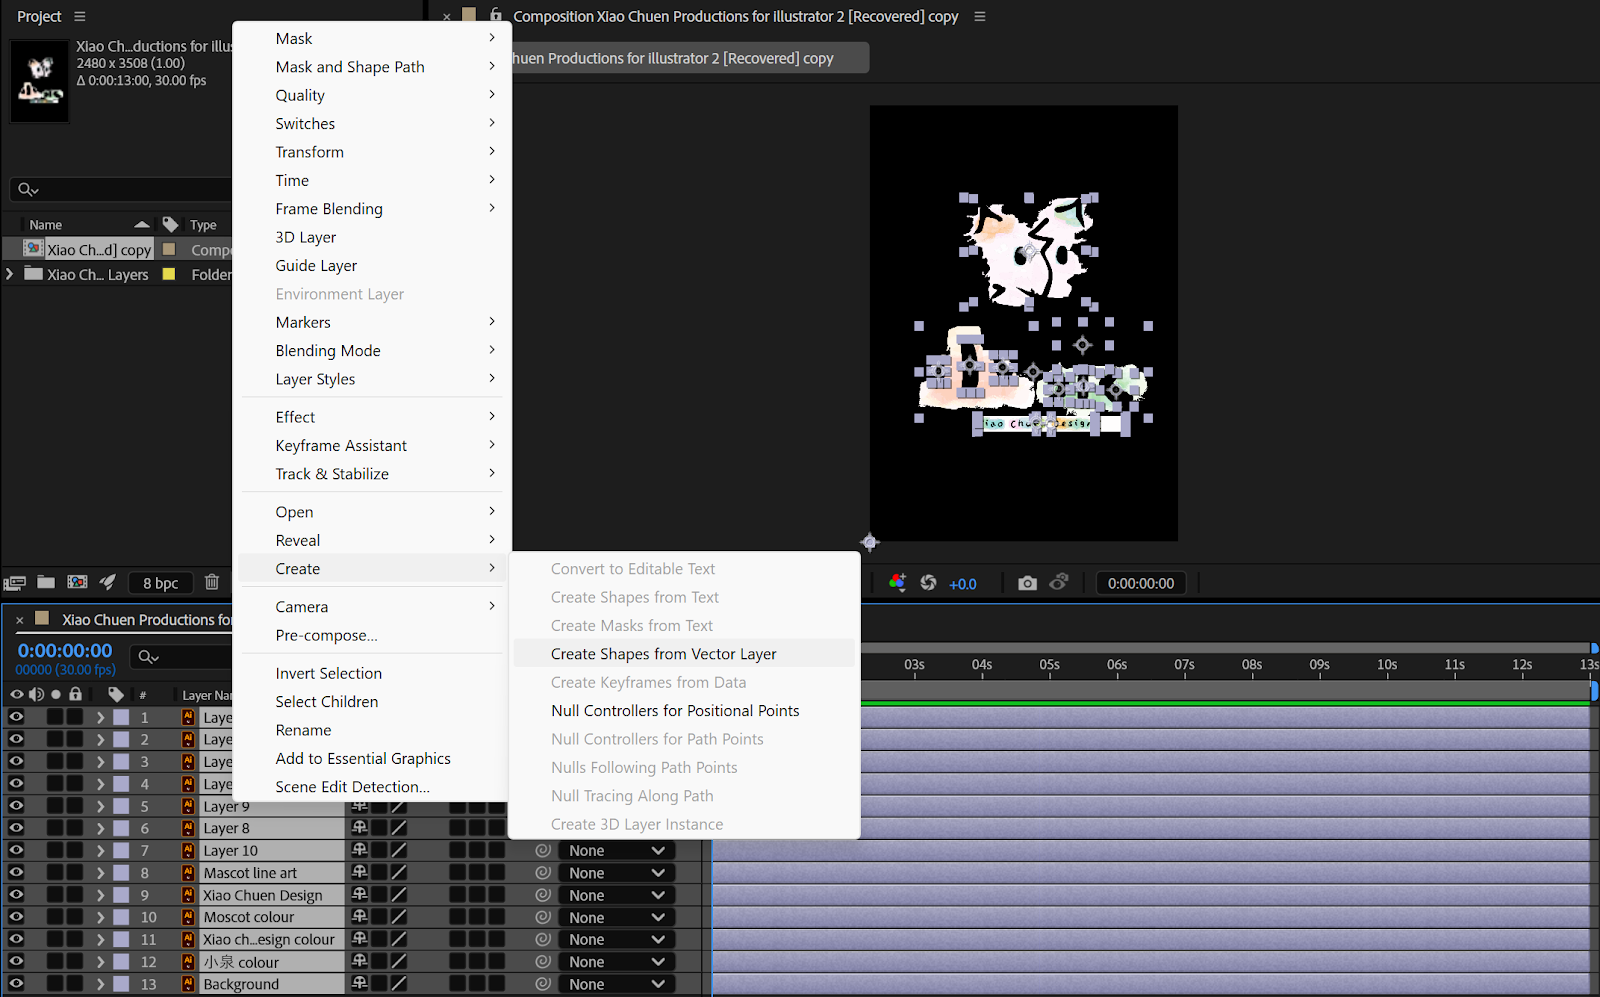
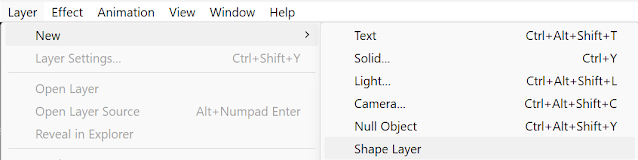
For the most of project, I use After Effects to create the animation
Importing file
I imported the illustrator project file into After Effects.
I converted the vector file into vector shapes to ease the ram usage without compromising the ability to change the shape of the images by adjusting the shape's vertices.
I change the background composition colour into white to match my logo.
Composition > Composition settings > Background colour > White
Frame 1: Taper logo effect
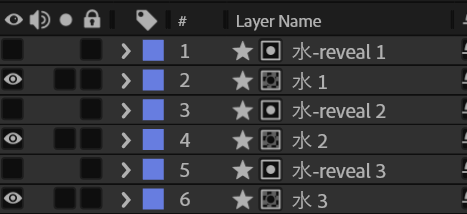
Labeling for each strokes
Firstly, for this character "小", I use the duplicate one of the strokes, named it as "Xiao 1".
Xiao 1
And renaming it to "Xiao 1-reveal" and placing it exactly on top of "Xiao 1".
Then by using Trim Paths, I adjusted the "End" timing to my liking by setting up key frames.
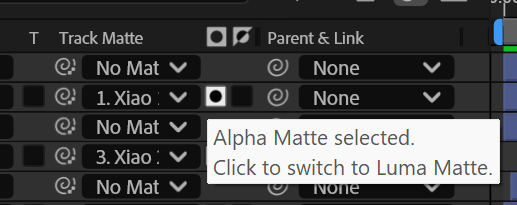
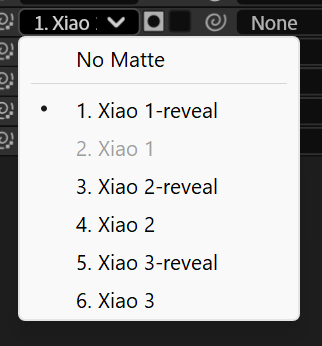
After that, by opening the Track Matt panel, I set Alpha matt on "Xiao 1".
And link the Track Matt function to "Xiao 1-reveal".
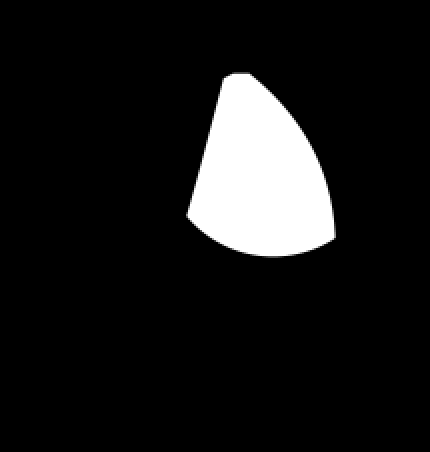
After that a masking effect is produced, where each frame of the "Xiao 1" is render out part by part.
Frame 1
Frame 5
Frame 17
After that, I repeat the process for "Xiao 2" and "Xiao 3"
The end results.
Frame 5
Frame 10
Frame 15
Frame 30
Then I repeat the whole process for the character "水".
Results.
Frame 10
Frame 20
Frame 40
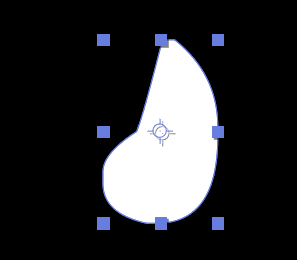
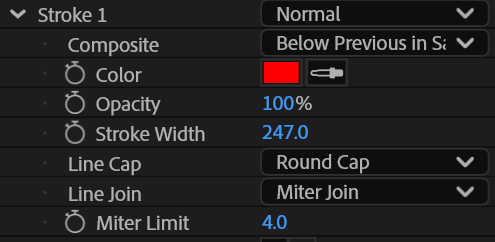
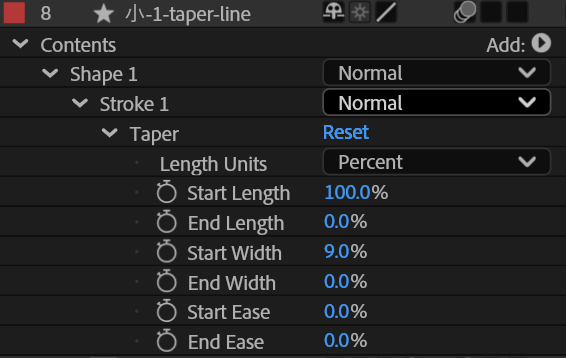
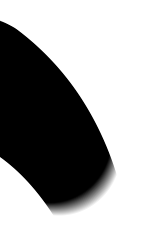
For the Taper Effect, I begin by drawing a path using the pen tool.
On the Stroke panel, I adjusted the stroke width, and changing the cap shape from Butt cap to Round Cap at Line Cap.
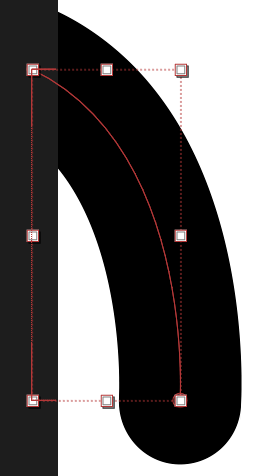
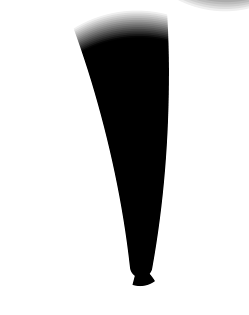
By changing the start width from 100% to 9% on Taper panel, I achieve a stroke width variation for my path.
I name this part as "小 1 Taper Line"
I duplicate this layer and rename the copy as "小 1 taper line reveal"
Again, using the add section, I added Trim Paths panel on "小 1 taper line reveal" layer.
Under the Trim Paths section, I added keyframes at the Start and End respectively. I also adjusted the duration to fit the timing that I wanted.
Again, I use the Track Matt section and link "小 1 Taper Line" to "小 1 taper line reveal" to create a masking effect.
Results.
Frame 10
Frame 15
Frame 20
Lastly, I create this taper effect for all the strokes of the characters, "小" and "水" respectively.
Character "小"
Character "水"
Frame 2: Words reveal
To enhance the lifelike and realistic animation of my characters, I introduce several squish and squash effect for each of the characters.
Using the Puppet Position Pin Tool.
I first create a mesh for each of the strokes.
I also adjusted the Expansion and Density to my liking.
I adjusted the position of each strokes, squishing and squashing it.
Frame 8
Frame 11
Frame 26
Frame 35
I also added Easy Ease on each of the frames to make it fluid-like.
Frame 3:Ball Jumping
Firstly, I create a new Shape layer.
Under add section, I add an Ellipse and named it "Ball".
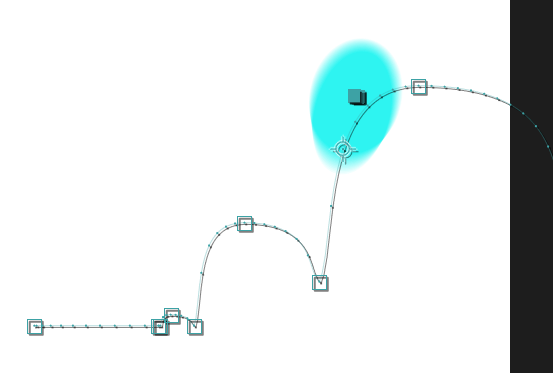
Under Position layer, I separate the dimensions into X-Axis and Y-Axis respectively.
Separate Dimensions
To create 3 jumps, I adjusted set 4 key frames (highlighted) for the Y-Axis, and also adjusting the height of the ball to create variation as energy is lost to the surrounding.
Next, I create two keyframes for the X-axis, Keyframe A is the origin and where Keyframe B moves away from the origin.
Furthermore, I adjusted the Scale (unchecking the constant properties),
To allow me to adjust the ball to be elongated or squished depending on the timing that I wanted.
Frame 2
Frame 8
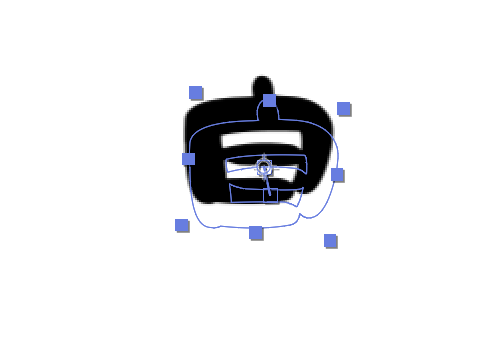
To further give the ball character, I do some line arts on the Ball.
I first drew random lines using Pen-tool and named it "Ball line art"
Ball line art
Under Set Matt, I set the source as "Ball", and parent it to "Ball", so "Ball line art" will move together with "Ball" as a parent.
Results.
Frame 12
Frame 26
Frame 4:Ball Transformation
For this part, I choose the frame where both of the animation has the highest energy to make the morph effect.
I keyframed and moved the X-axis of the ball to the left while also rotating the anchor point of the ball to build anticipation.
And the transition or morphing occurs in-between the frames to make it seamless.
Lastly I also exaggerate the movement of the characters by rotating it's anchor point, position and size.
Frame 5:Shake
To achieve this wriggle effect, I use Wiggle-Position from the Effects and Presets panel.
Wiggle-position
I added the preset into "白 shake" layer, also adjust the wiggle per second and wiggle per pixels to my liking.
Wiggle-position
I also increase the shutter angle to create motion blue for the shaking animation.
Shutter Angle
Results.
The "白"character slowly diminish in size while shakes vigorously.
Frame 2
Frame 18
Frame 6:Explosion to reveal colours and mascot
This part is the most complicated process of the animation.
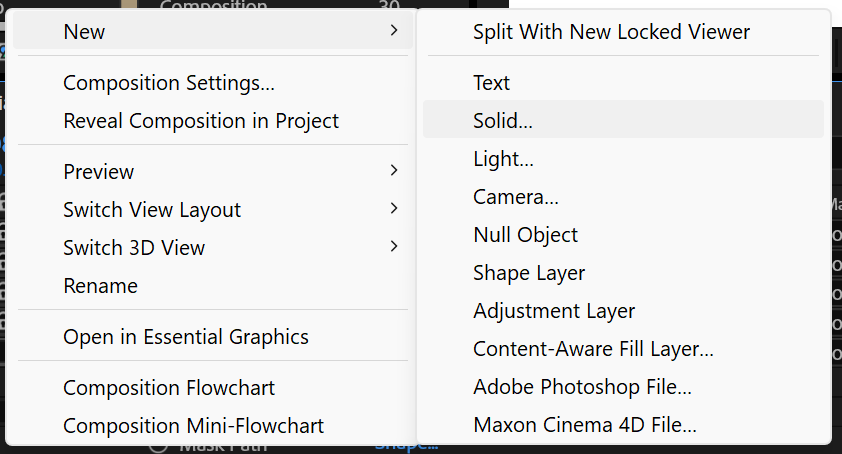
First, I create a Solid layer then added a circular mask using the ellipse tool.
Solid layer
Circular mask
Circular mask
After that, I adjusted the Mask Expansion, where the mask will increase in size from small to large.
Frame 5
Frame 23
Results.
Frame 5
Frame 23
Lastly, for attention to detail. I use Roughen Edges from the preset to roughen the circular expansion, matching the watercolour effect of my background.
Roughen Edges
Results.
Roughen edges of a circular mask
I also change the expression of my mascot by adjusting its eyes and the stroke of it's outlines using Puppet Position Pin Toon.
Frame 10
Frame 22
Frame 7: Wiggle effect of English Words
I first create a Black Solid Layer,
Black Solid Layer
After that, I import the preset of Fractal Noise into that Black Solid Layer.
Fractal Noise
Result of effect
I also adjusted the Random Seed by coding and parameters.
Results.
Frame 1
Frame 2
Frame 3
Frame 8:Catchy tone
I create a Ellipse and using the same principle as the Jumping Ball, to produce a jumping effect.
Then I use Pucker & Bloat to create a star shape.
Pucker & Bloat 1
I adjusted the size and rotation to match the jumping timing of the star.
As for the colour, I set keyframes at points I wanted it to change, and set the colours to red, green, blue and yellow respectively.
Results.
Frame 1
Frame 11
Frame 23
3.3 Sound Design Process 💫
I use Premier Pro to layer all my sound design. I use this flow to keep my sound design process smooth as possible.
Base > Intro and Riser > Main sound effects > Falling action > Refinement
Firstly, I layer the base of my sound (yellow colour). Using an angelic riser to build tension as an opening. Time: 00:00:00 - 00:13:00
Time: 00:00:00-00:13:00 (base)
Angelic pad
Next, I layer on the riser(Brown)for the explosion stage of the character “泉” and reveal of the background colour.
Time: 00:07:00 - 00:13:00
Time: 00:07:00 (reveal of the background colour)
Time: 00:09:00 (reveal of the background colour)
Dreamy Piano Atmosphere
For the main sound effects, that is the tag line, "Xiao Chuen Design", I layer three sounds namely, Voice Over(purple), Ball Jumping sound(cyan) and a Handpan(Green)tone.
Voice Over and Handpan
Voice Over
Handpan tone
Time: 00:03:00 (Jumping Ball)
Time: 00:04:15 (Jumping Ball)
As for the Falling Action, I use a kid intro song(Matcha green)as an ending to make the whole intro feel complete.
Time: 00:09:11 - 00:11:00
As for the refinement process, I use whoosh effects to add depth to the animation
Time: 00:02:09 - 00:02:24 (whoosh 1)
Time: 00:04:15 - 00:05:03 (whoosh 2)
Time: 00:08:06 - 00:08:29 (whoosh 3)
4.0 Problem Solving 💫
Initially, I wanted to use a water colour blooming effect as my background reveal, where the background is revealed patches by patches.
Due to the watercolour effects vector in Illustrator has too much vertices, my laptop could not handle the processing power.
Instead I save the background that has colour as an PNG then import it into After Effects.
Then my laptop back to normal and I just change the method on how I reveal the colours.
5.0 Principles of Animation👌
There are several principles of animation that I use make my animation more lively.
For example, Squash and Stretch in animating the movement and jumping of Ball to simulate the loss of energy and momentum as time goes on.
Staging where focus is important. It is to tell "Hey, something big is about to happen, don't blink". I use this specifically for the part where the character "白" shakes. It tells the viewers that something is about to happen and keep them engaged while anticipating on what will happen next.
The most use principle is Timing in my opinion, as every frame needs to fit together with the sound design and I have the ability to control the mood and reaction of my characters design in After Effects.
Lastly is Appeal, where my designs and sound need to be appealing throughout the animation. This is the reason I use dreamy sound effects and colourful colour choices for my character's design. It not only it humanised the animation, it makes it easy to read, listen and to "feel" my story's development and cheering personality.
6.0 Reflection👌
Hands down this is one of the most challenging projects that I have completed. Using After Effects can be demanding to both me and my laptop where I encounter file errors, syntax errors and more but no matter what, I will present the best work within my ability.
From researching on video tutorials on how to achieve the effects that I desire, to picking the best sound design to suit every part of my animation, to understand how copyright works and lastly, to produce a proper citation on the videos I refer to.
I also put into consideration on the Principles of Animation to make my animation as fluid and realistic as possible. As no animation should remain lifeless and boring which will lower the engagement of the viewers.
I realised there is no right or wrong way in animating your own story, it is what and how do I create something that can present my story as appealing as possible to the audience.


Comments
Post a Comment